Create a Web Analytics Profile
Updated
Sprinklr has a holistic web analytics experience. If you do not have Google Analytics, SiteCatalyst, or Core Metrics, you may enter your platform’s parameters and map them to Sprinklr variables. For example, you can use the Custom Analytics Profile to create a Google Analytics URL using certain parameters.
Before You Begin
Web Analytics does not work on Auto Imported posts. The data for clicks and associated information will come only for posts sent from Sprinklr. (Only bit.ly shortener as it allows to capture clicks data in Auto Imported Posts.)
It only works if the posts have a link in them for tracking.
Special characters are encoded automatically in the web analytics application. These include the blank/empty space and " < > # % { } | \ ^ ~ [ ] ` ( ).
 Note: To allow Web Analytics to be applied without being encoded, please work with your Success Manager.
Web Analytics will not work if the URL added in Publishing is a shortened link. It will work if a normal URL is added and then the URL shortener is applied.
Web analytics can also be applied to each account. The account level configuration will override the workspace level configuration.
To Create a Web Analytics Profile
Click the New Tab icon. Under the Governance Console tab, click All Settings within Platform Setup.
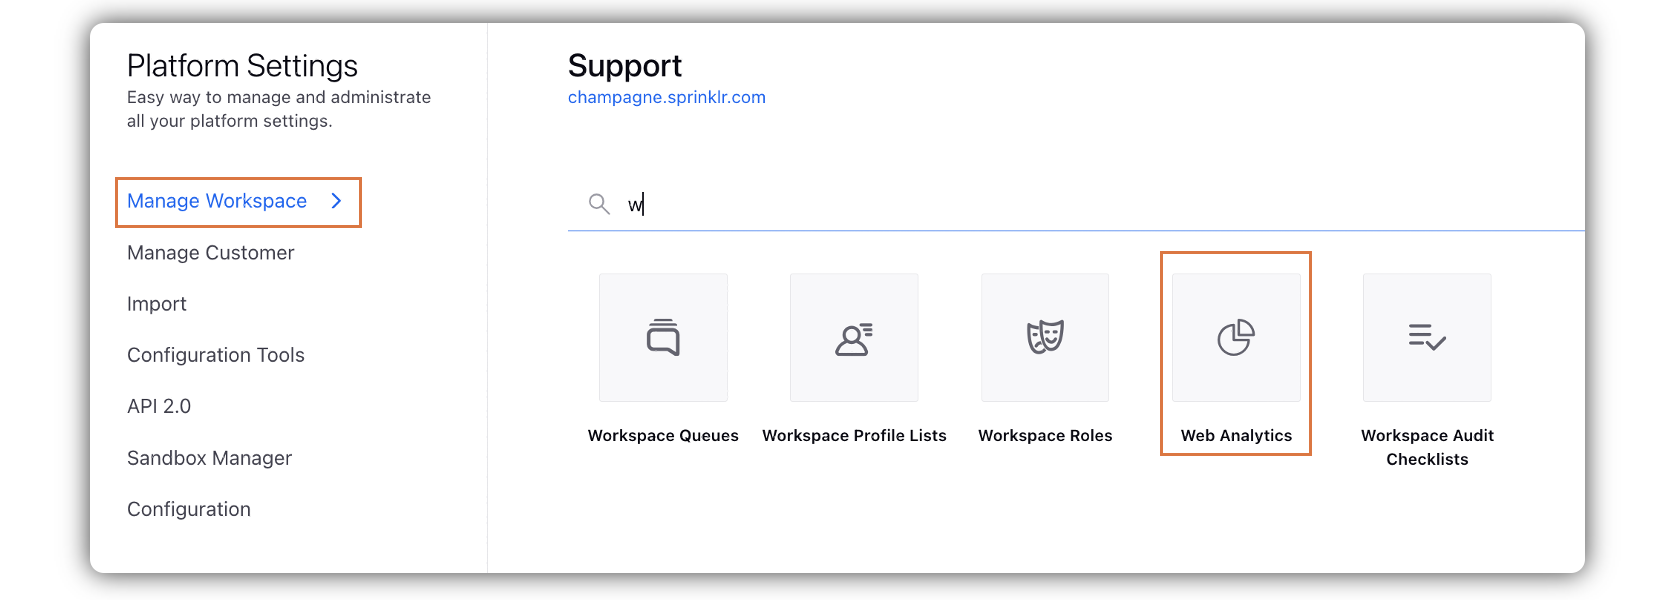
On the Platform Settings window, select Web Analytics from the list of options.
In the top right corner of the Web Analytics window, click Add Analytics Profile.

Enter the details in the Create Analytics Profile window.
Click Save in the bottom right corner of the window.
![]() Note: To learn more about using Channel IDs as parameters in Web Analytics, please work with your Success Manager.
Note: To learn more about using Channel IDs as parameters in Web Analytics, please work with your Success Manager.
To Configure Web Analytics for Domains
You can set the domain as a wild card (*) and append the Analytics Profile to all links that are published. You can also use the wildcard to ignore text that precedes the wild card.
Click the New Tab icon. Under the Governance Console tab, click All Settings within Platform Setup.
On the Platform Settings window, select Web Analytics from the list of options.
In the top right corner of the Web Analytics window, click Edit Domain Analytics for client.

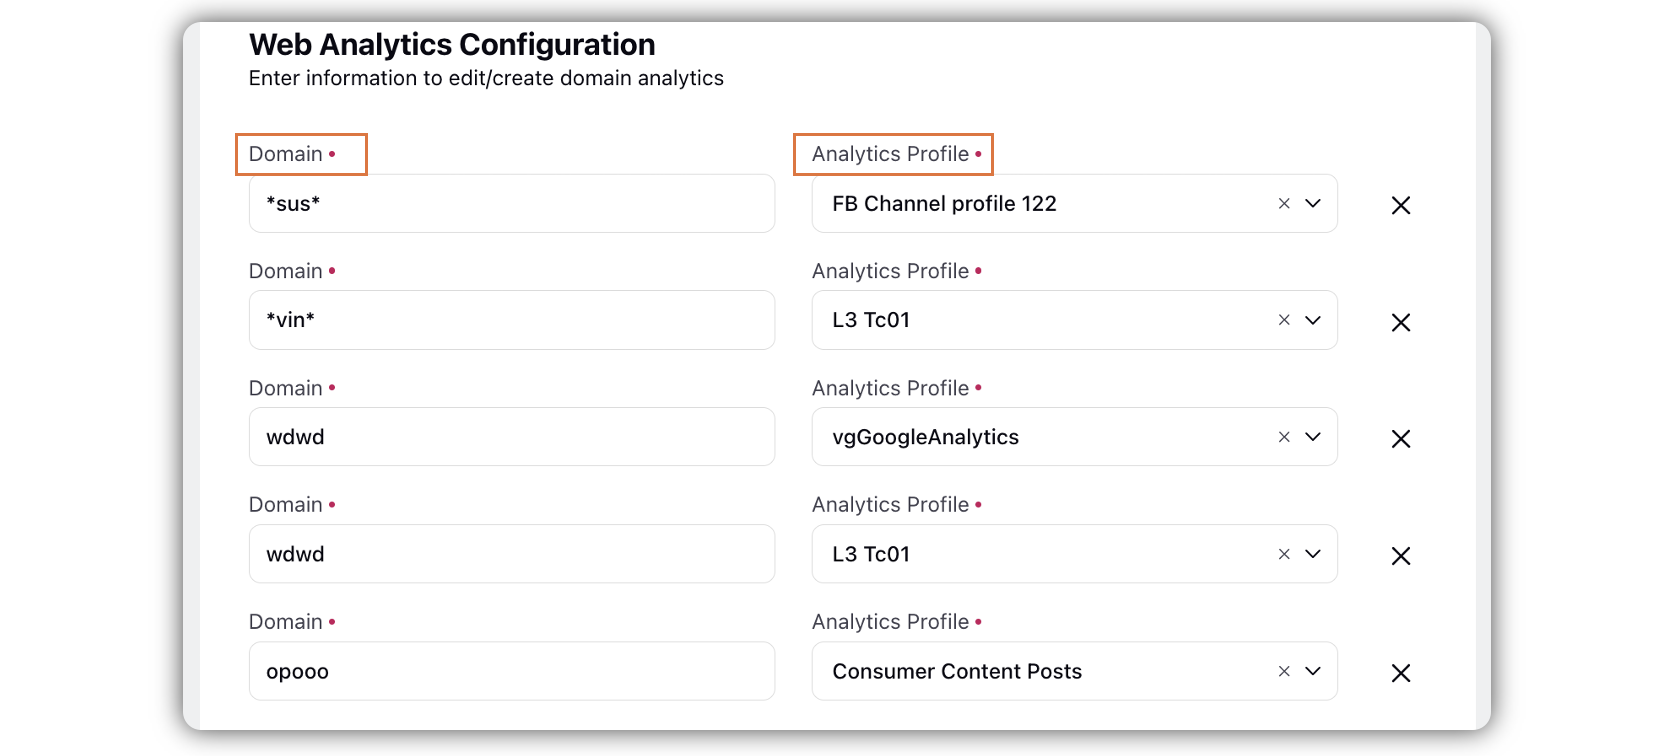
On the Web Analytics Configuration window, enter information to edit/create domain analytics.
Example Scenario:
If the domain is *, Web Analytics will be applied to all domains in the workspace environment i.e. regardless of the web URL, the web analytics profile will always be applied.
If the domain is *sprinklr*, Web Analytics will only be applied to domains that contain sprinklr in the workspace.
You can use separate web analytics profiles for URLs with same domain, but different paths.
![]() Note: This capability to use separate web analytics profiles for URLs with different paths (same domain) needs specific set up. Get in touch with your Success Managet to get this capability enabled.
Note: This capability to use separate web analytics profiles for URLs with different paths (same domain) needs specific set up. Get in touch with your Success Managet to get this capability enabled.
To Configure Web Analytics at the Ad Accounts Level
This section describes how to select Web Analytics for Accounts.
Click the New Tab icon. Under the Governance Console tab, click Accounts within Platform Setup.
On the Accounts window, hover over the Options icon alongside the desired account and select Web Analytics.
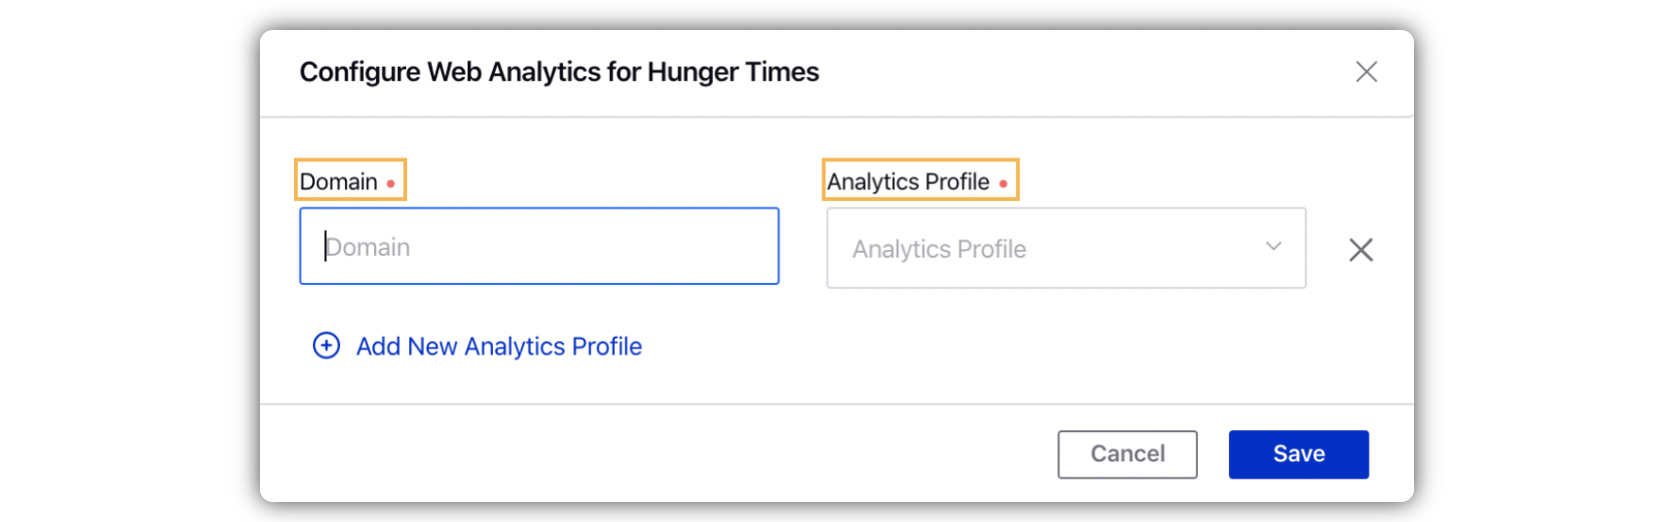
On the Configure Web Analytics pop-up window, enter the Domain details and select the Analytics Profile. Click Save in the bottom right corner. For more information, see Web Analytics Configuration — Field Descriptions.
Example Scenario:
At Page Level - Web Analytics will be applied at the Page level when you use Page in a Creative regardless of Ad Account.
At Ad Account Level - Web Analytics will be applied at the Ad Account level when you use Ad Account in a Campaign regardless of Page.
If the domain is *sprinklr*, Web Analytics will only be applied to all domains/web URLs containing sprinklr when using the Ad Account or Page.
If the domain is *, Web Analytics will be applied to all domains/web URLs when using the Ad Account or Page.
Web Analytics Configuration — Field Descriptions
Term | Description |
Domain | Enter the domain of the client for which you want to view web analytics. Domains should start and end with * to ensure anything after the domain is considered in web analytics. |
Analytic Profile | Select the analytics profile from the list for which you want to view the web analytics. |
Add another parameter | Click to add another parameter. |
Note Without mapping domains with correct profiles, web analytics will not work. |
Create New Analytics Profile — Field Descriptions
Term | Description | |
Basic Information | ||
Name | Enter a unique name for the Analytics Profile. | |
Module Type | Select from:
| |
Analytics Profile Type | Select the Analytics Profile Type from the following: | |
Prepend Query Parameters | Check the box to attach the query parameters to the beginning. | |
Set Variables and Parameters | ||
Preview URL | Shows the URL when you select the parameters and variables. | |
Parameter | Type in the parameter for the URL. This helps to define the name of the parameter to be tracked. | |
Variable(s) | Add the variables from the list for the parameter selected. This helps to set the values to be tracked via the parameter. Click Paid or Publishing below to view the list of the available variables for the respective module Type:
| |
Variable(s) should be used in | Select the variable(s) either in the upper case or lower case. | |
Replace space within a variable with selected separator | If variable values have spaces then it can break the link to have an option to provide a replacement for spaces. | |
Separator | Type the separator that you want to use between the parameters and variables. This helps to separate different values of a separator. | |
Remove extra separators | Check the box to remove extra separators. If the selected variables have an empty value then the preview link will seem to have an extra separator. This option is to remove extra separators in such scenarios. | |
Use as Path Parameter | Check the box to use as the path parameter. | |
Add another parameter | Click to add more than one parameter. | |
Add Custom Separators for UTM Parameters and Values
You can add custom separators for UTM parameters and values in web analytics profile. Currently by default we use “&” as the separator for two different UTM parameters and “=“ as the separator for UTM parameter and its value. In case you do not set custom separators, the current separators will be used as default separators.
![]() Note: This capability needs specific setup. To enable this feature, get in touch with your Success Manager.
Note: This capability needs specific setup. To enable this feature, get in touch with your Success Manager.
Custom Separator for two Parameters | Type the separator that you want to use between the two parameters. |
Custom Separator for Parameter and Variable | Type the separator that you want to use between the parameters and variables. |
