SLA Preset Configuration
Updated
SLA metrics are used for measuring agents' response times against pre-set objectives (in consideration of business hours, if applicable) to determine brand and employee performance. SLA preset configuration feature helps businesses streamline and manage their service level commitments efficiently. By setting up predefined SLA configurations, businesses can ensure consistent and reliable service delivery, meet customer expectations, and maintain high levels of customer satisfaction. This article provides details on the implementation of SLA preset configurations in optimizing service level management within an organization.
To Set Up SLA Configuration
Click the New Tab icon. Under the Sprinklr Service tab, click Reporting within Analyze.
Select the custom dashboard on which SLA Preset has to be applied.
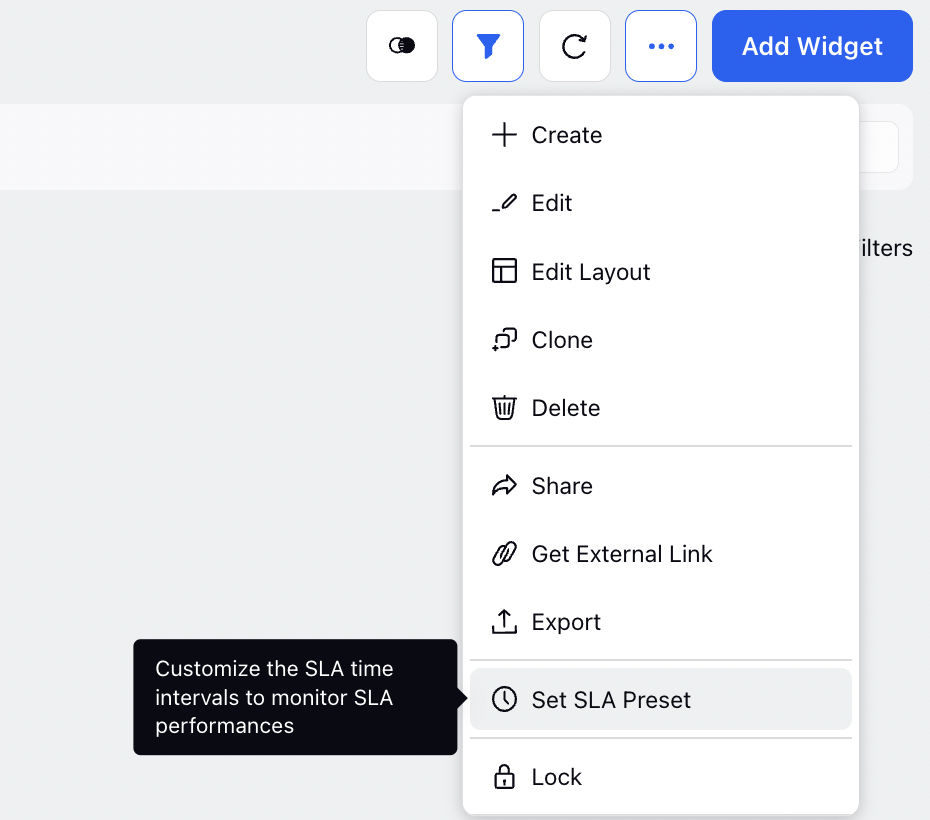
In the top-right corner of the dashboard, click the Options icon and select Set SLA Preset.
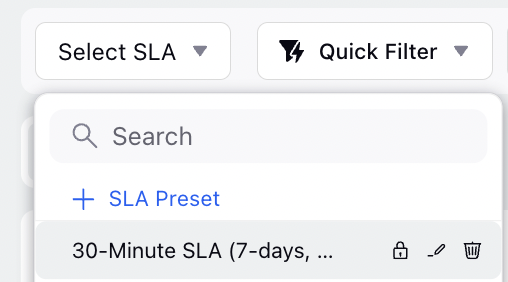
In the top-left corner of the dashboard, click the Select SLA tab and select + SLA Preset.
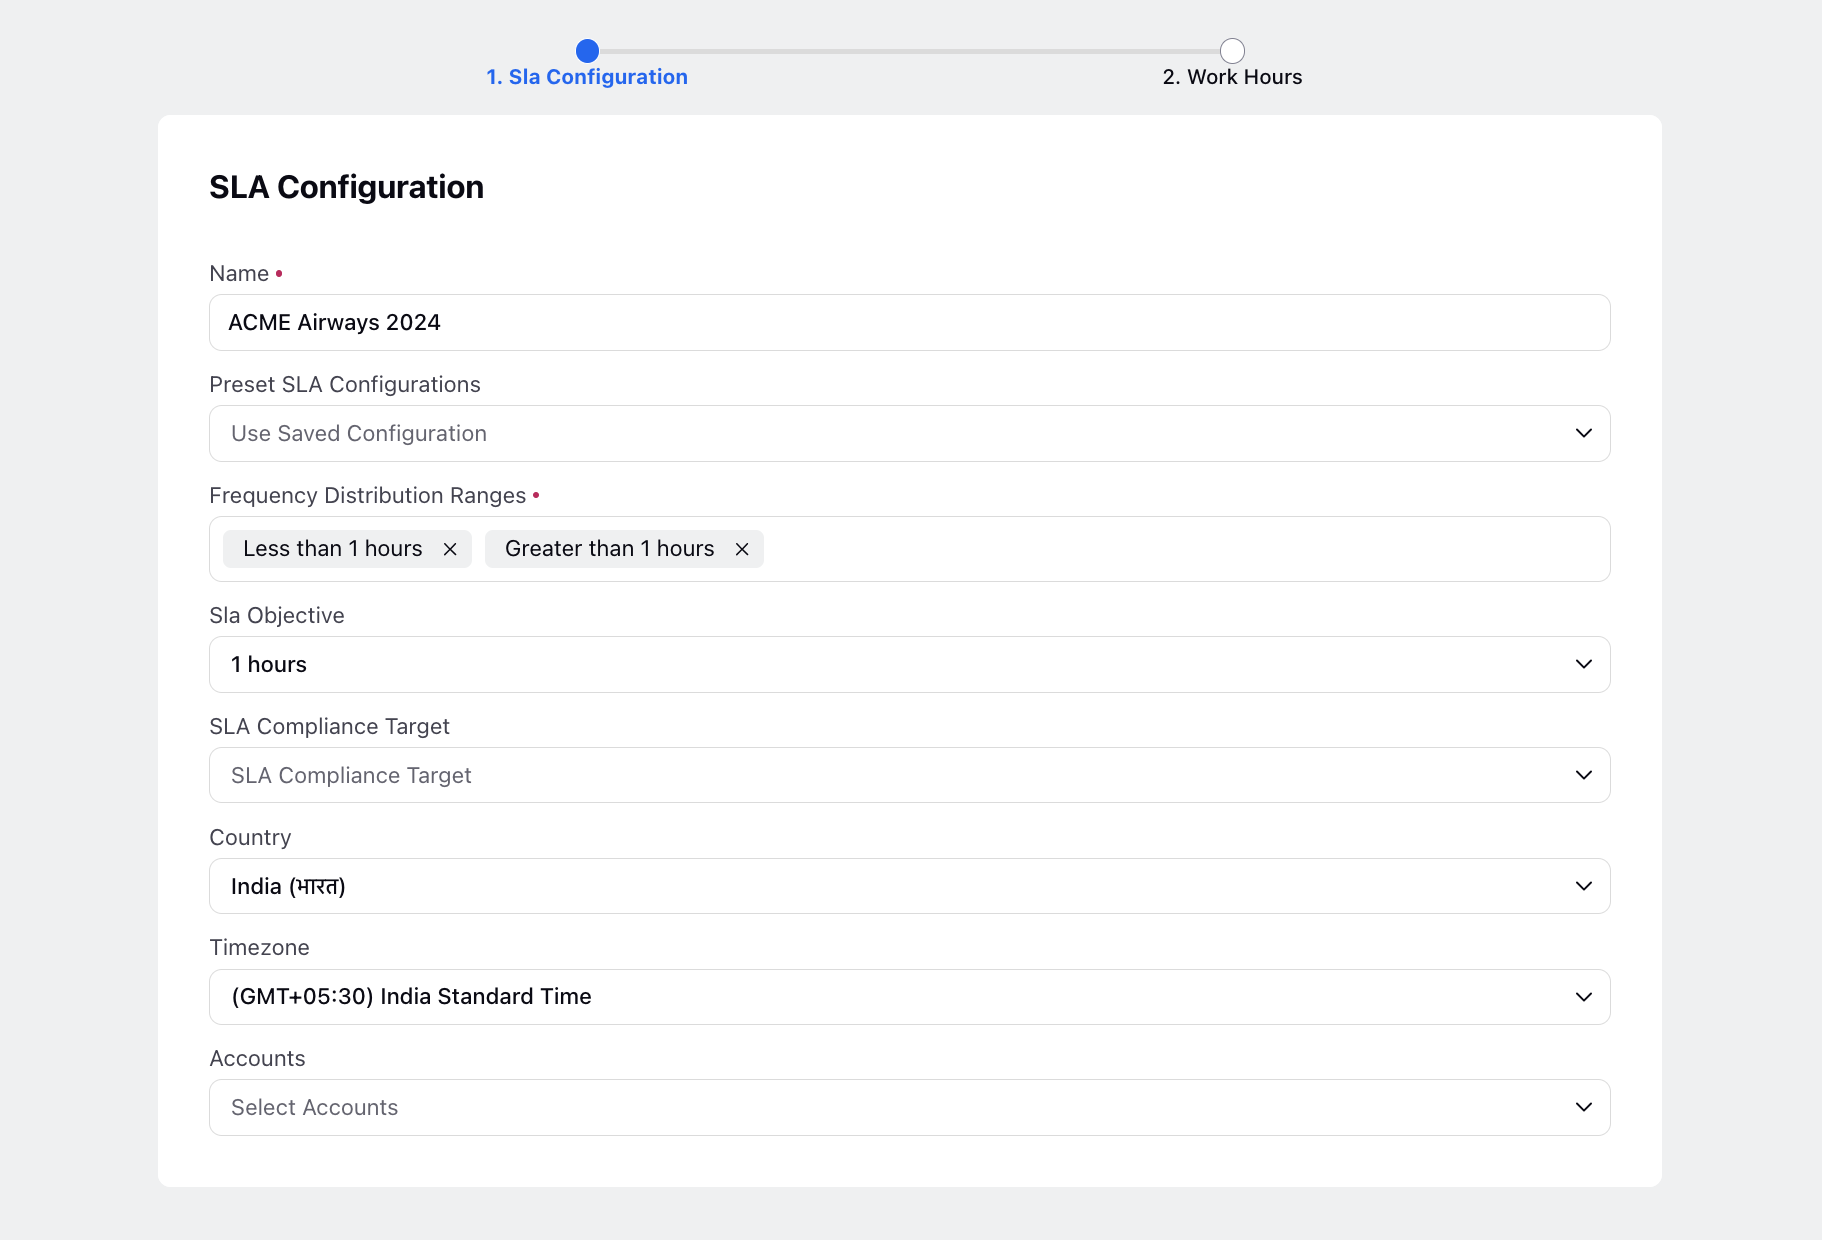
Enter the configuration details on the SLA Configuration window. Refer to the SLA Configuration - Field Descriptions section below for more details.
In the bottom-right corner, click Save & Apply to confirm your changes. Once saved, you can hover over the configured preset from the SLA Presets dropdown menu and click the Edit icon or Delete icon alongside it to make changes or delete the SLA configuration, respectively.
In the top-left corner of the dashboard, click the SLA Presets drop-down menu and select the SLA filter of your choice.
SLA filter is available for Standard Dashboard. When you clone the Standard Dashboard, the SLA preset filter gets automatically applied to the cloned dashboard.
Note
|
Response Time
Inbound messages arrive in real-time. As a user replies to the inbound message, the outbound message is time-stamped. The SLA is calculated by taking the difference in time according to the pre-set configuration guidelines. SLA is counted only when there is a response. If 100 messages come in but a user responds to 5, the SLA will calculate the average for those 5 responses.
For example: If the business hours and working days are set from 9 am - 5 pm Monday through Friday and the Inbound Message is created on Sunday at 11 pm when a user responds at 9:15 am on Monday morning, the Response Time will be calculated as 15 minutes. If the SLA threshold was set to 30 minutes, then the post will be considered to have met the SLA.
Other Considerations
SLA applies to all inbound messages. Inbound can also include persistent searches.
SLA applies to all replies made from the Sprinklr platform. SLA only tracks replies made from the platform. If replies are made on the native channels, SLA is not tracked.
You can choose to view Reporting by individual clients and/or accounts.
Making a configuration change to one SLA dashboard will not configure the others.
SLA is only calculated on the SLA dashboard itself through the UI. It is not a metric that is stored in the custom metric builder for additional analysis.
If business hours are set and messages come in outside of business hours, the SLA will be calculated once the business hours of operation start.
SLA Best Practices
Configure SLA preset by Account, Account Group, or User Group.
Make sure the company has organized these dimensions correctly to calculate SLA for the team or client user as a whole.
Do not manage different SLA presets by User.
50 users do not mean there should be 50 presets.
Do not have confidential information visible, since all SLA presets will be available to all users within your Client environment.
SLA Reporting Best Practices
SLA can be configured on a weekly basis allowing users to indicate what days of the week no staff is on duty.
In the case of needing to run a monthly report with a holiday, you should create a holiday SLA preset, and run the report for the weeks of normal hours, and then run the report with the holiday preset for the week with the holiday.
SLA Configuration — Field Descriptions
Field | Description |
Name | Enter a name for the SLA Configuration. |
Preset SLA Configurations | Select a pre-existing SLA configuration from the dropdown menu. |
Frequency Distribution Ranges | Enter the time ranges to measure (e.g., "less than 5 minutes", "greater than 5 minutes"). |
SLA Objective | Enter your desired response time (e.g., "5 minutes"). |
SLA Compliance Target | Enter the percentage of messages for which you want to reach the objective. |
Country | Select a country in which the statistics are to be tracked. |
Timezone | Select a timezone to be used for displaying the metrics. |
Lock SLA | Check the box if you do not want any changes to this configuration in the future. You can alternatively lock/unlock the SLA configuration from the SLA Presets dropdown menu by clicking the Lock/Unlock icon alongside the preset. |
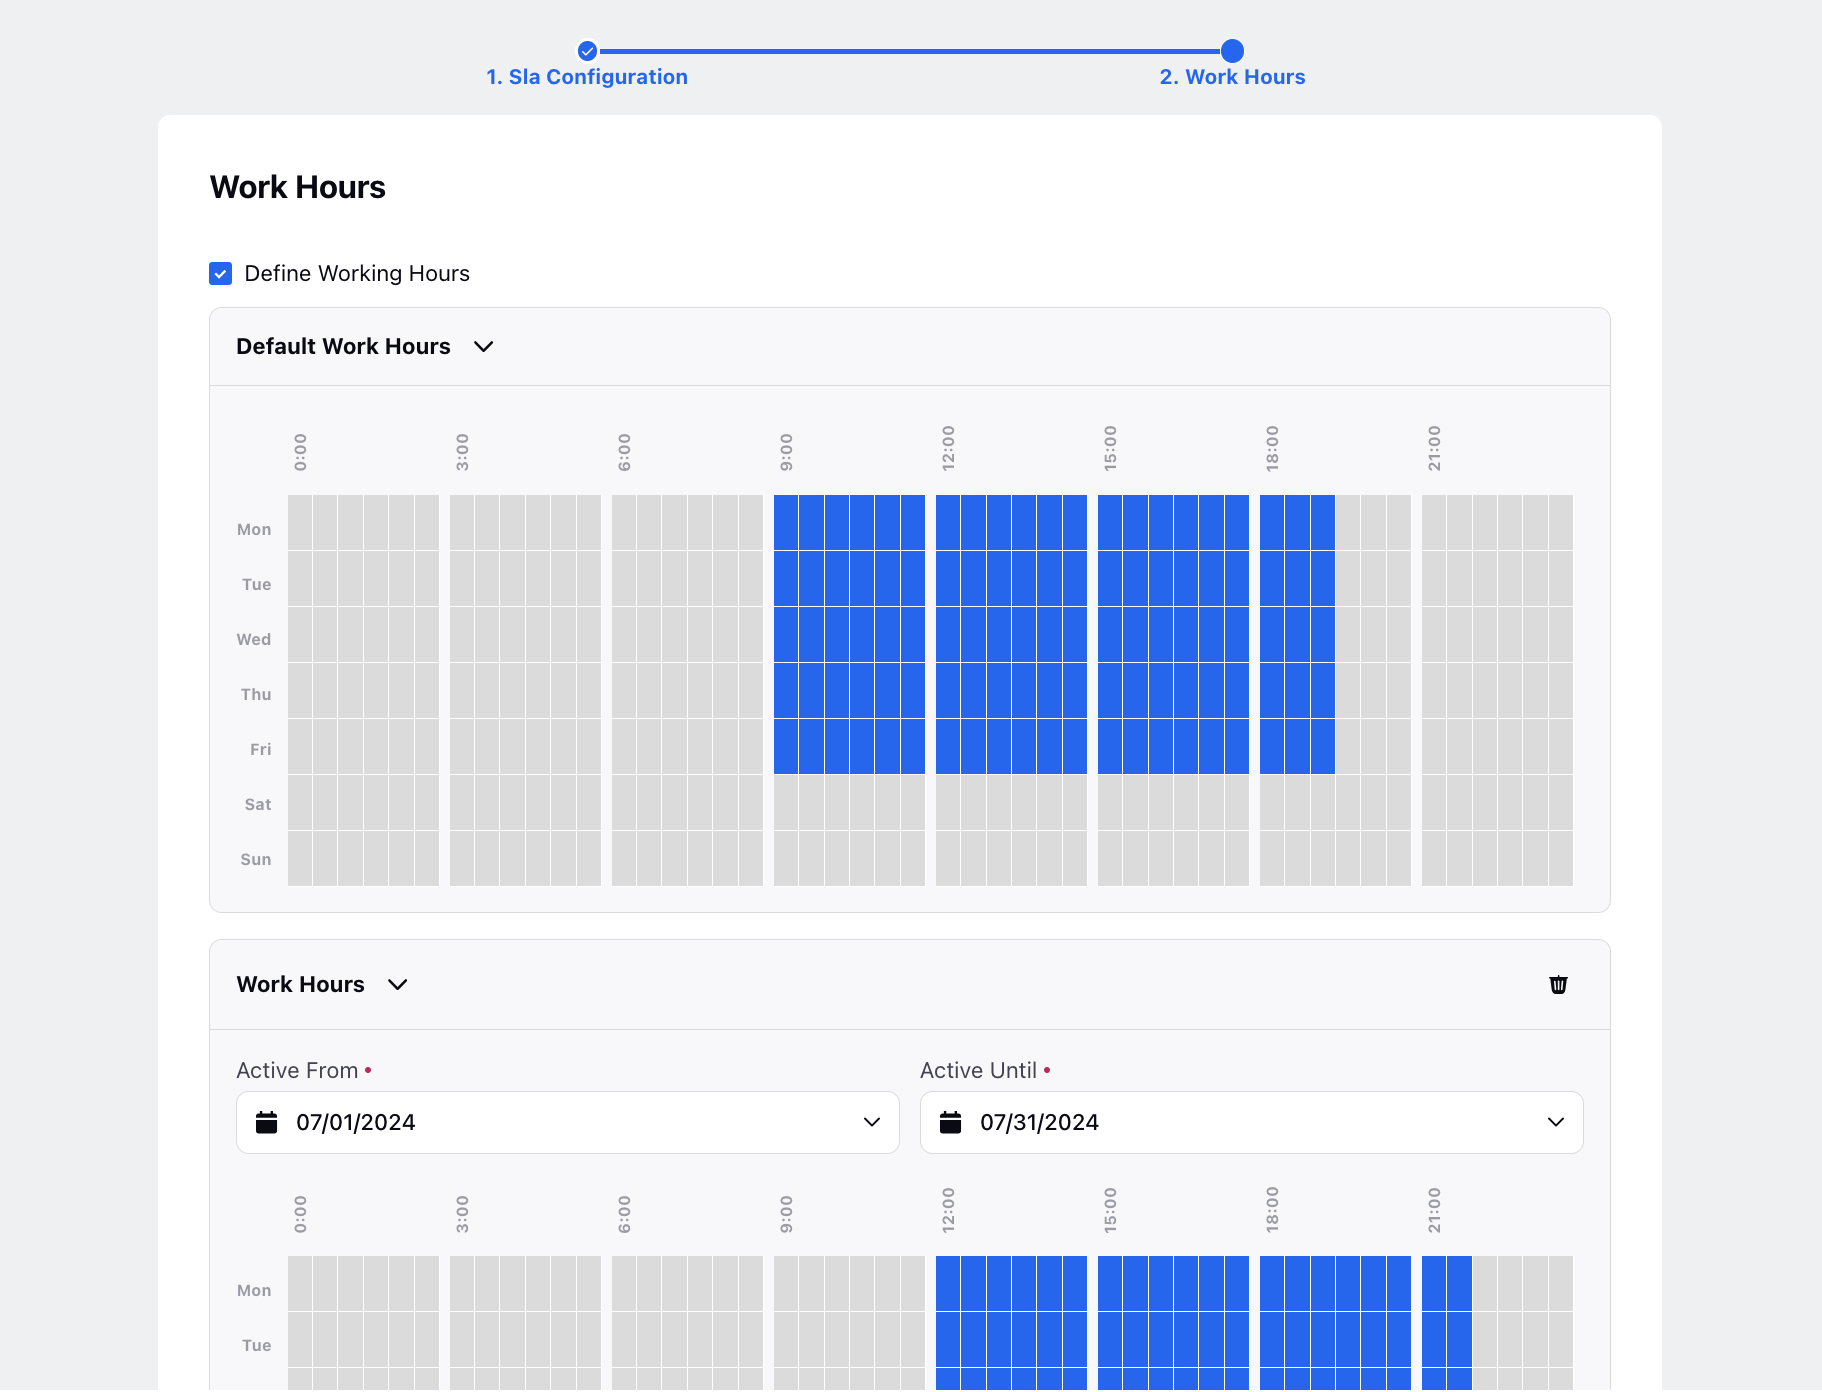
Define Working Hours | Check the box to set the working hours by dragging across the hour boxes. You can add default work hours and different work hours for different date ranges in a single SLA preset configuration. |
Add Inactive Hours | Check the box to set the inactive hours of the day. |