Certificate Based Token Generation
Updated
This guide will walk you through the process of creating an access token using the JWT (JSON Web Token). This is a certificate-based token generation approach that eliminates the need to store any token while ensuring secure authentication and information exchange. This process involves using a JWT signed by a pre-registered application certificate as the refresh token, which, in turn, helps generate a new access token.
Here are the detailed steps that need to be followed for generating the certificate-based access token:
Step 1. Generate Key
Generate an environment-specific key. For more information, refer to the Getting Started guide for the detailed steps.
Step 2. Generate Authentication Token
Once you have the key, the next step involves generating an authentication token. For more information, refer to OAuth 2.0 for Customers guide for the detailed steps.
Step 3. Generate X509 Certificate
This step involves generating X509 Certificate, which will provide:
A server.key file to authorize your organization with the auth:jwt:grant command.
A server.crt file to create the connected app required by the JWT bearer flow.
Here’s how to generate the X509 Certificate:
Generate a private key, and store it in a file called server.key.
openssl genrsa -des3 -passout pass:SomePassword -out server.pass.key 2048 openssl rsa -passin pass:SomePassword -in server.pass.key -out server.keyYou can delete the server.pass.key file because you no longer need it.
Generate a certificate signing request using the server.key file. Store the certificate signing request in a file called server.csr. Enter information about your company when prompted.
openssl req -new -key server.key -out server.csrGenerate a self-signed digital certificate from the server.key and server.csr files. Store the certificate in a file called server.crt.
openssl x509 -req -sha256 -days 365 -in server.csr -signkey server.key -out server.crtGenerate the key in .der format from .key(.der key will be used in step 4 Java Code)
openssl pkcs8 -topk8 -inform PEM -outform DER -in server.key -out server.der -nocrypt
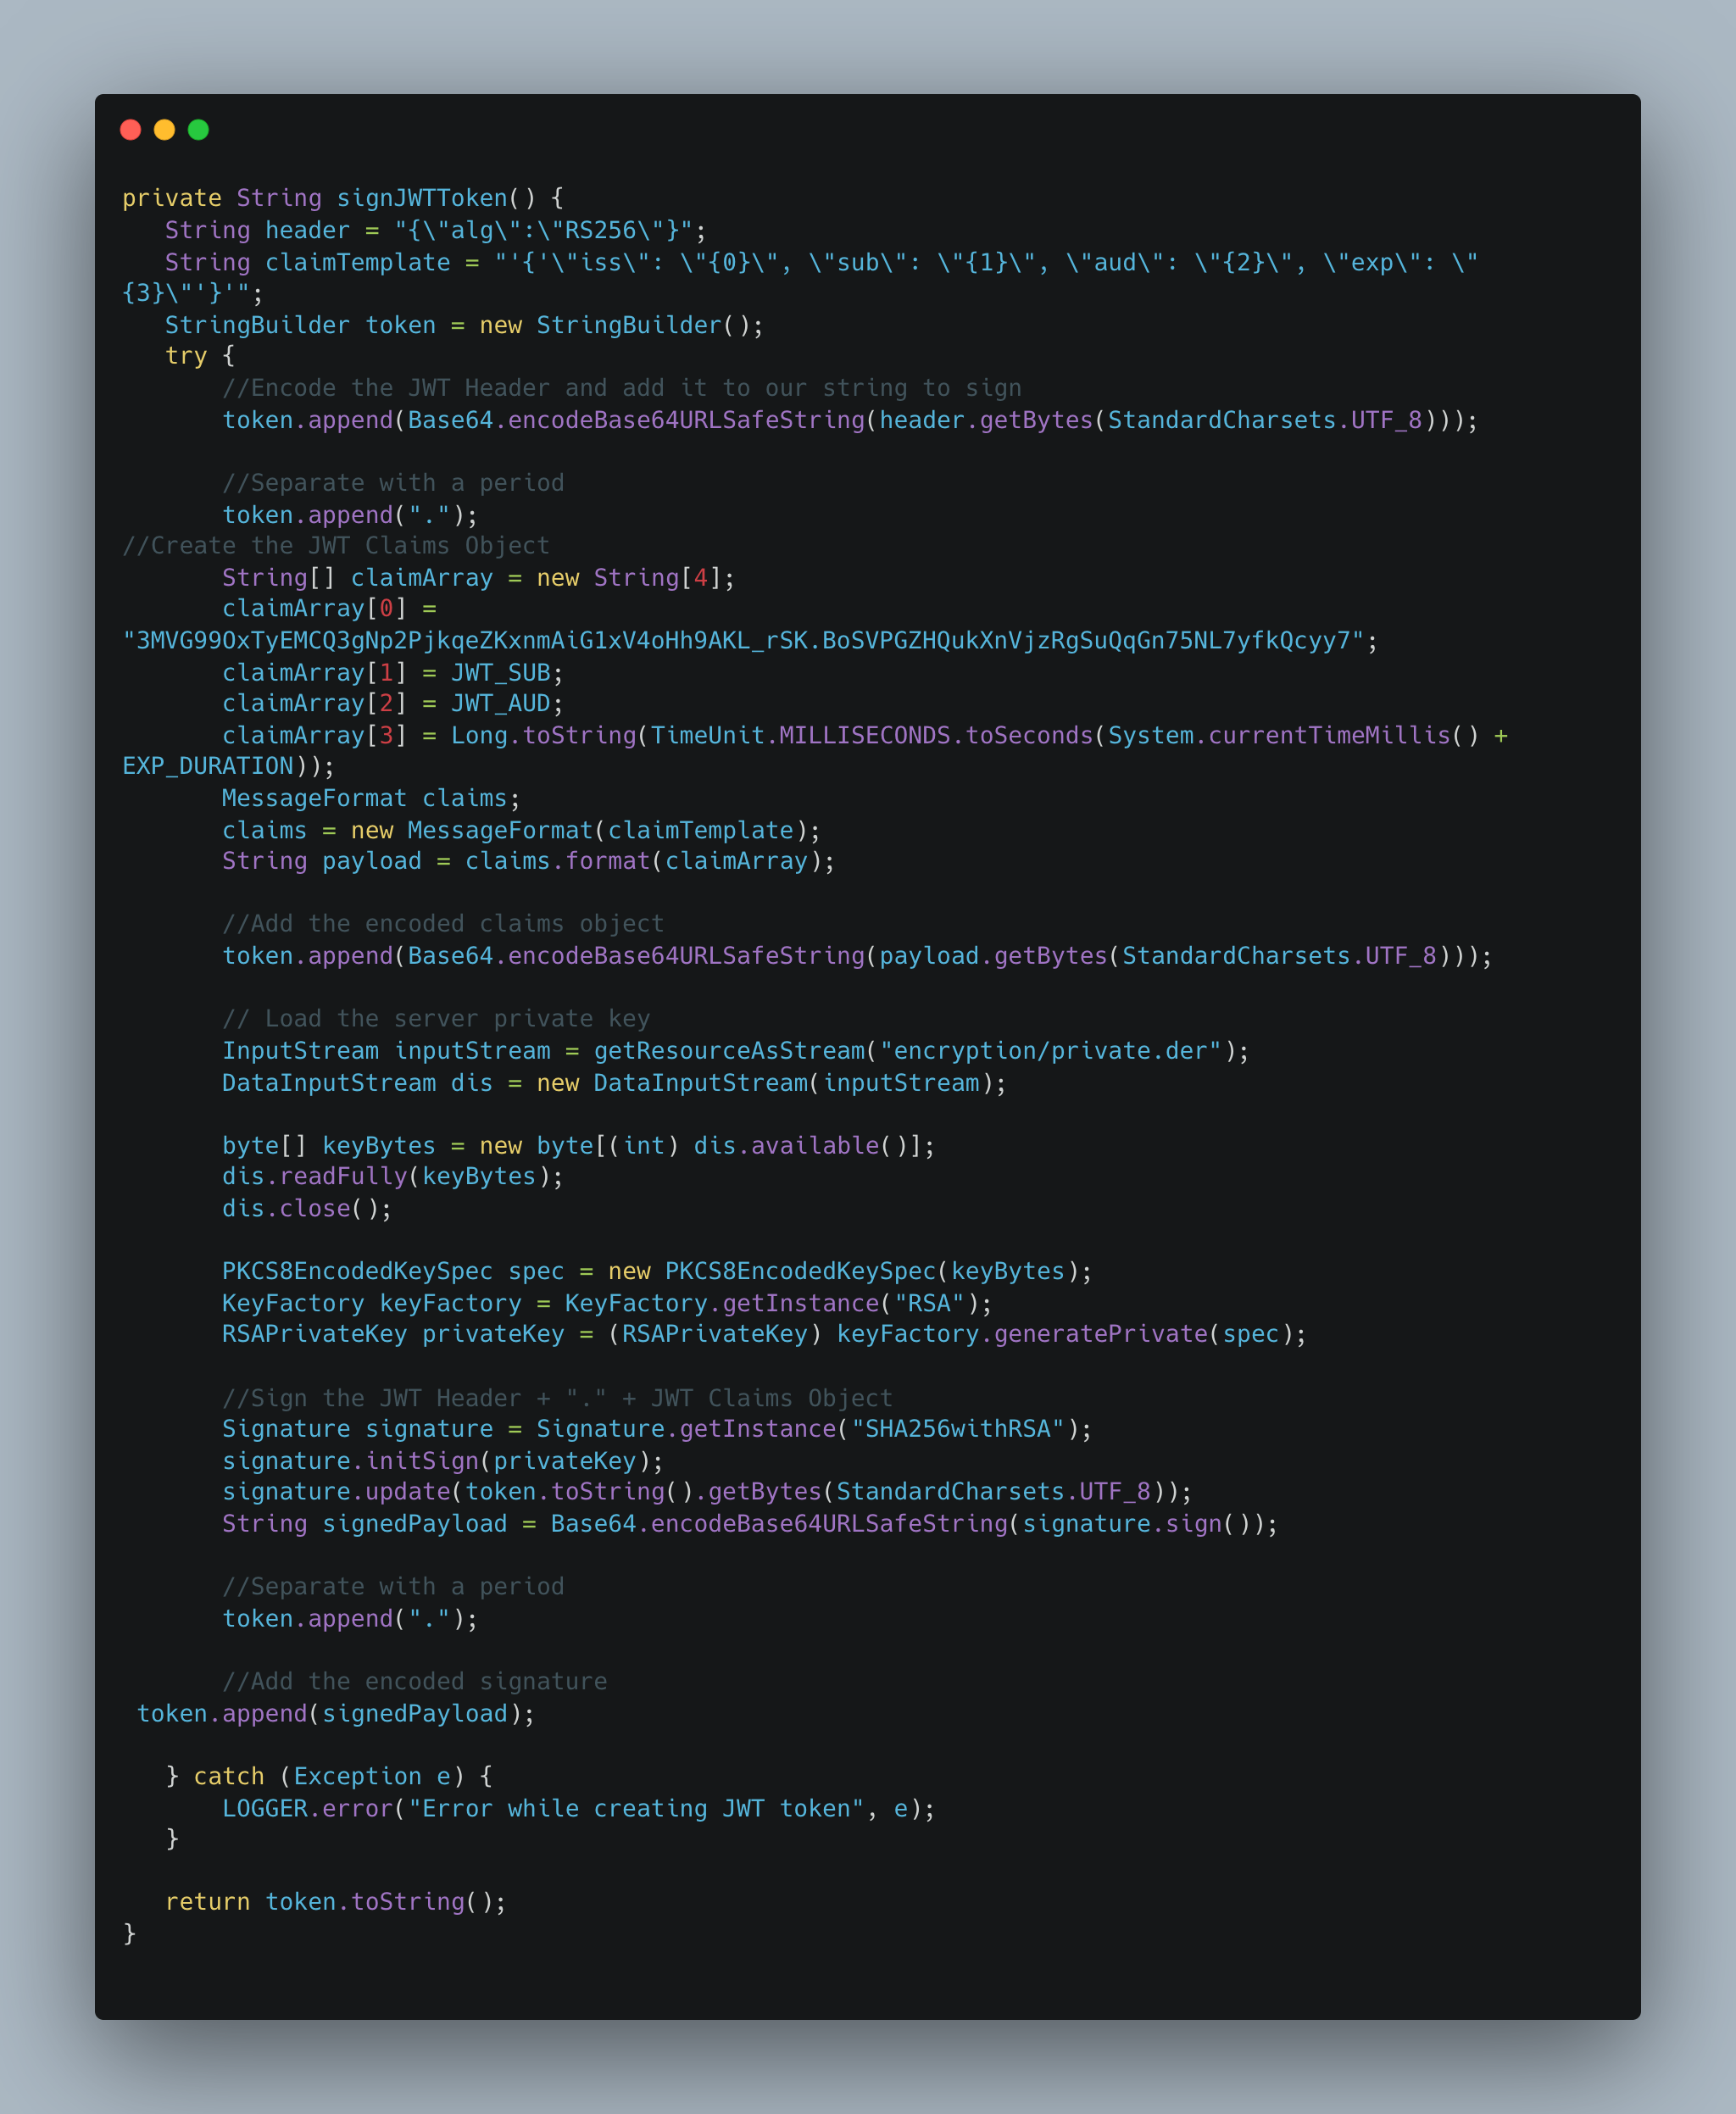
Step 4. Generate JWT Token
This step involves generating a JWT Token that needs to be used as the refresh token in the authentication process.

Note
The generated JWT Token should not be cached/stored by the user in any way. The user should generate this new JWT Token each time to get a new access token.
Must-know conventions:
{iss} : issuer - App ID (generated using step 5)
{sub}: subject - Sprinklr’s instance login username
{aud}: audience - https://www.sprinklr.com/

Step 5: App Registration
This step involves executing an API call for app registration. The API details are mentioned as follows:
Method Type POST
API Endpoint https://api2.sprinklr.com/{{env}}/api/bdi/app/register
Headers
Key | Value | Description |
Authorization | Bearer {{token}} | Credential used by the API to authenticate a user with the server For generating authorization token, refer to Authorize section on the developer portal. |
X-API-KEY | api-key | API key helps authenticate the application with the server For generating API key, refer to Getting Started guide. |
Content-Type | application/json | Content-Type is a representation header that determines the type of data (media/resource) present in the request body. |
Request Parmeters
Parameter | Required/Optional | Description | Type |
X509 certificate(server.crt) | Required | This is the digital certification. You upload this file when you create the connected app required by the JWT bearer flow. The JWT token uses a public/private key pair in the form of a X.509 certificate for signing. | String |
Request - Example
.png)
Response - Example
.png)