Access Quick Search Settings to manage Saved Queries, Scheduled Exports, and Explore Lens
Updated
Learn how to navigate to Quick Search Settings to manage saved research queries, scheduled exports, and explore lenses.
Quick Search Settings help you quickly pull up data from billions of data points on topics of your interest. From Quick Search Settings, you can easily manage your saved queries, scheduled exports, and explore lenses.
Saved Queries in Quick Search allow you to save queries directly from the dashboard, and Schedule Exports triggers reports at defined intervals. Explore helps you create and manage pre-created explore lenses that help you drill down existing dashboard data. This enables you to save time on searches that may not require the effort of creating a new dashboard. In this article, you will learn how to access Quick Search Settings to manage Saved Queries, Scheduled Exports, and Explore Lenses.
To access Quick Search Settings
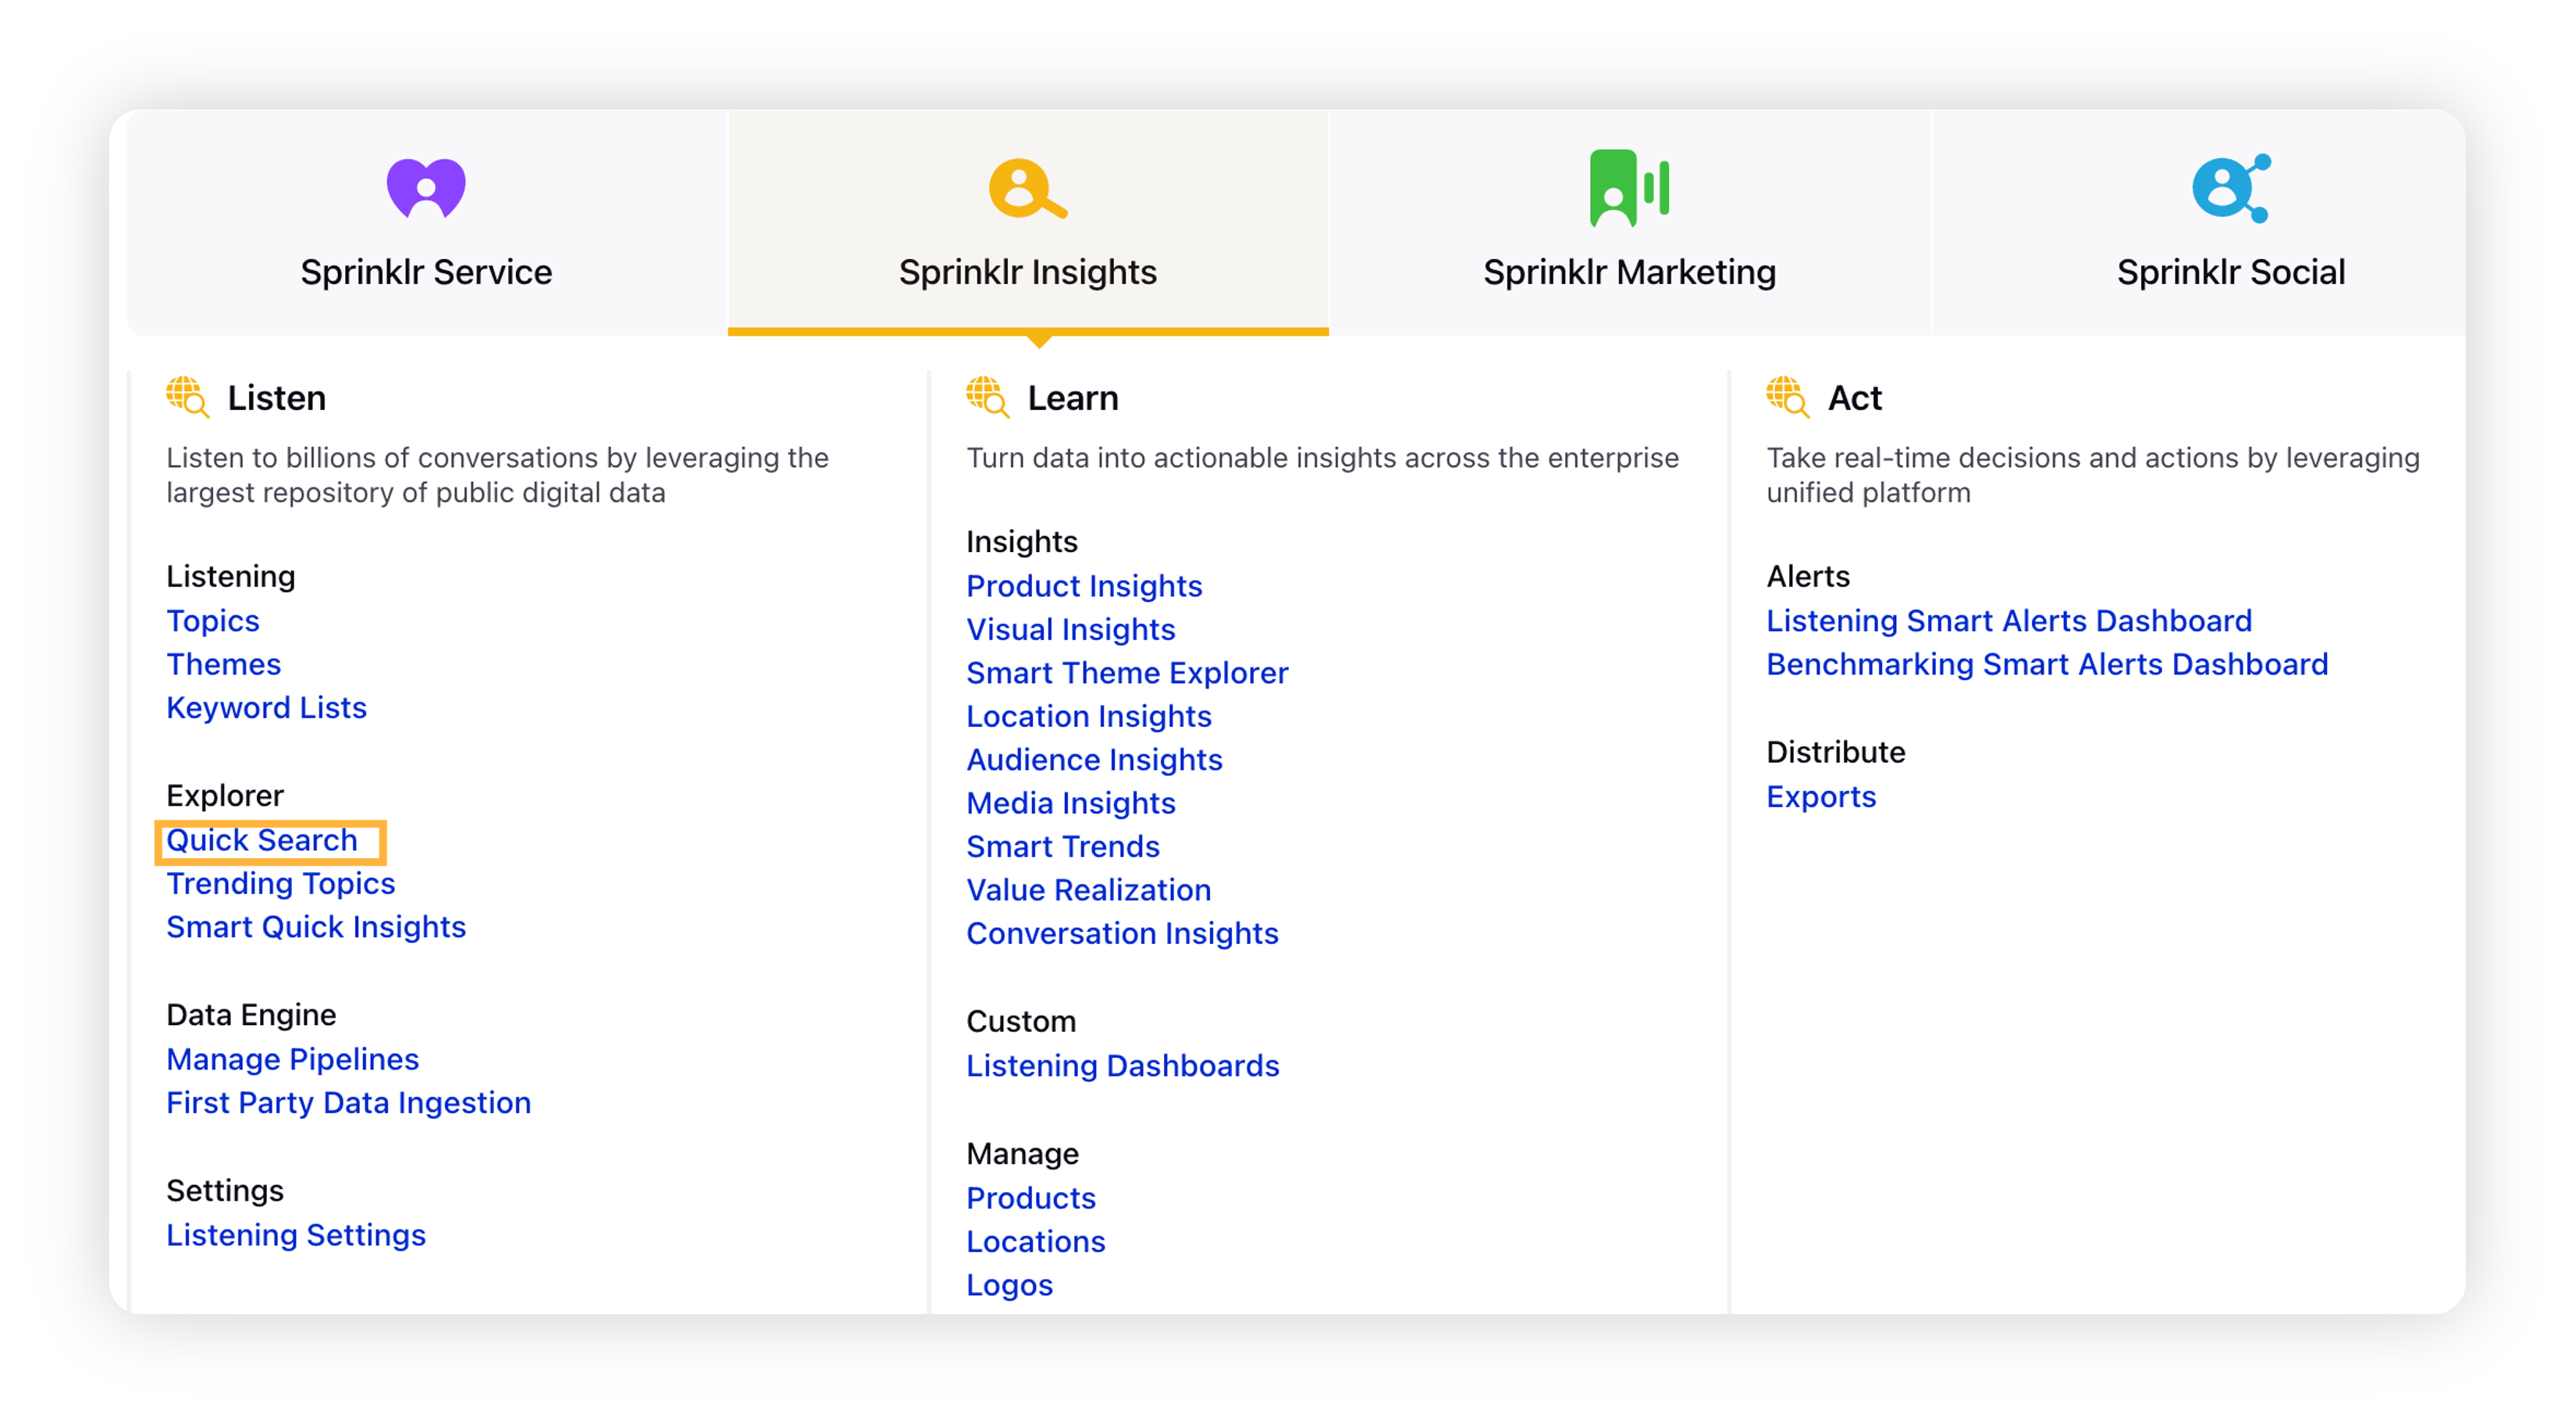
Click the New Tab icon. Under Sprinklr Insights, click Quick Search within Listen.
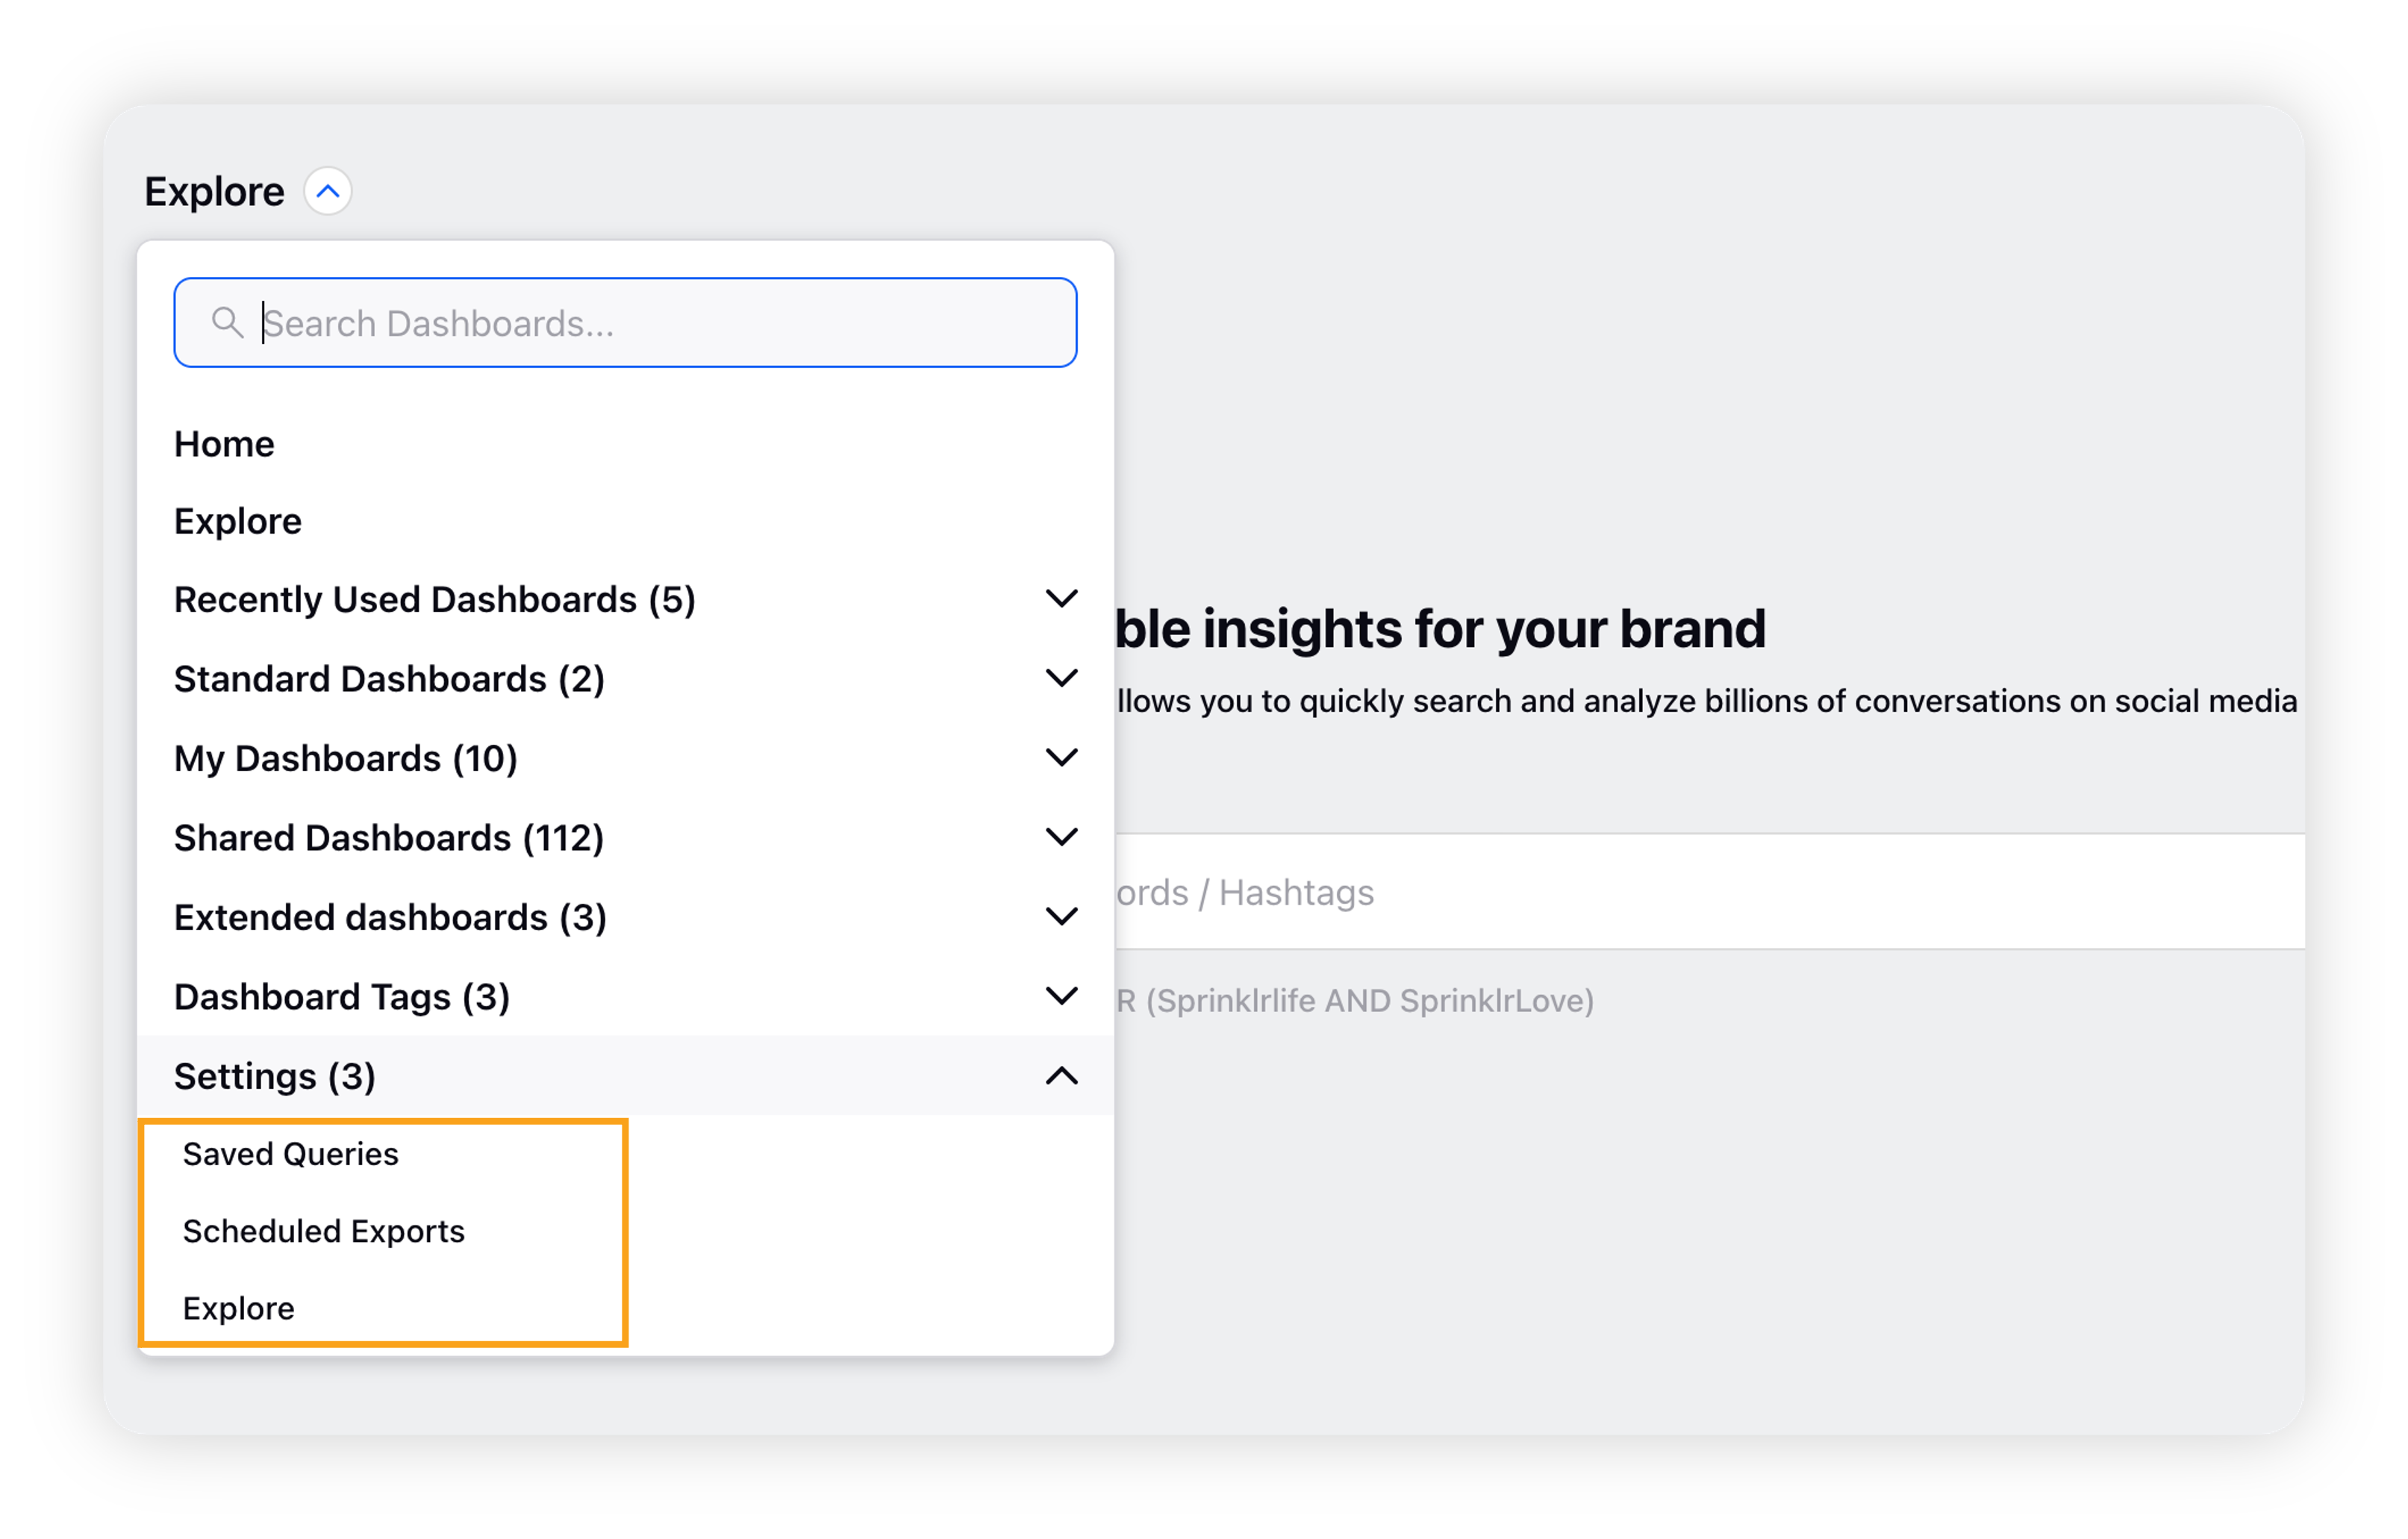
On the Quick Search home window, click the drop-down icon in the top left corner.
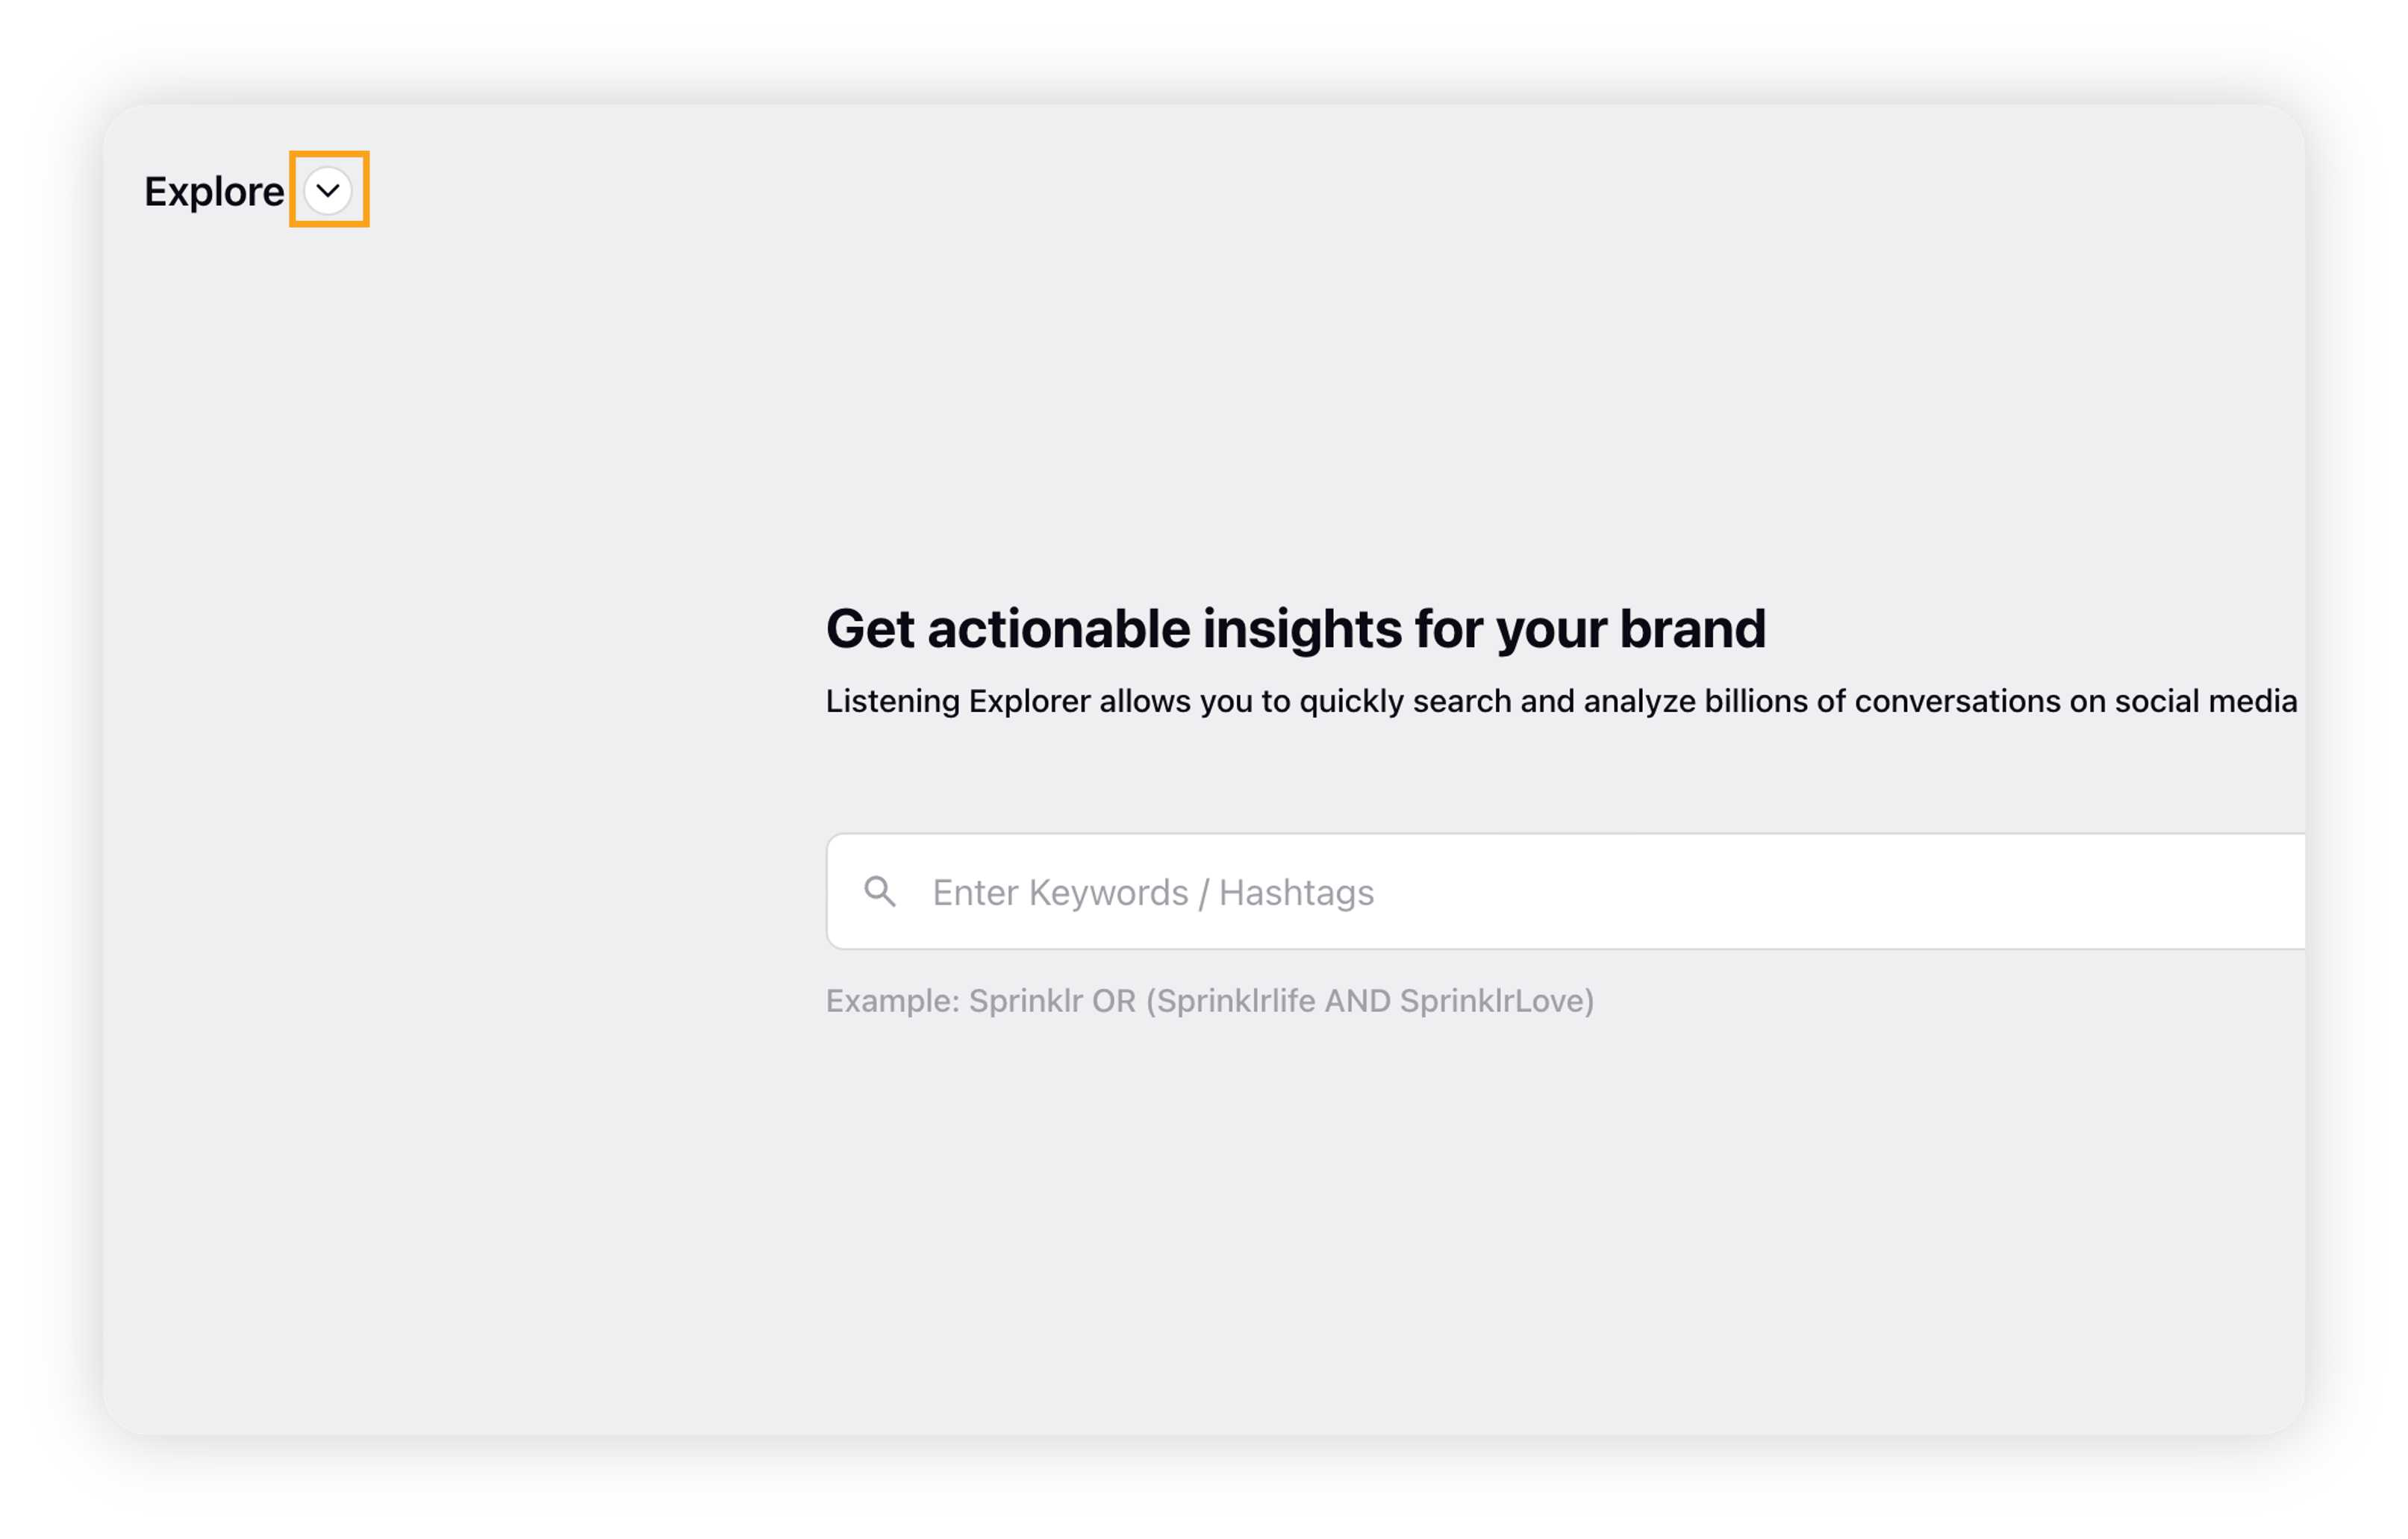
Scroll down to Settings. There are three options – Saved Queries, Scheduled Exports, and Explore.
Saved Queries
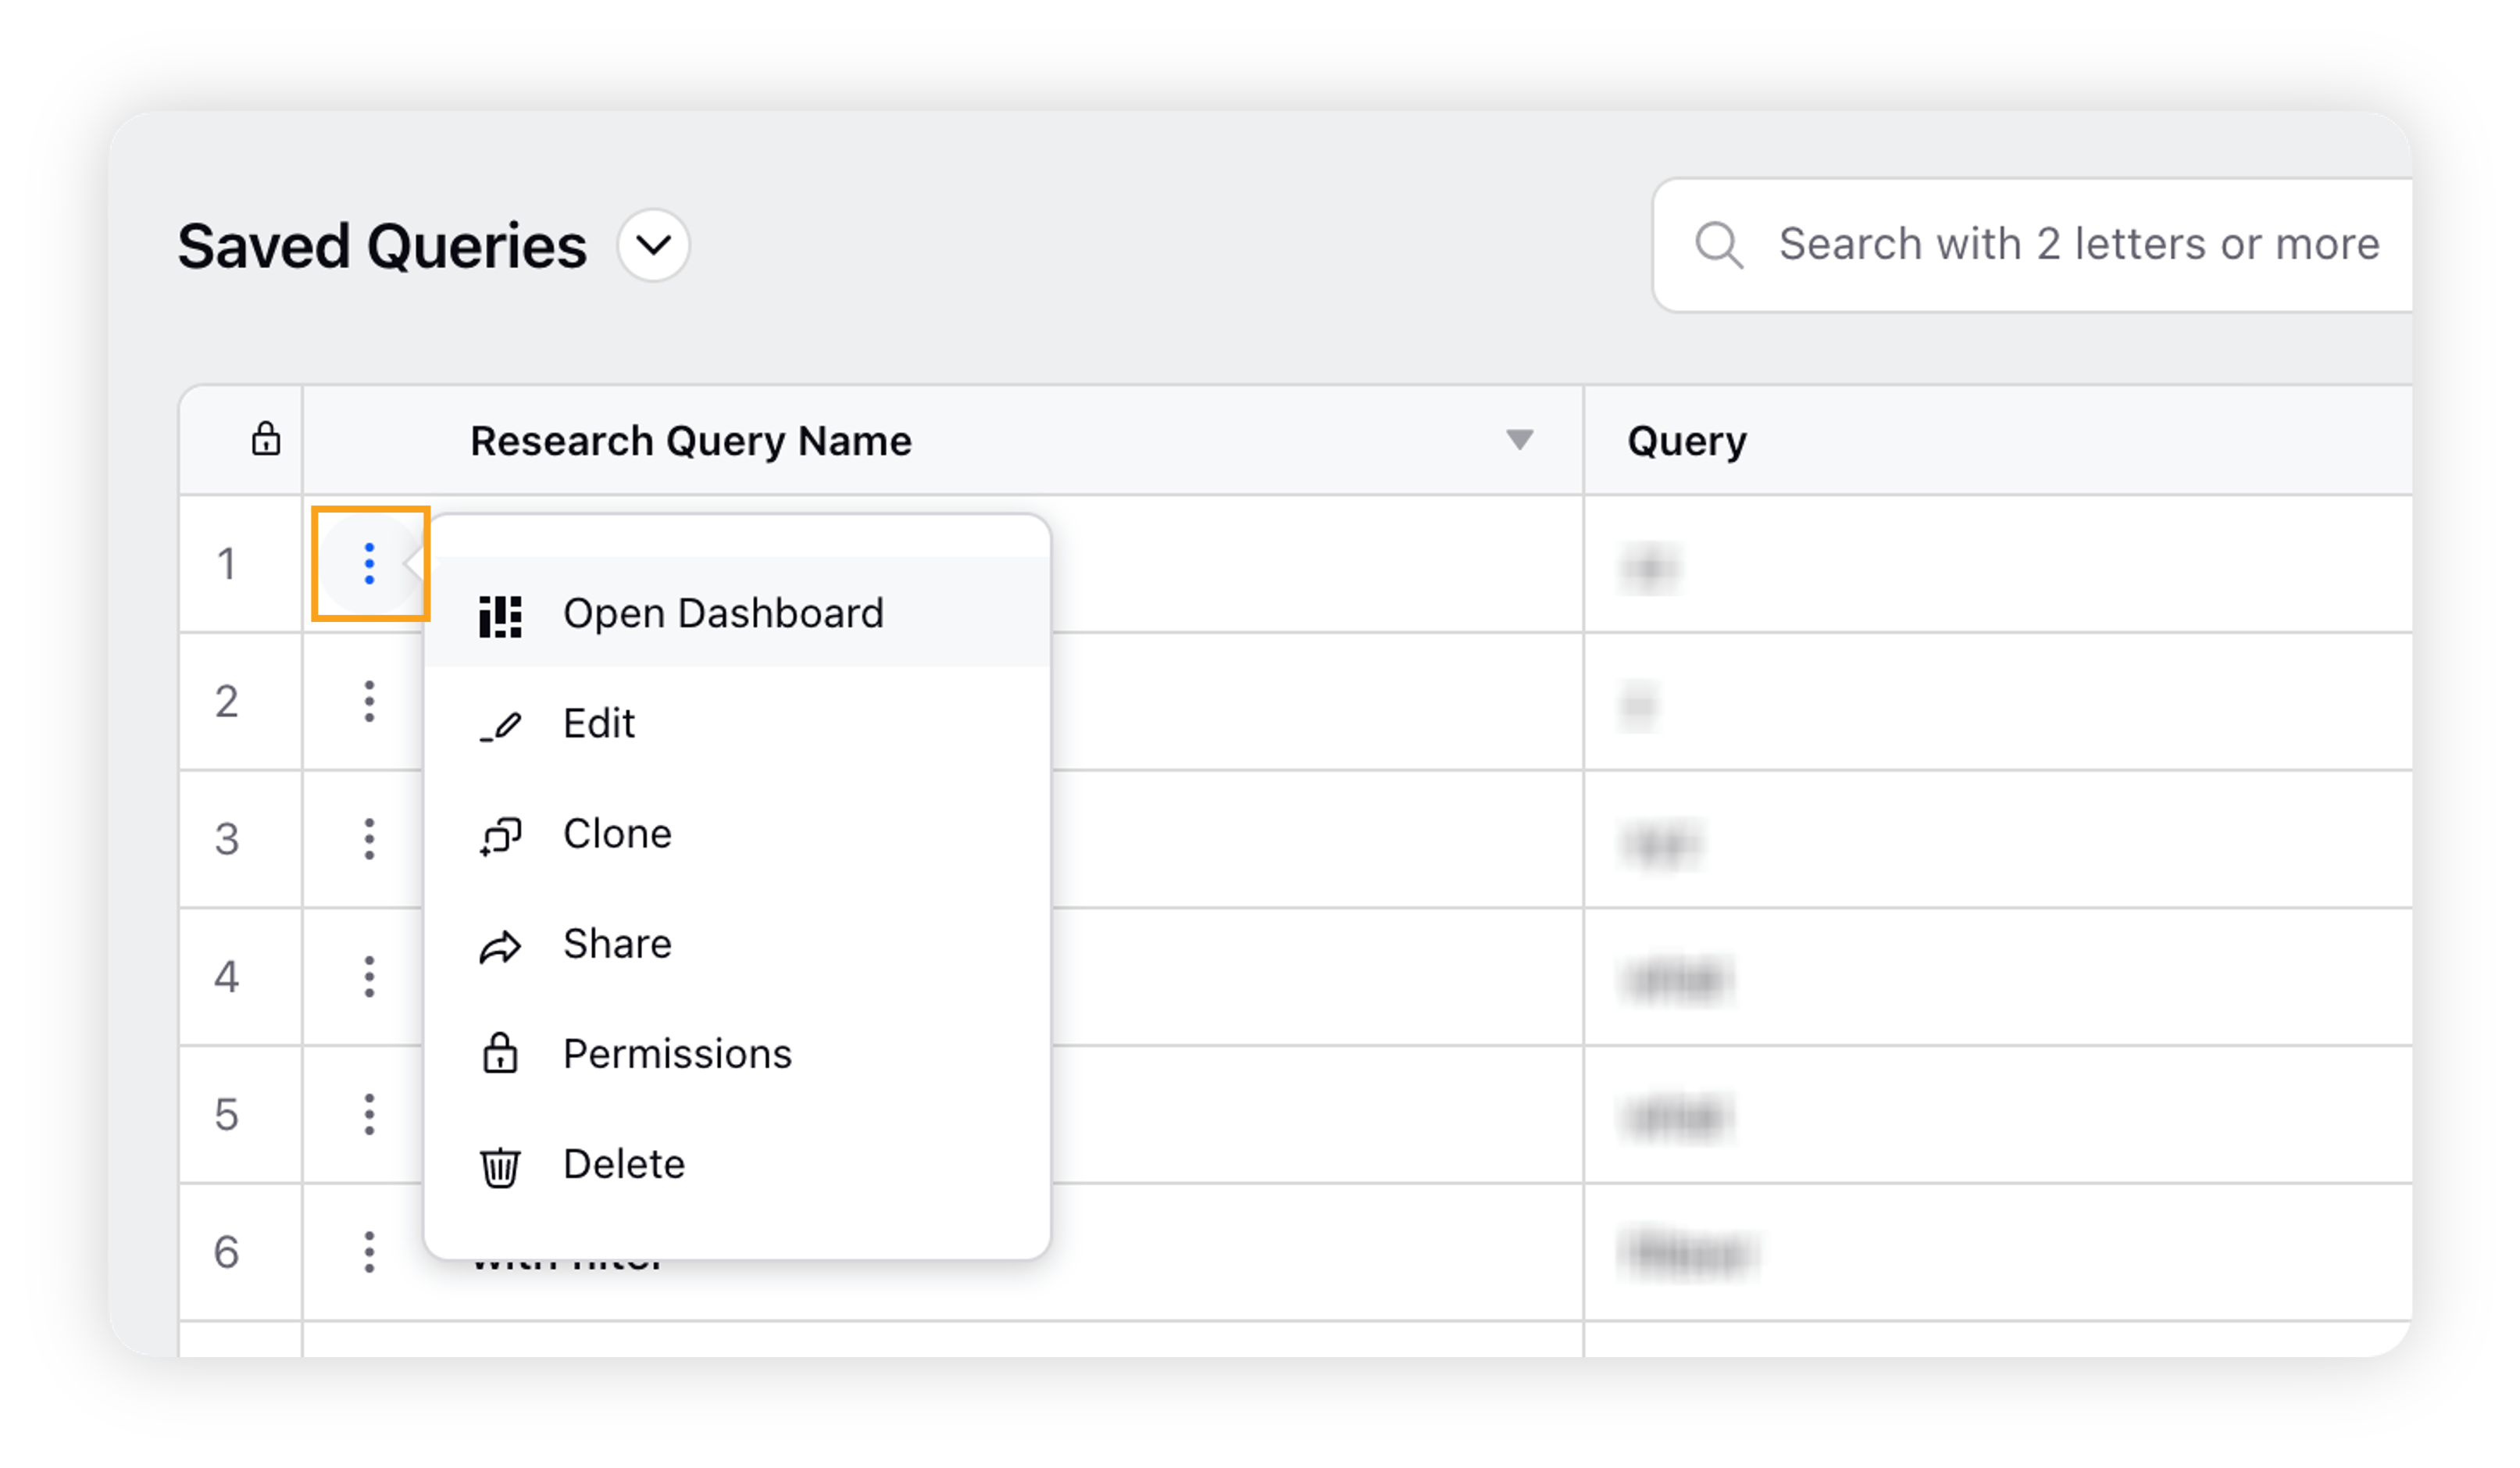
On the Saved Queries window, Research Queries are listed in a grid format with each query's name, the query terms, any tags, and the last modified time.
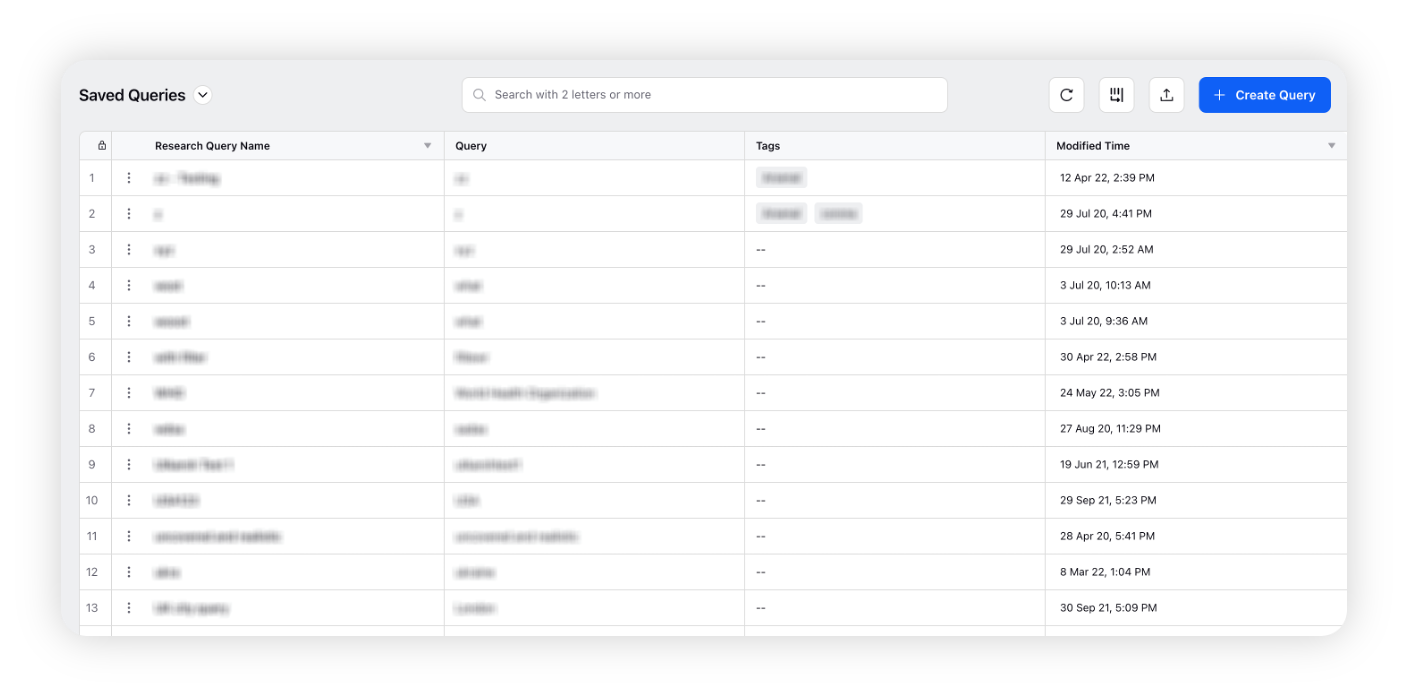
Hover over the Options icon before the research query name to take action upon it. Open the Research query dashboard, Edit the Query, Clone it, Share it with other users, set Permissions, or permanently Delete it.
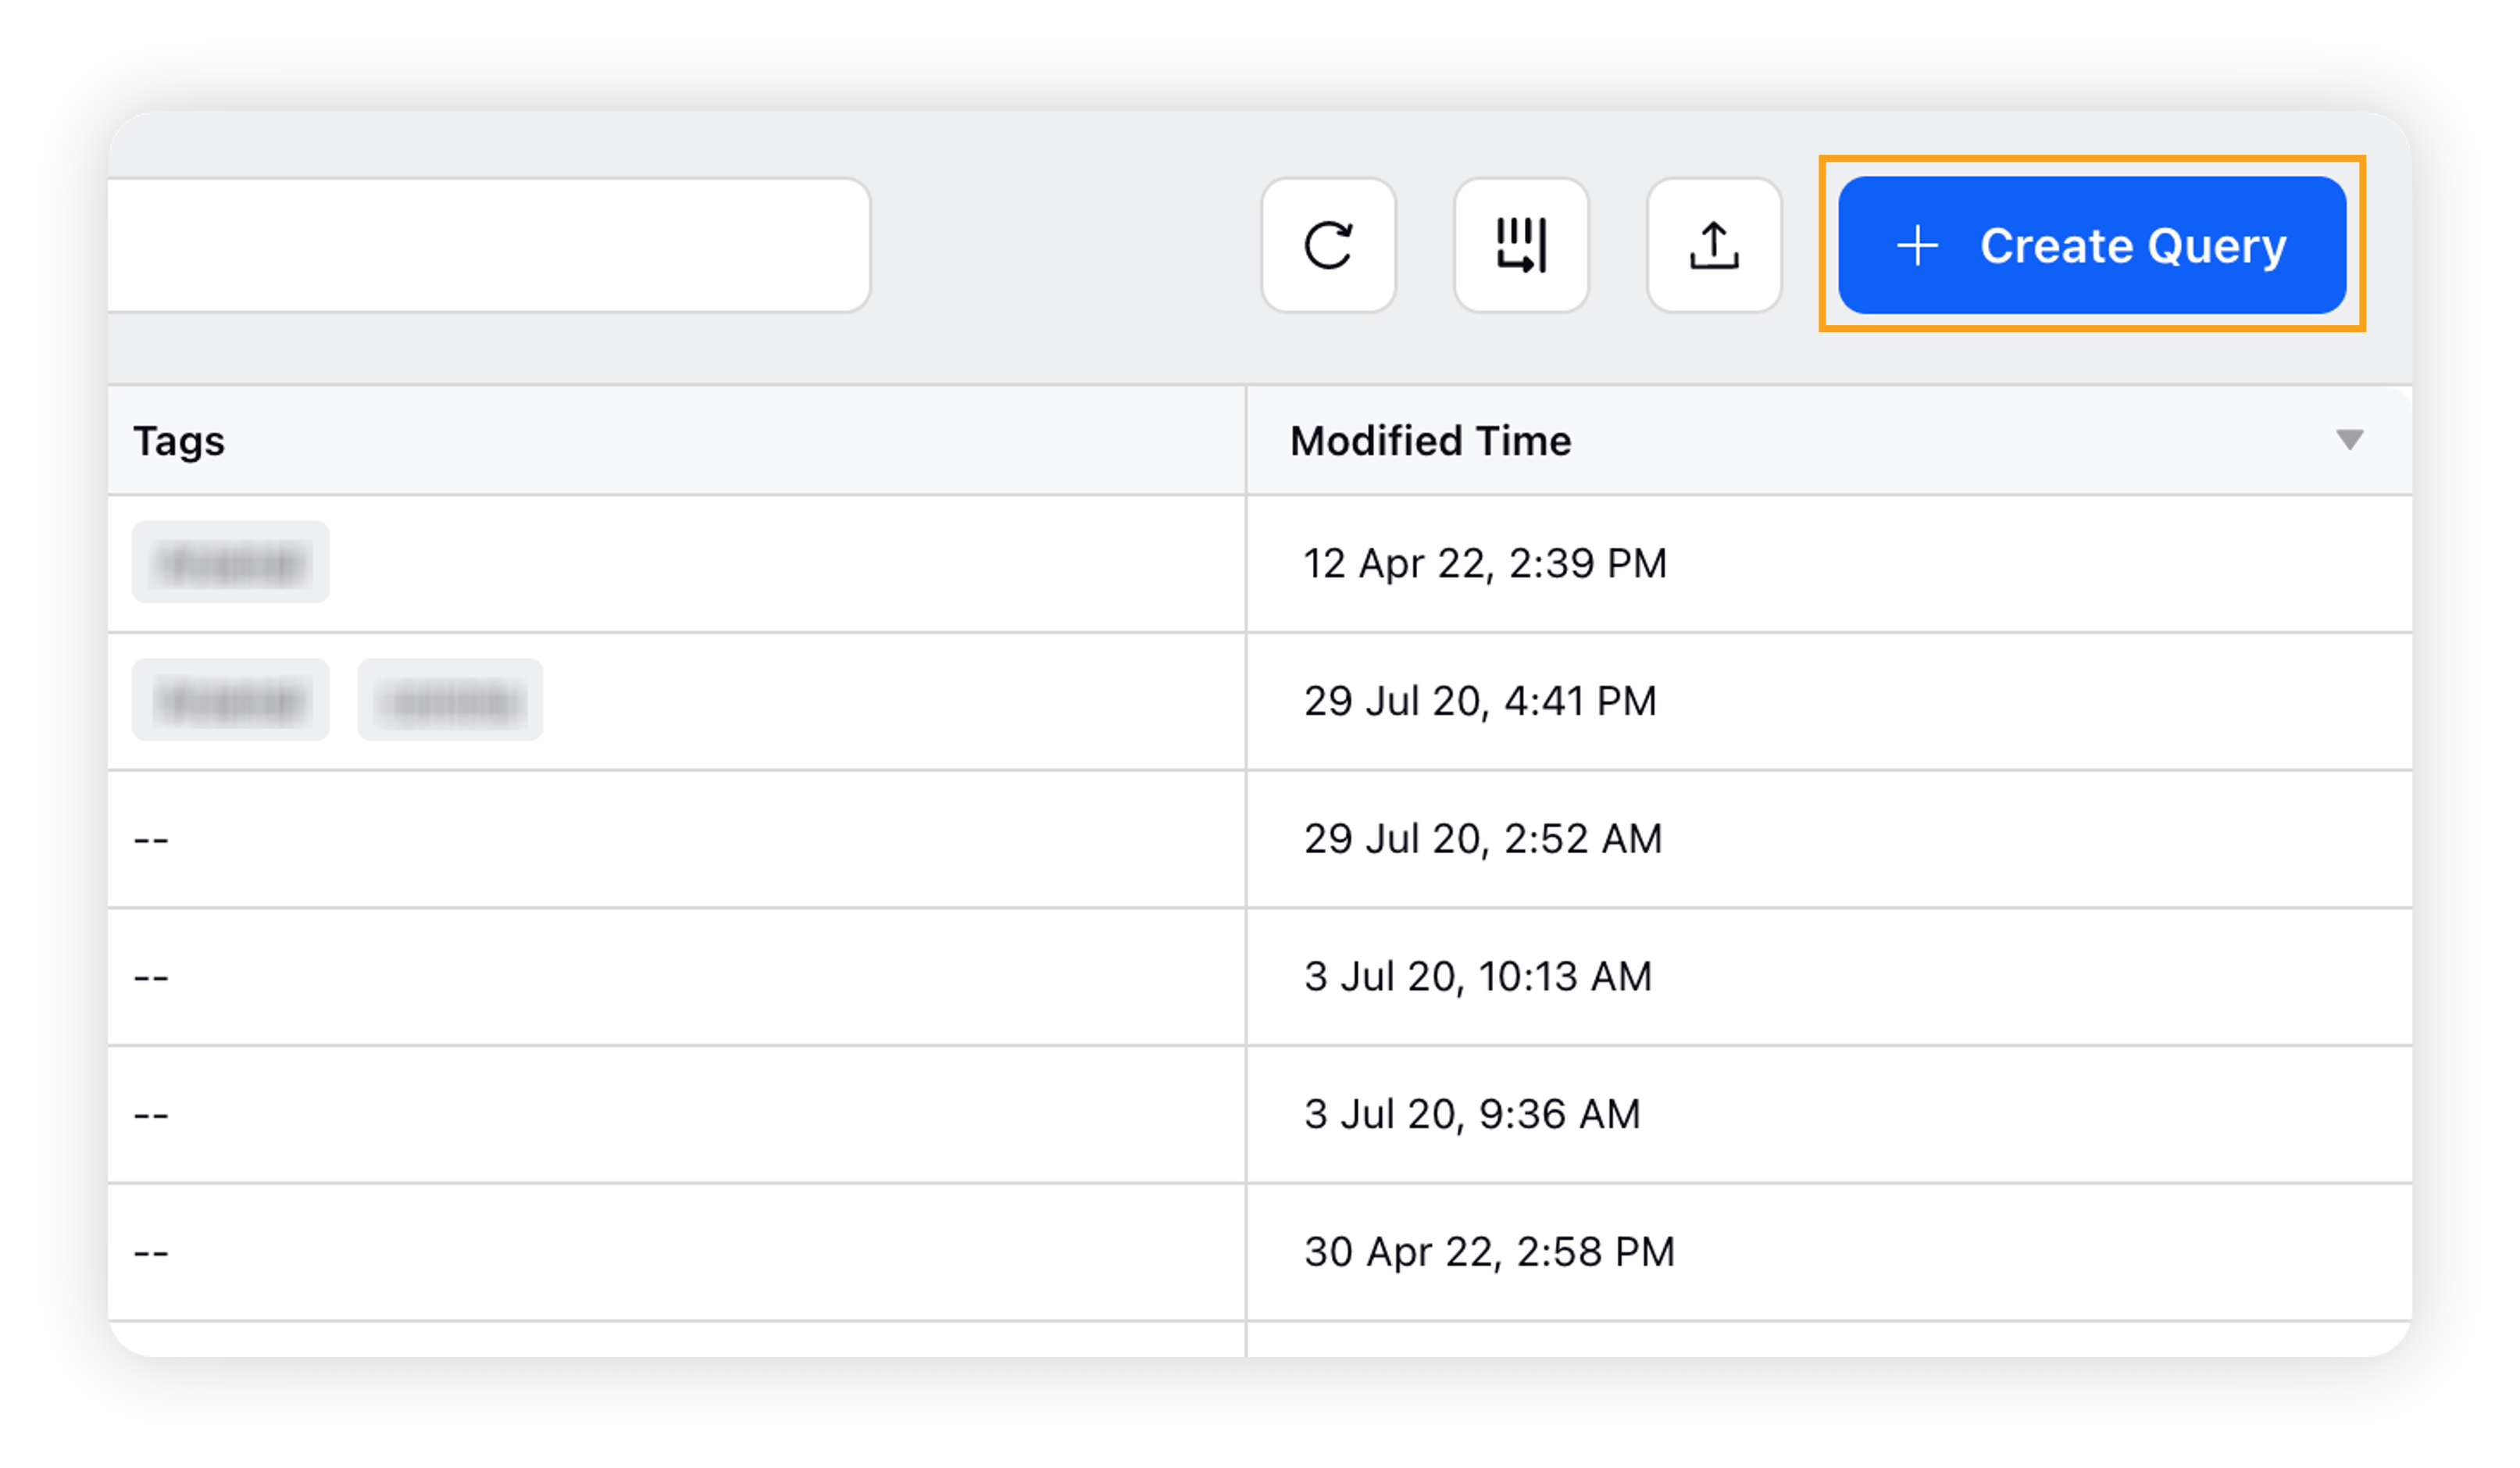
Click Create Research Query in the top right corner to build a research query.
On the Research Query dialog box, enter the name, query, tags and filters. Then click Create.

Note: You can also add/create a research query directly from the Research Query Dashboard. |
Scheduled Exports
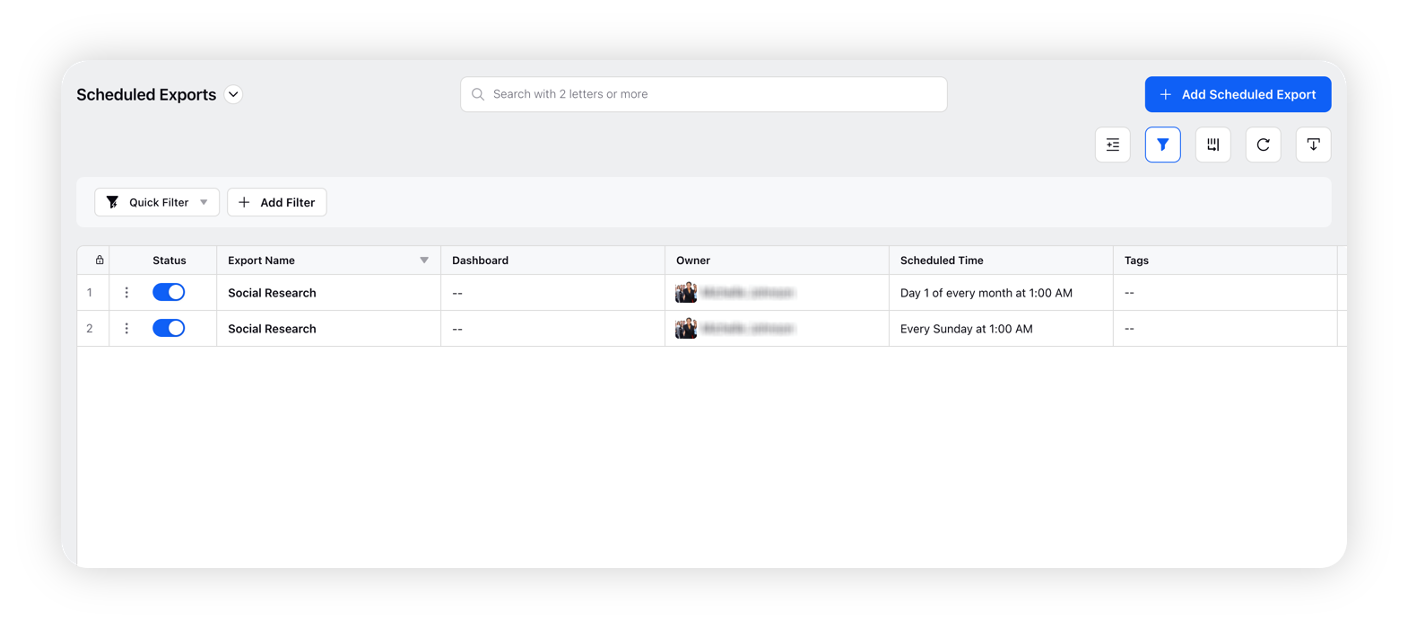
On the Scheduled Exports window, the scheduled export(s) that has been previously created will show up here.
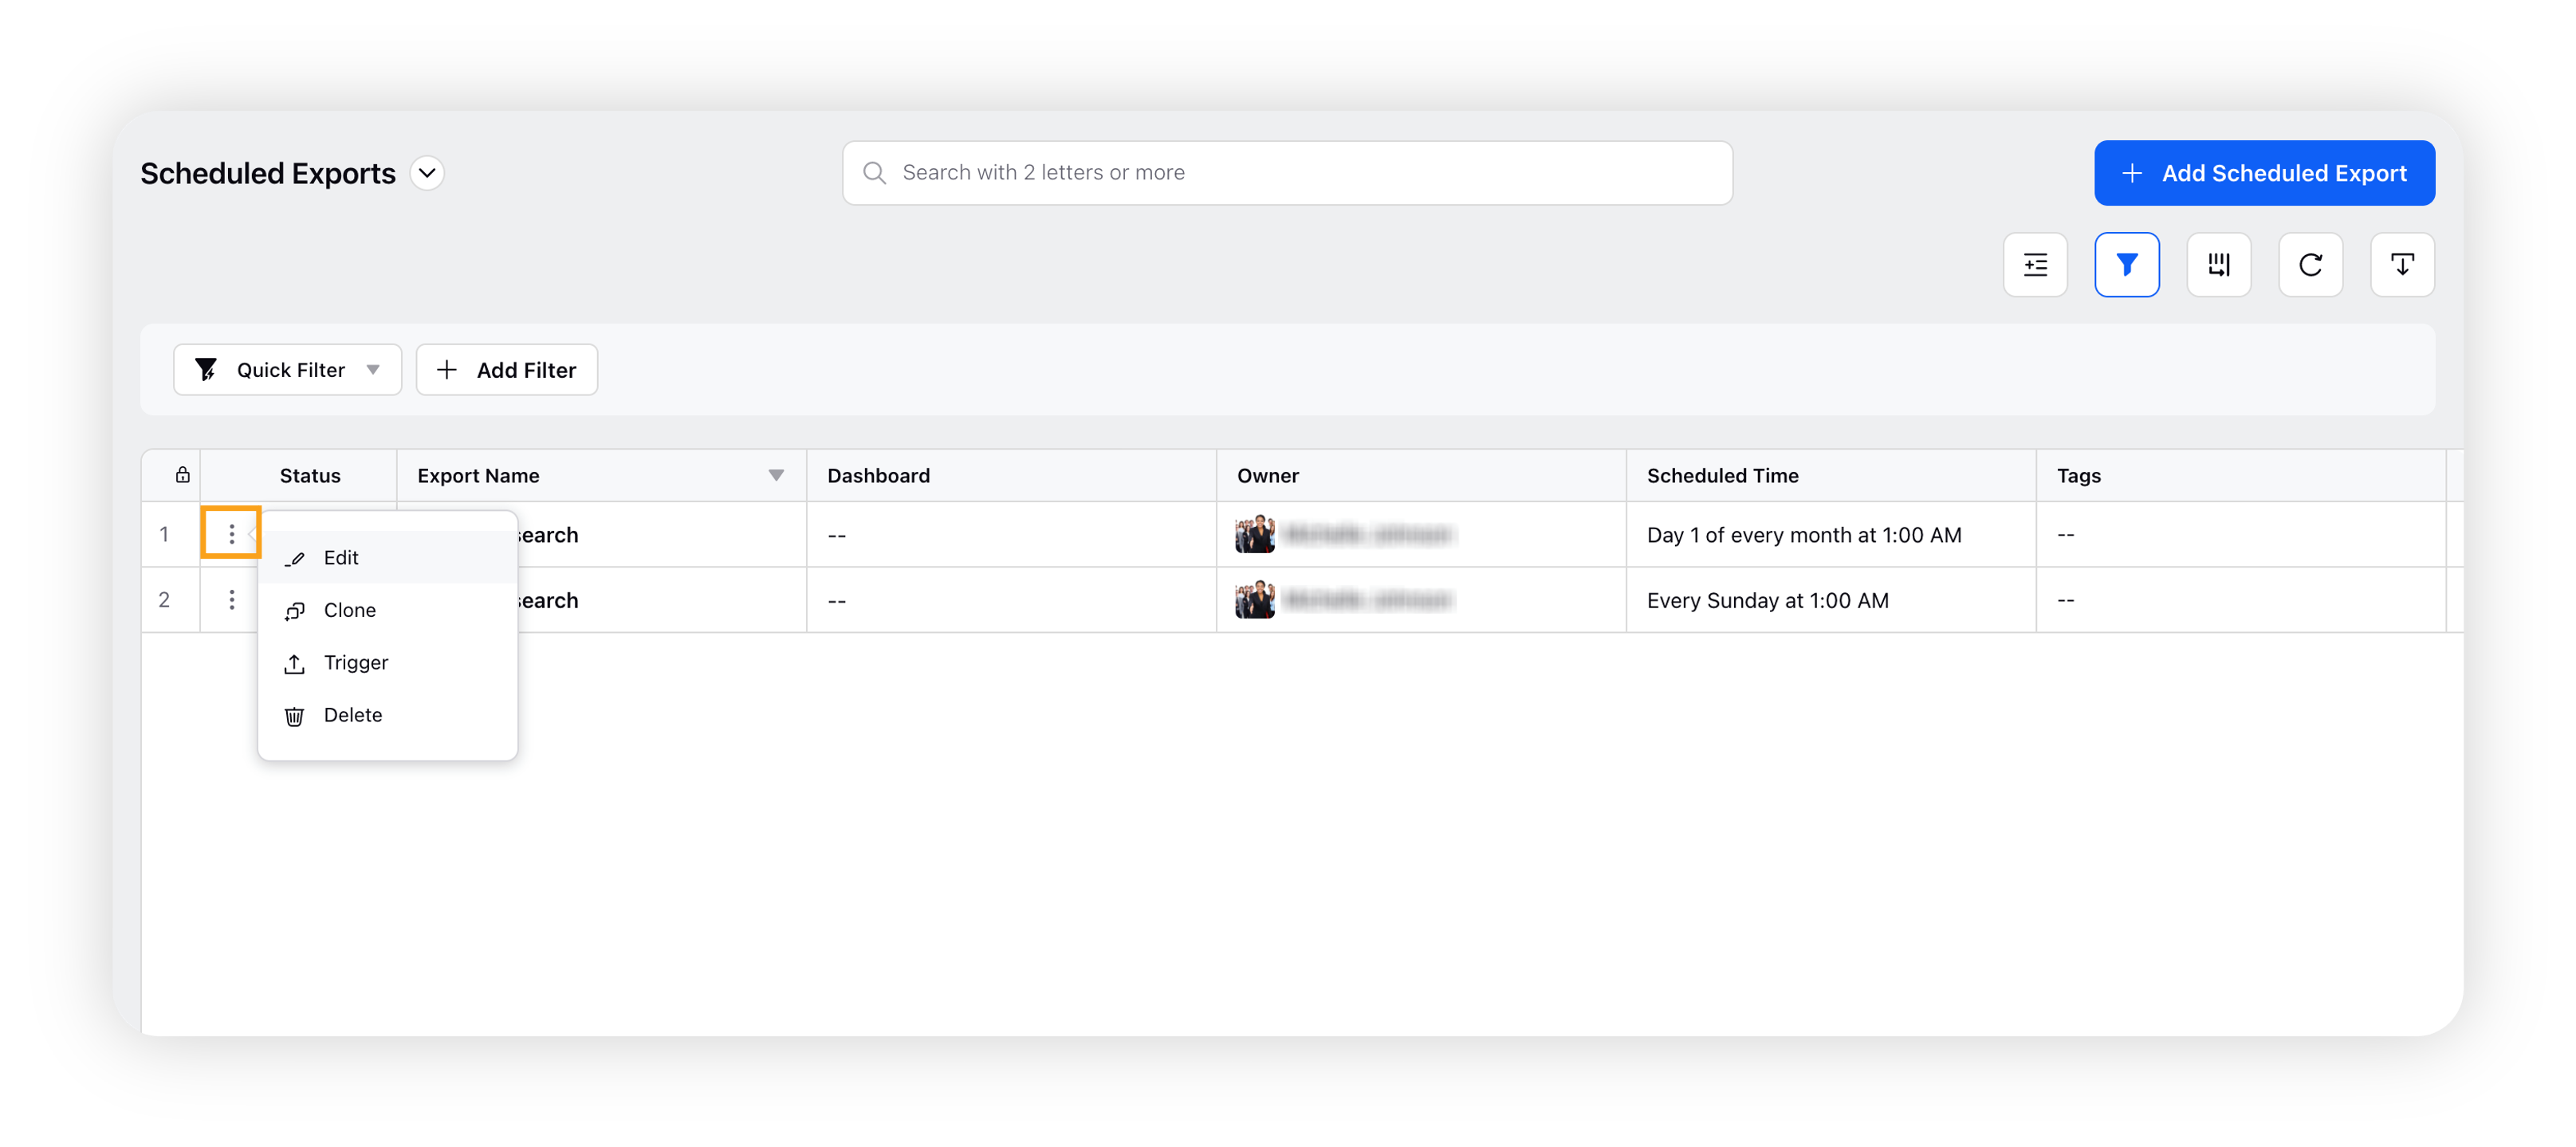
Hover over the Options icon before the scheduled export status to take action upon it. You can Edit the export, Clone it, Trigger it to download the report, or permanently Delete it.
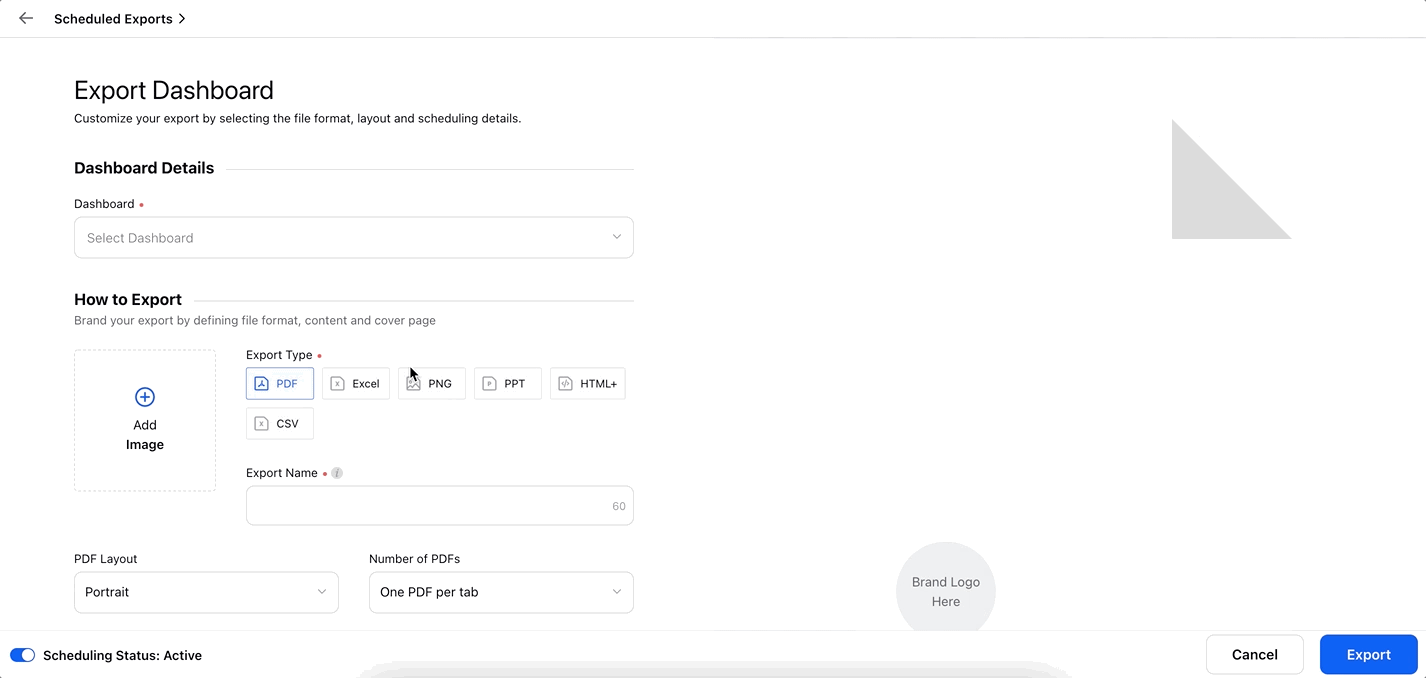
Click Add Scheduled Export in the top right corner to create new scheduled export.
Configure the Scheduled Export as desired, and then click Export. For more information, see Scheduled Exports.
Explore
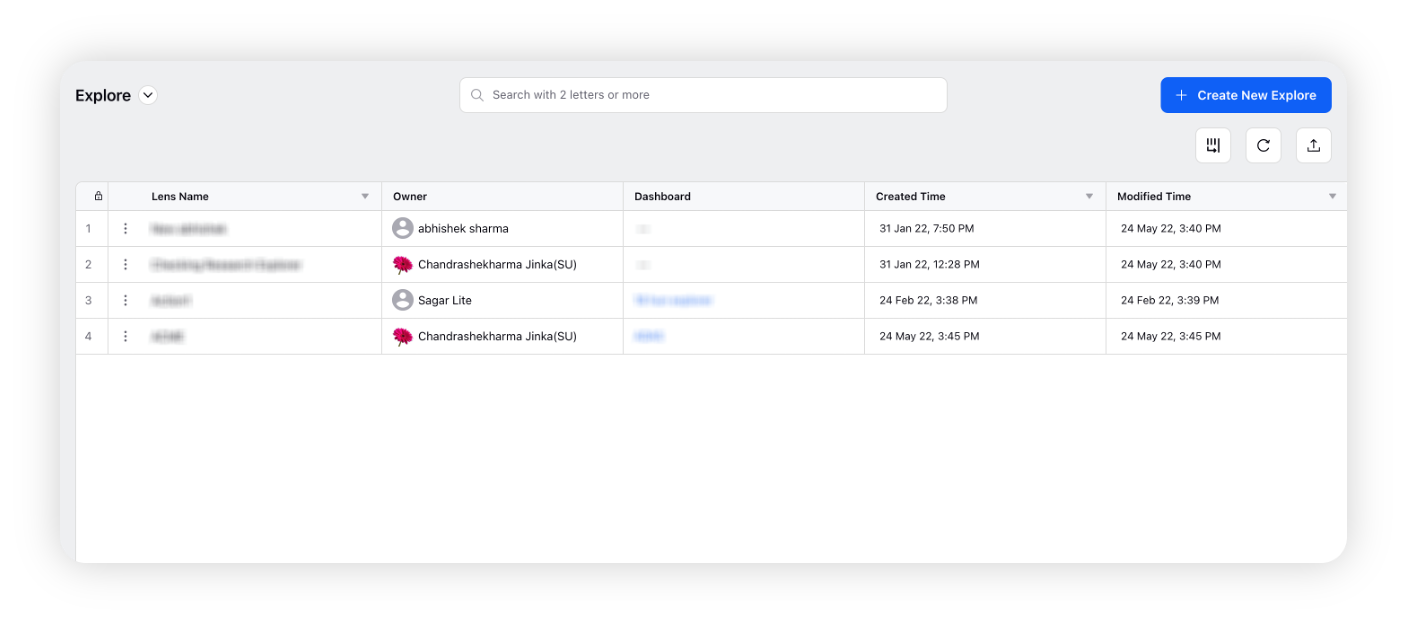
On the Explore window, the explore lenses that have been previously created will show up here.
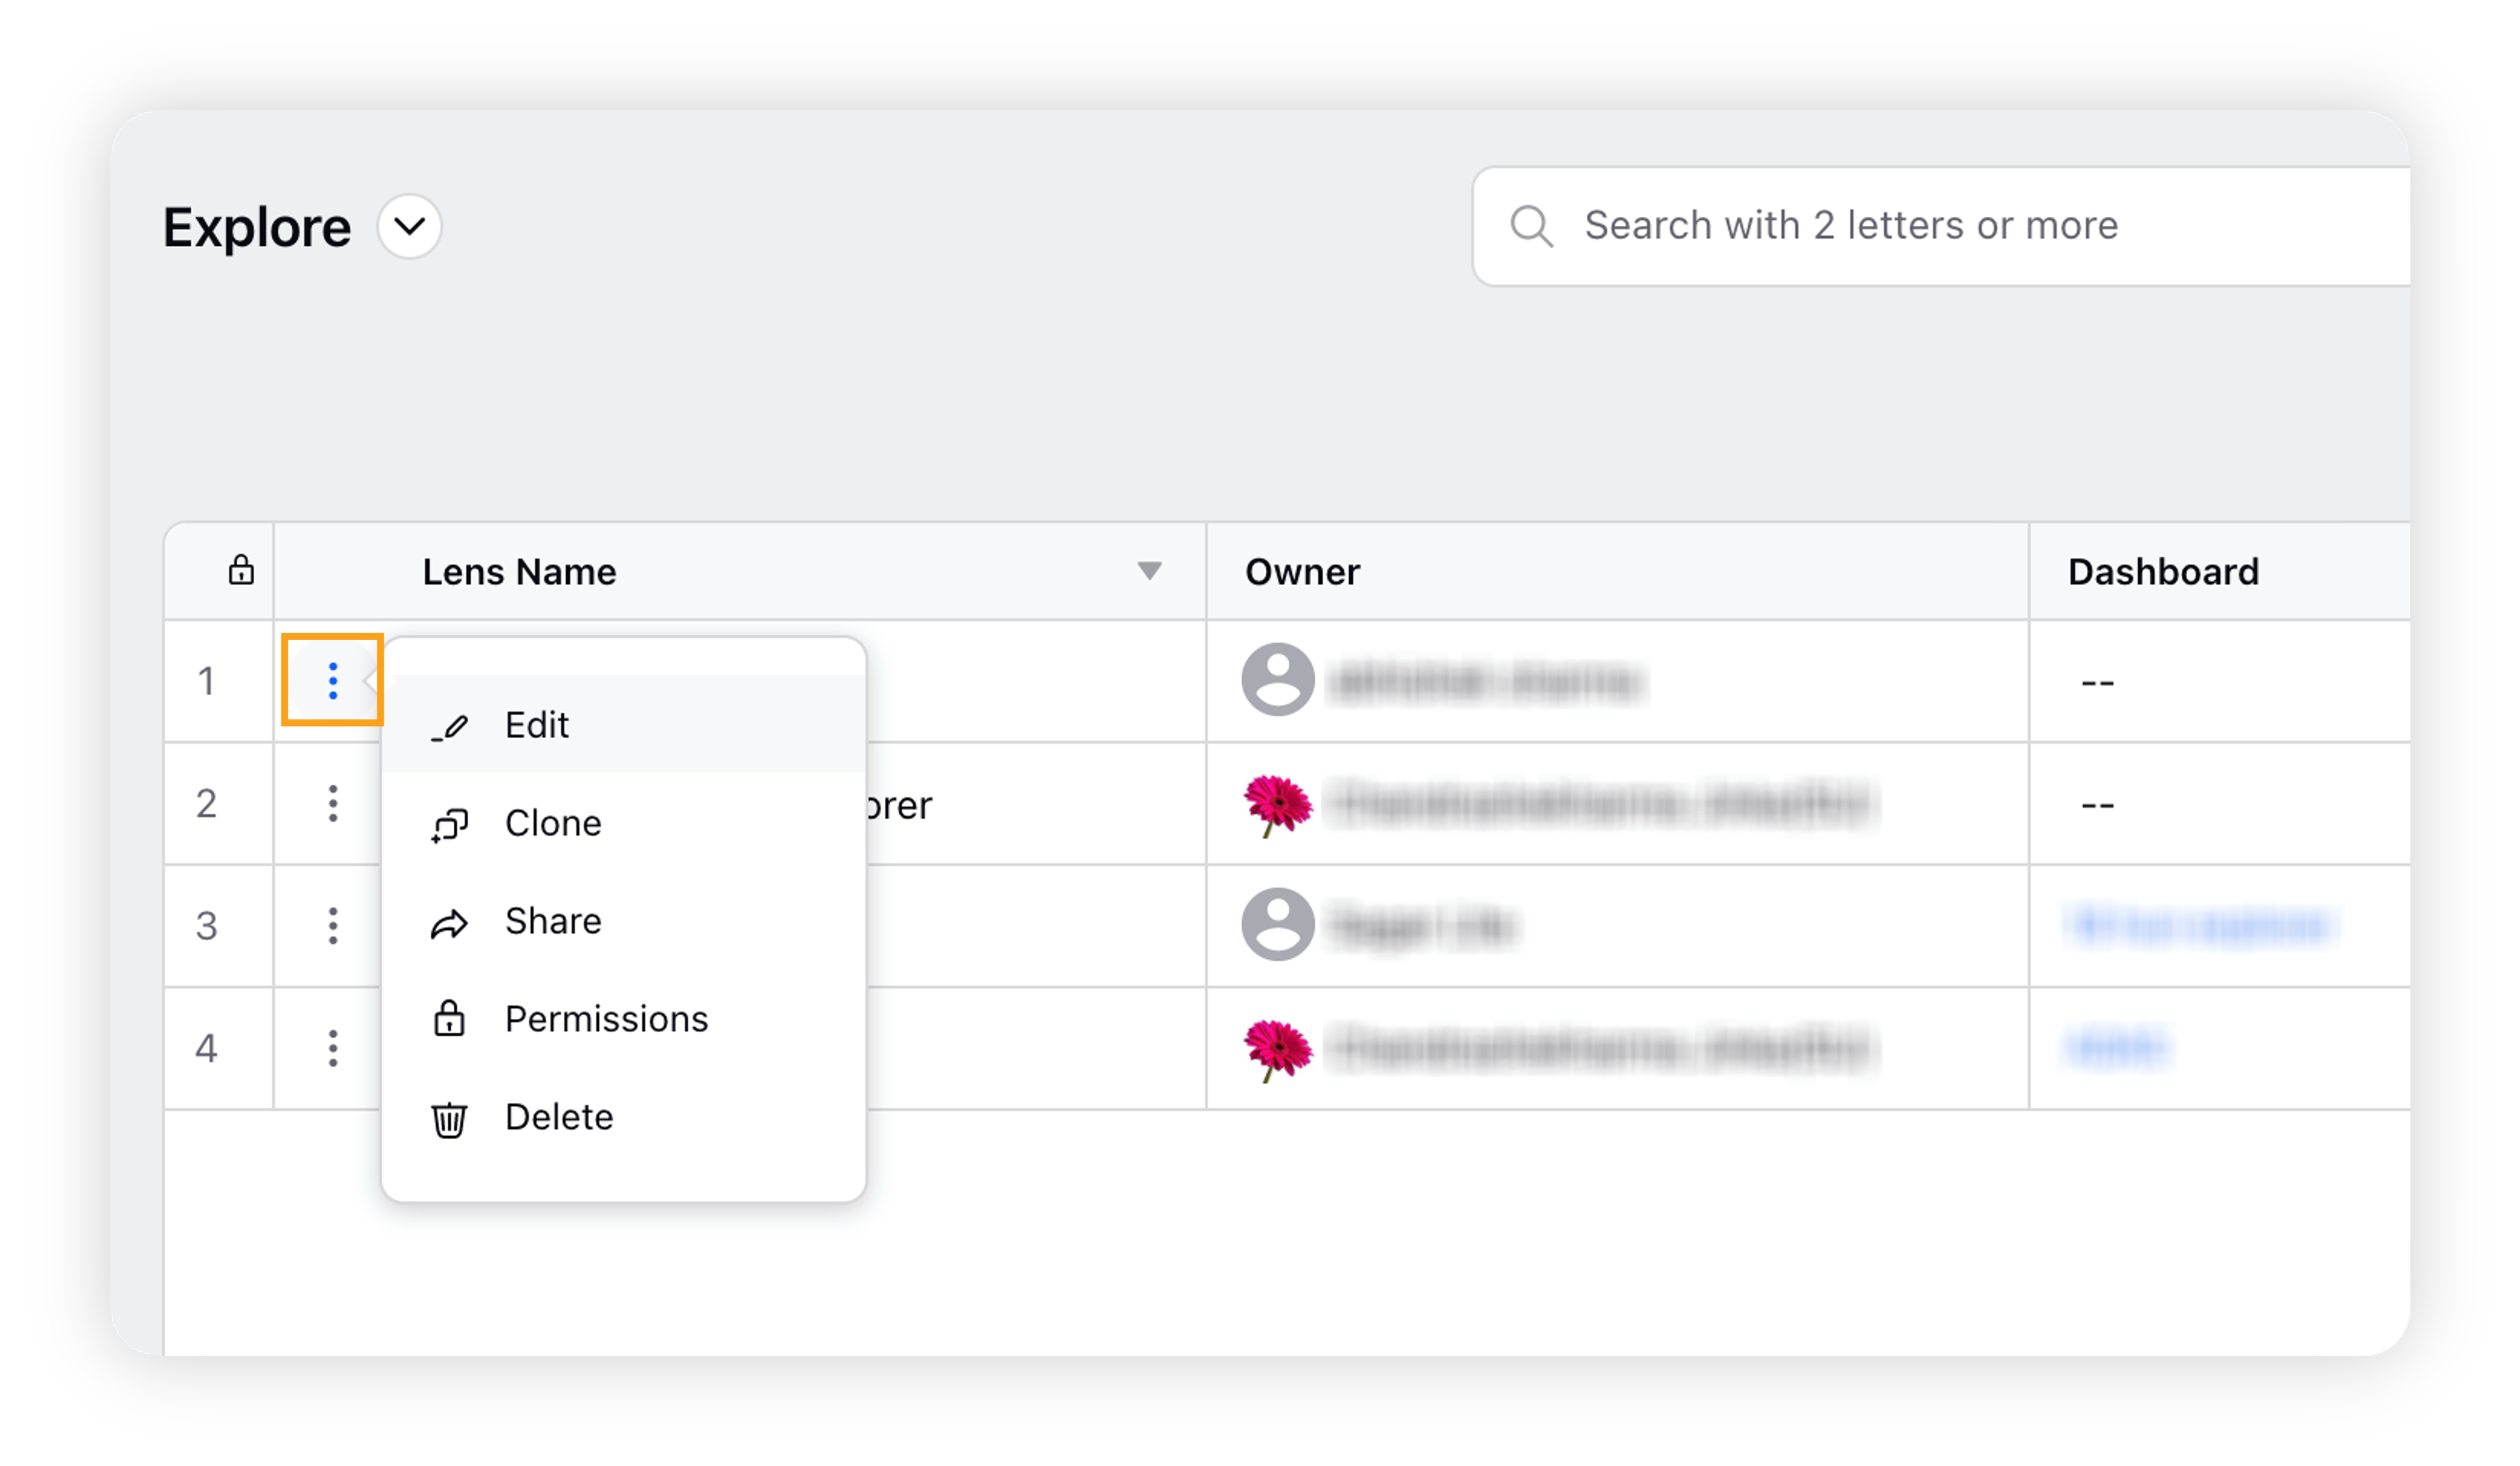
Hover over the Options icon next to the Explore Lens to Edit, Clone, Share, Set Permissions, and/or Delete it.
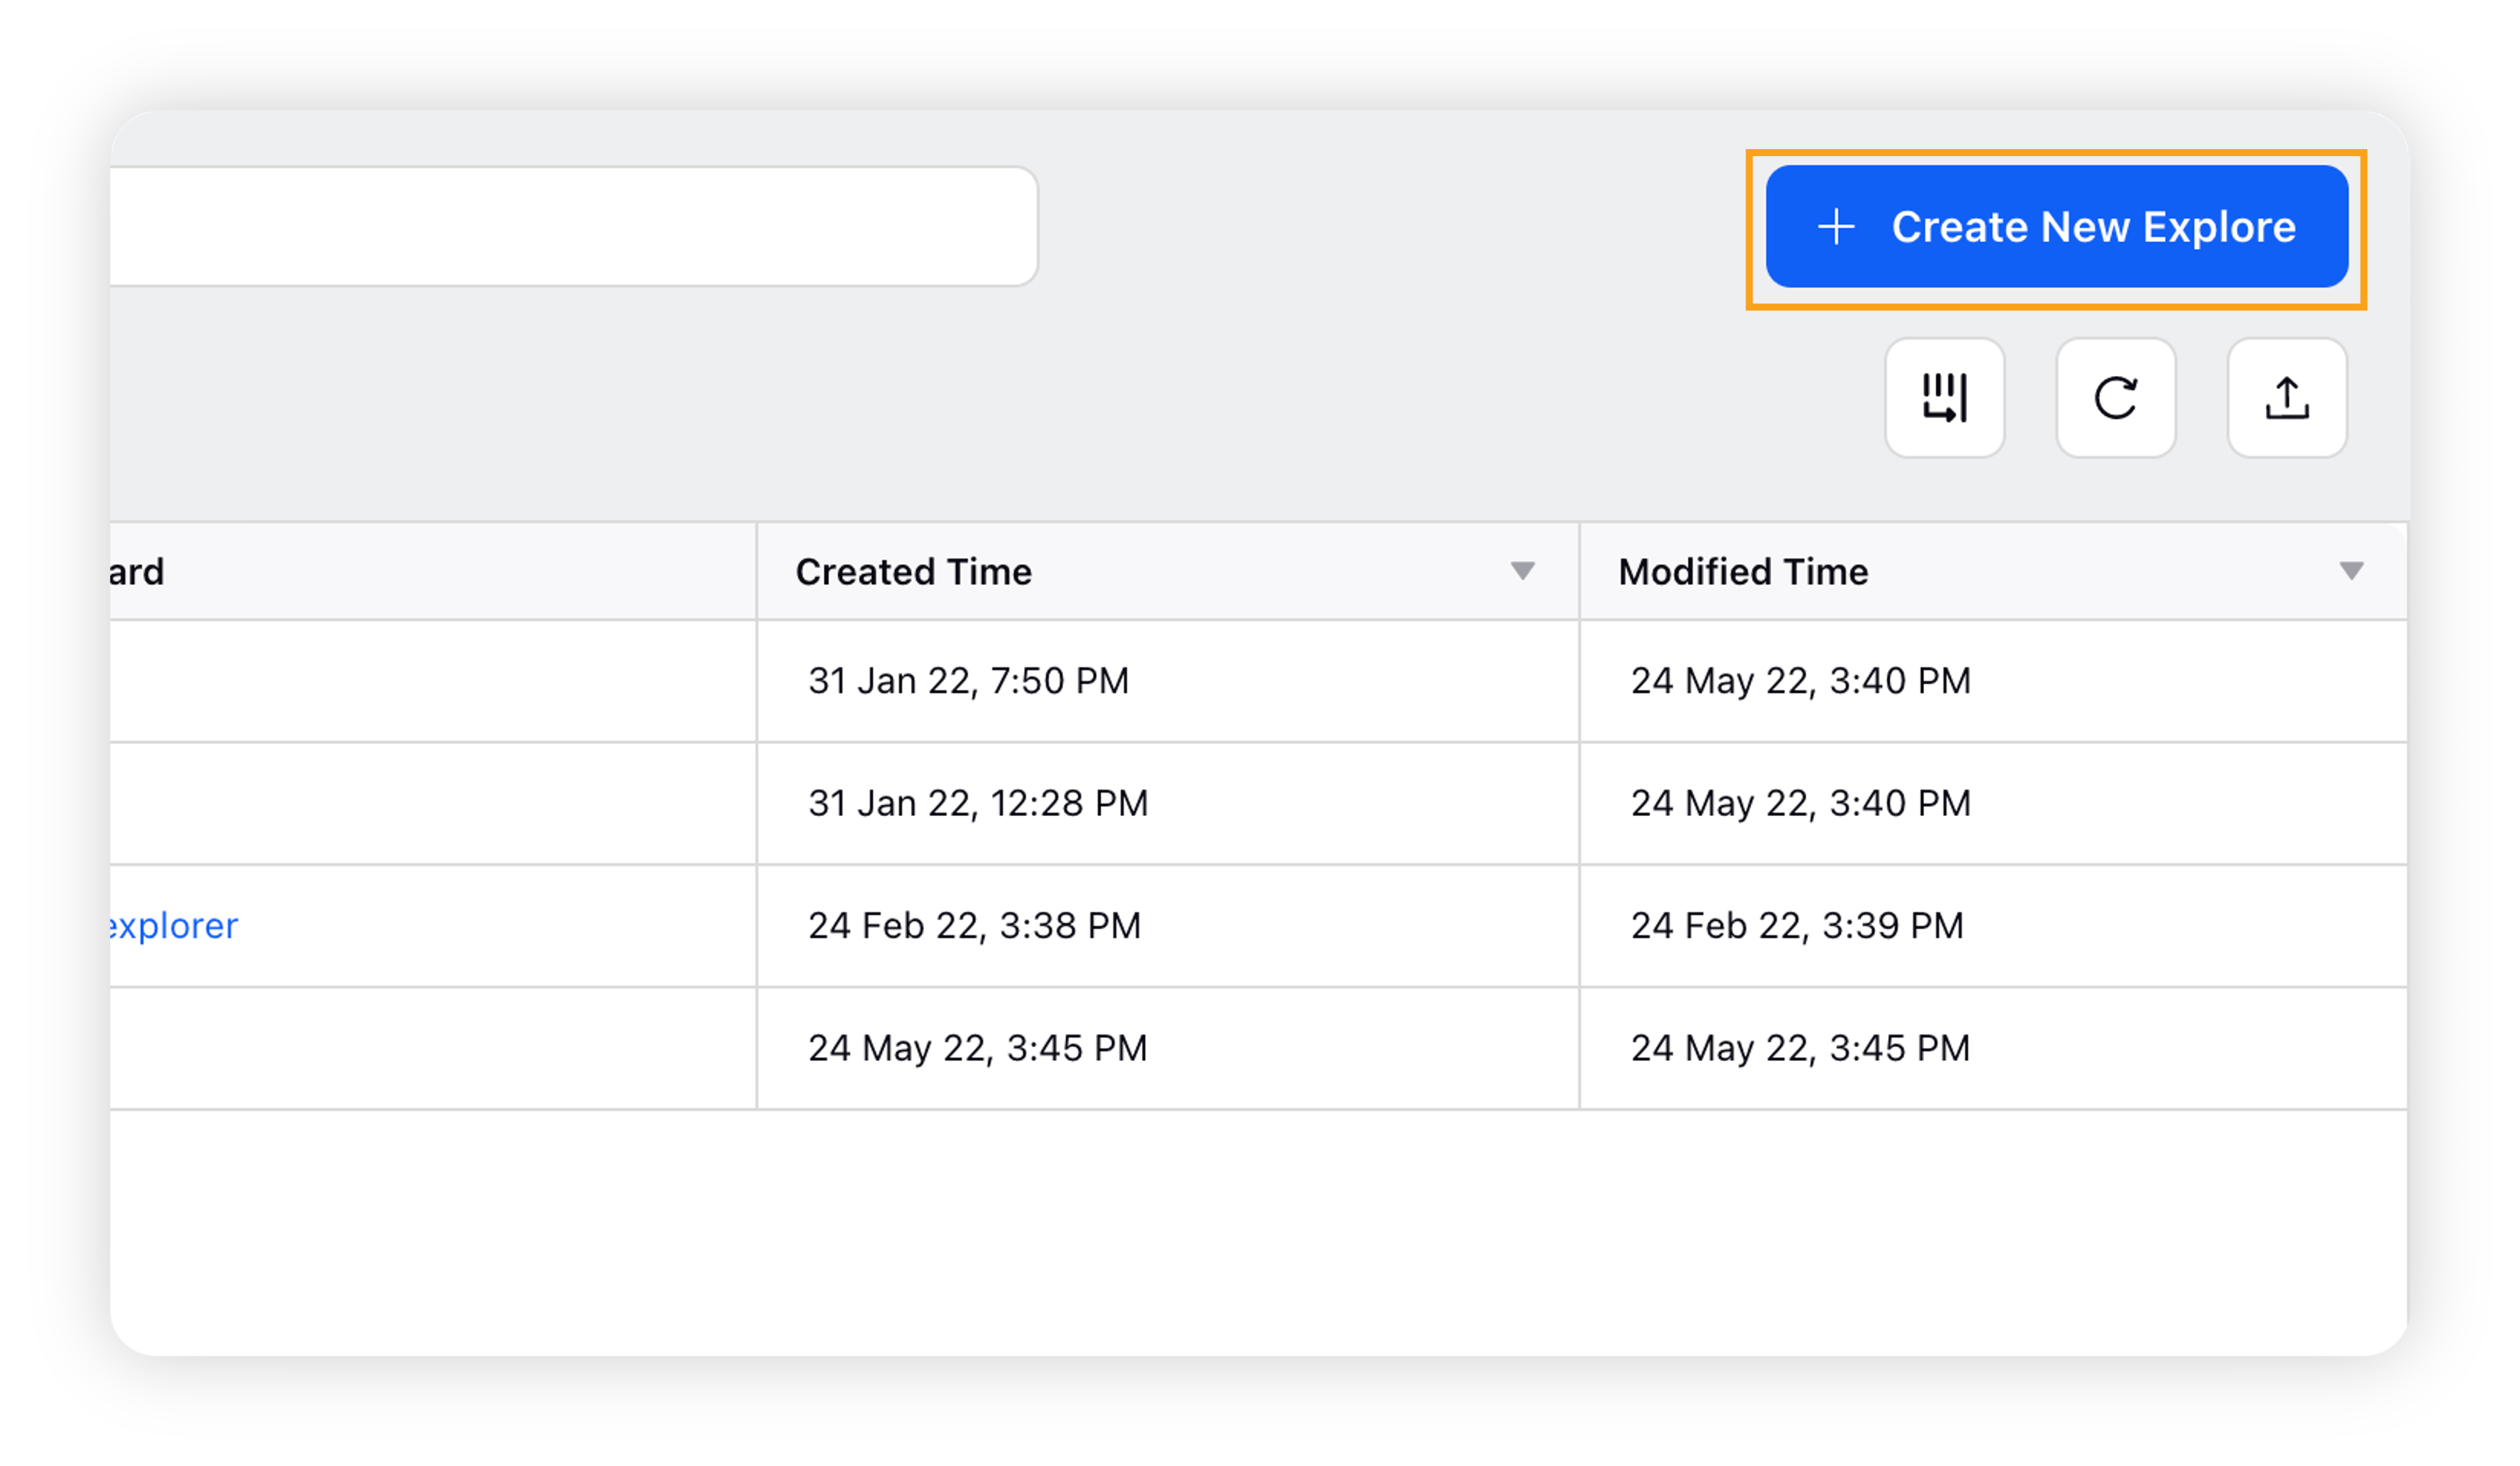
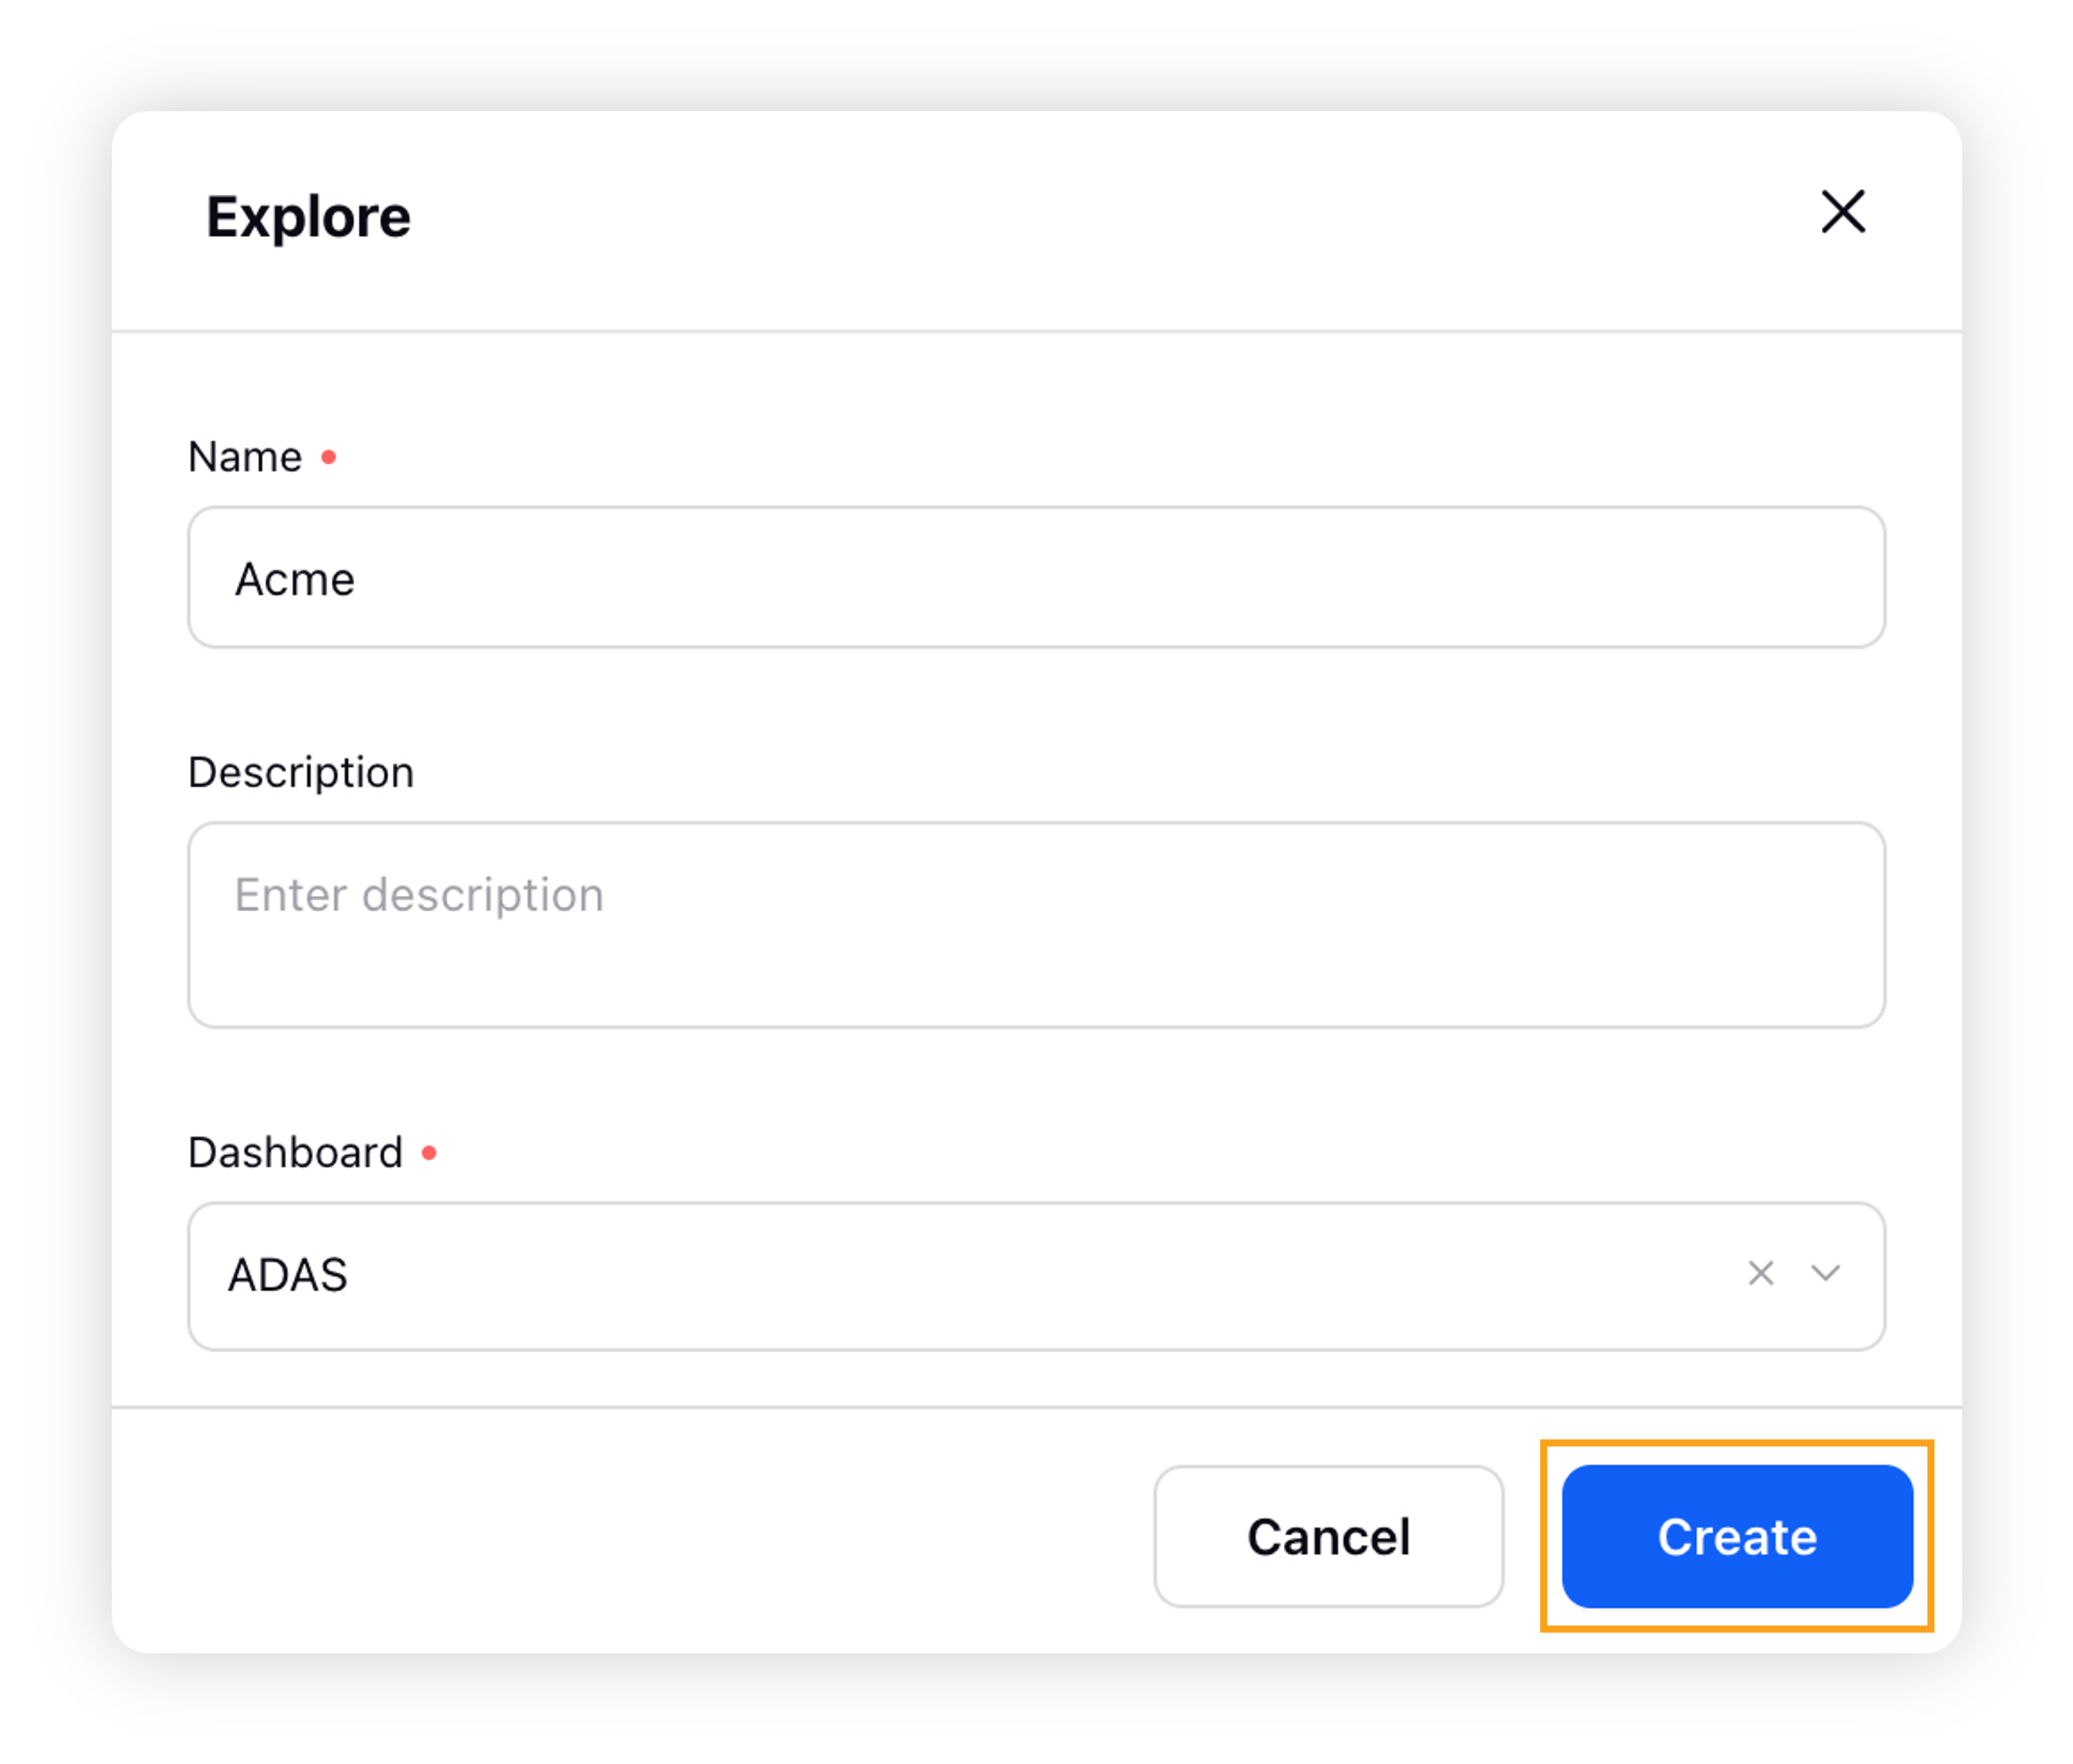
To create a new explore lens, click the Create New Explore button in the top right corner.
Enter the name, an optional description, and select the dashboard. Click Create.
Once the Explore Lens is successfully created, it will be listed on the Explore window.
Note: To get Explore the Lens capability enabled for Quick Search in your environment, please work with your success manager. |