Send One Time Notification for Proactive Messaging
Updated
Sprinklr allows brands to send one-time marketing campaigns on WhatsApp for promotional, transactional, and marketing purposes. This involves starting a brand-initiated conversation hence only HSM templates can be sent. The whole process can be divided into 4 steps where:
Create marketing content (HSM template) to be sent using Digital asset management.
Upload customer details using the Audience profile section.
Create cohorts of target customers using the Audience segment.
Create a marketing journey and schedule the same (either immediately or for a future time) using the Journey facilitator.
Create marketing content using the Digital Asset Management module
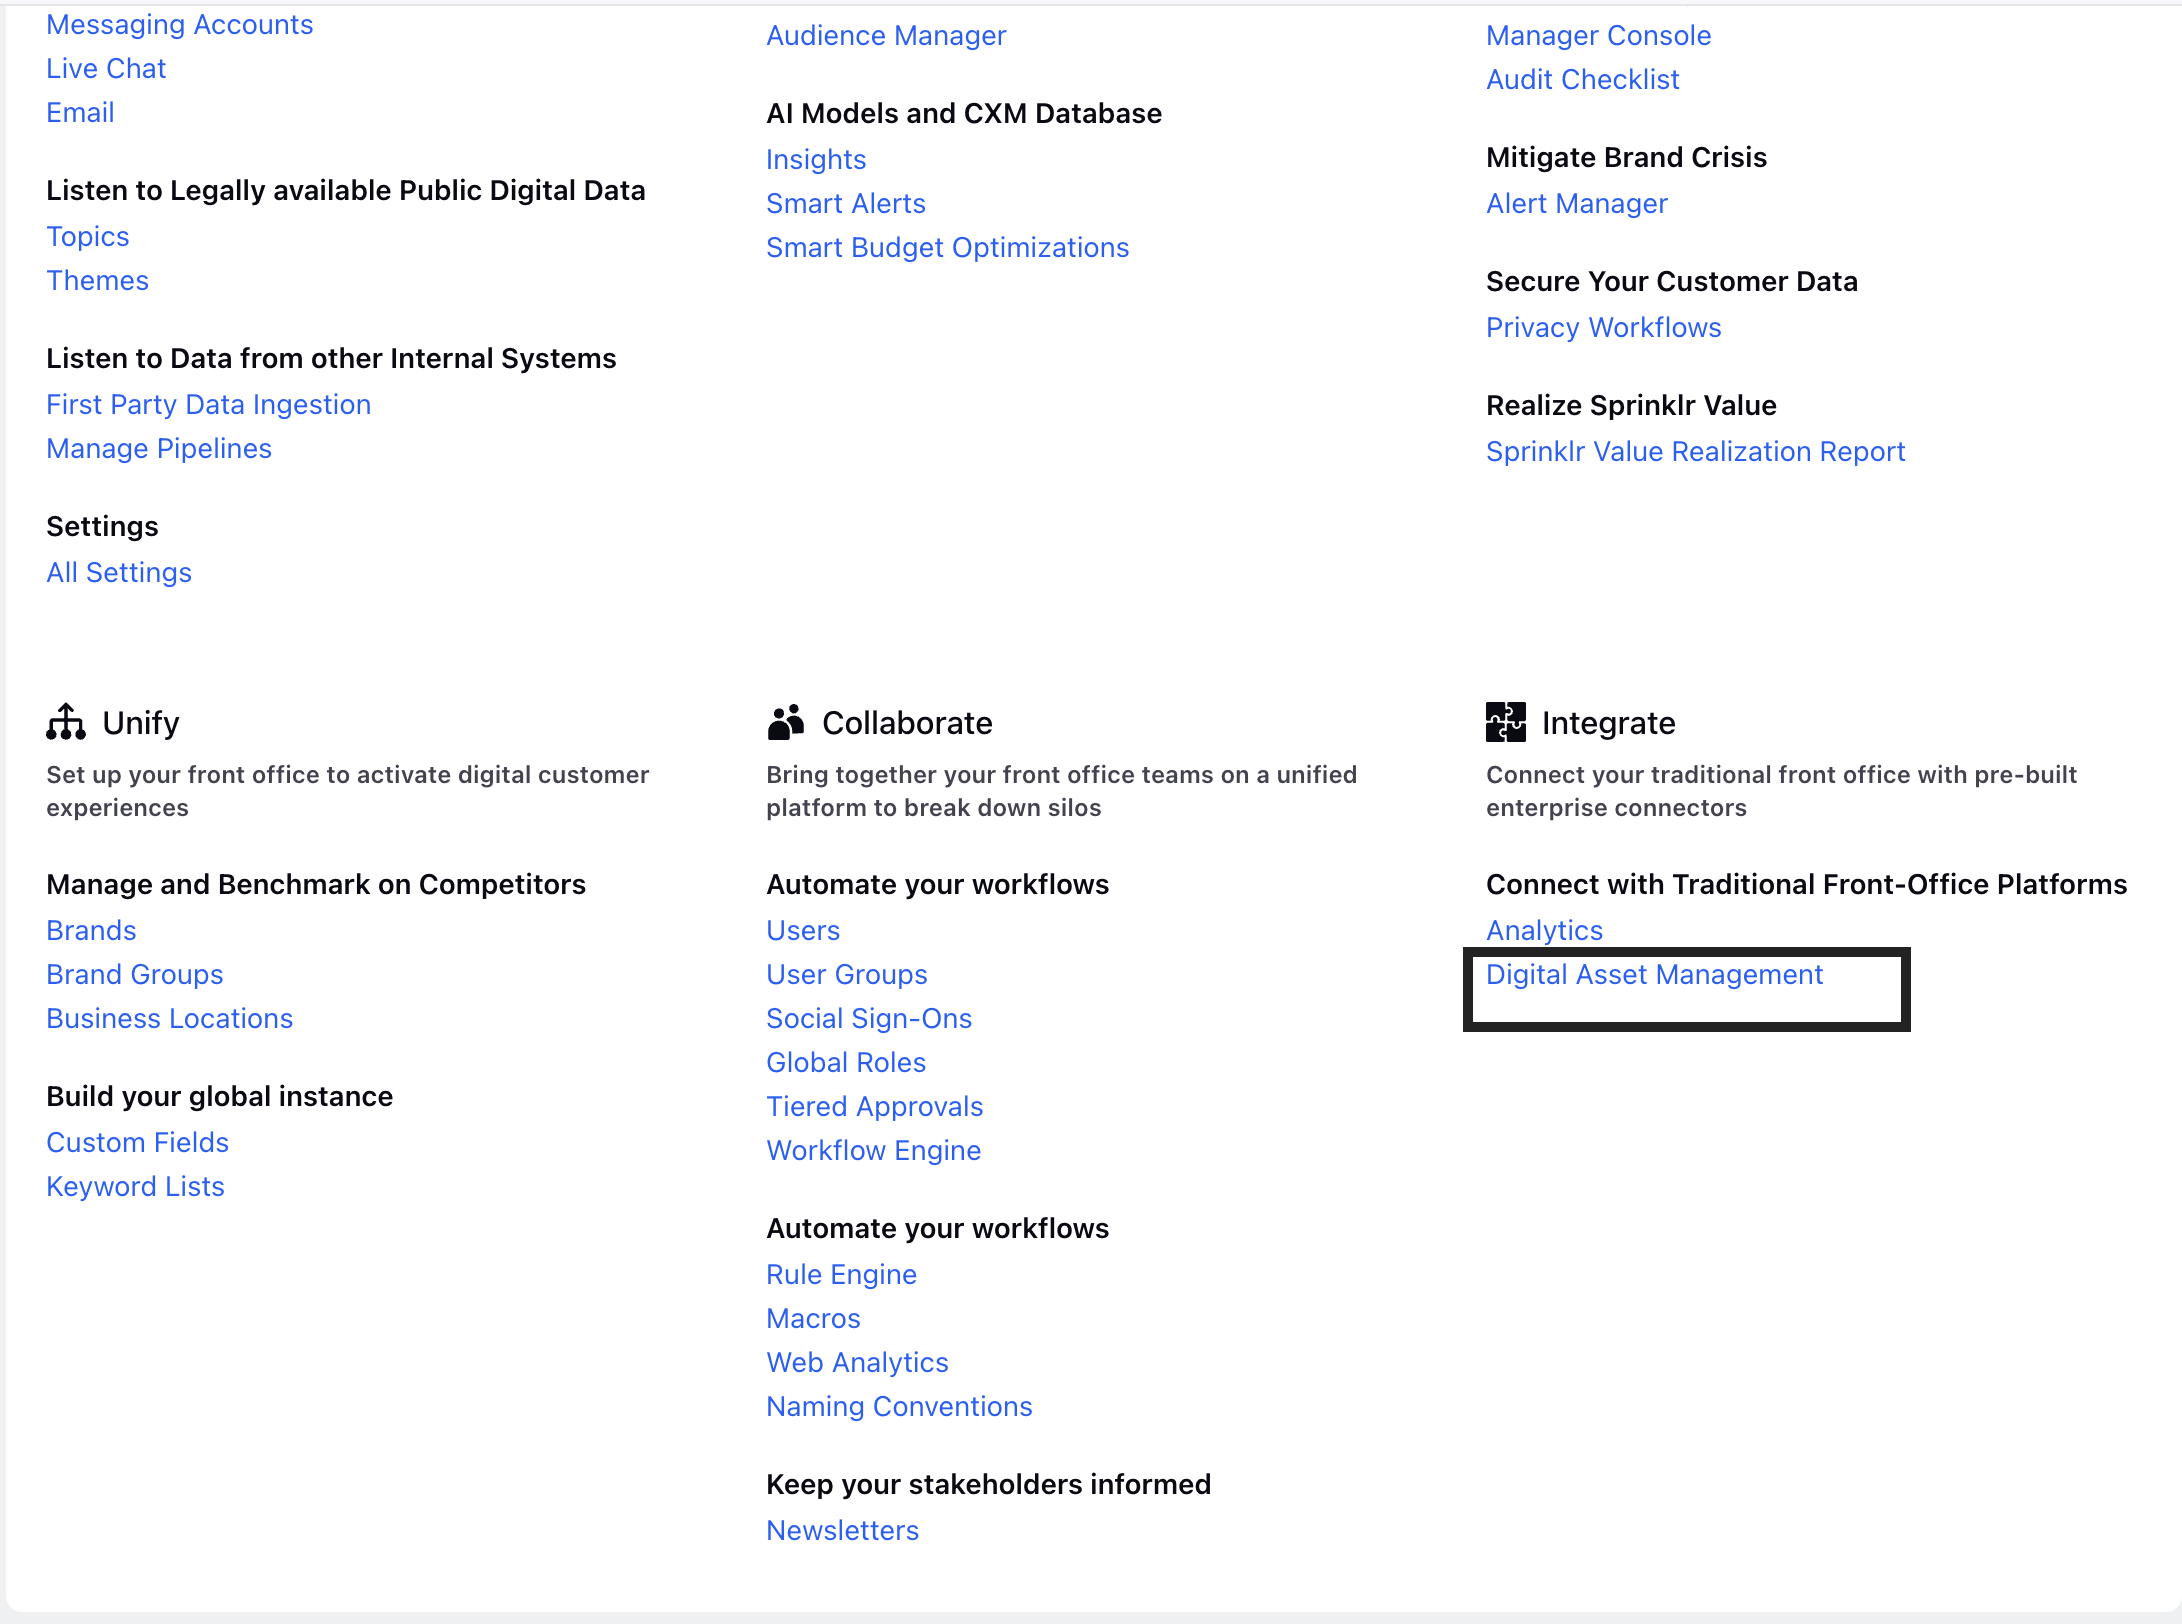
1. On a new tab click Digital Asset Management within the Integrate section.
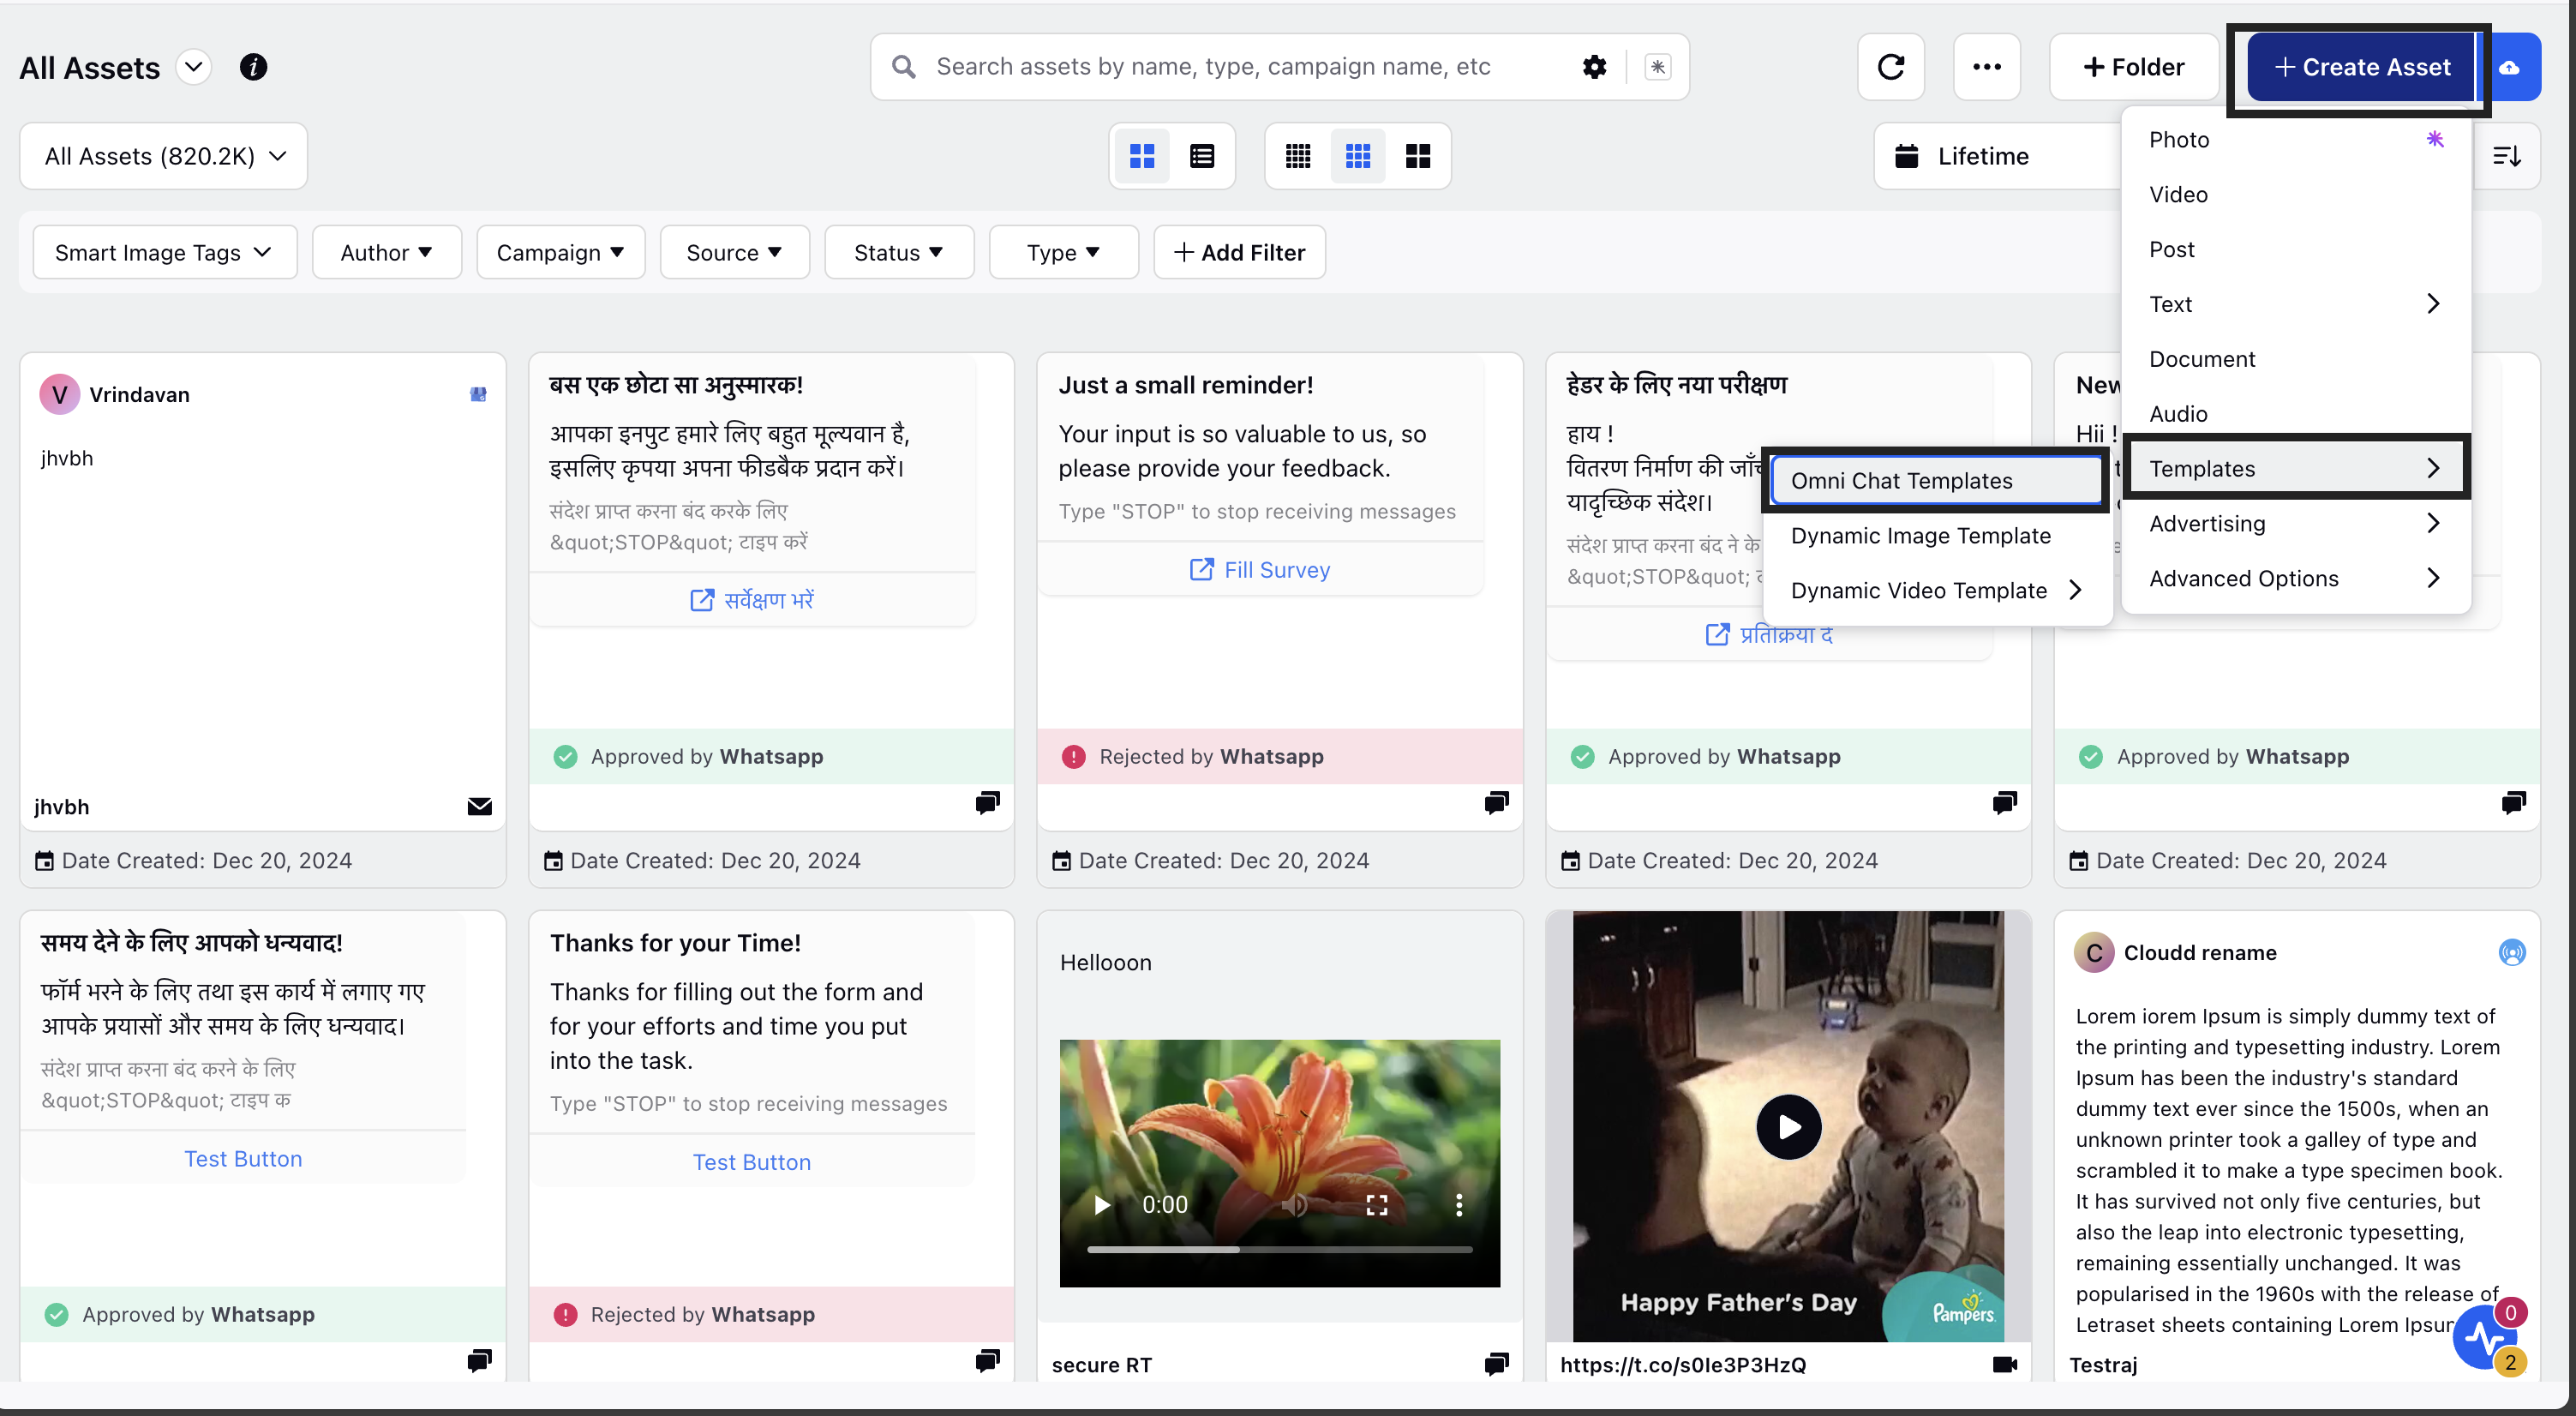
2. Click on Create Asset and select Omni Chat Templates under Templates.
3. On the Create New Asset window, fill in a name and a description for the asset in the respective fields under Basic Details.
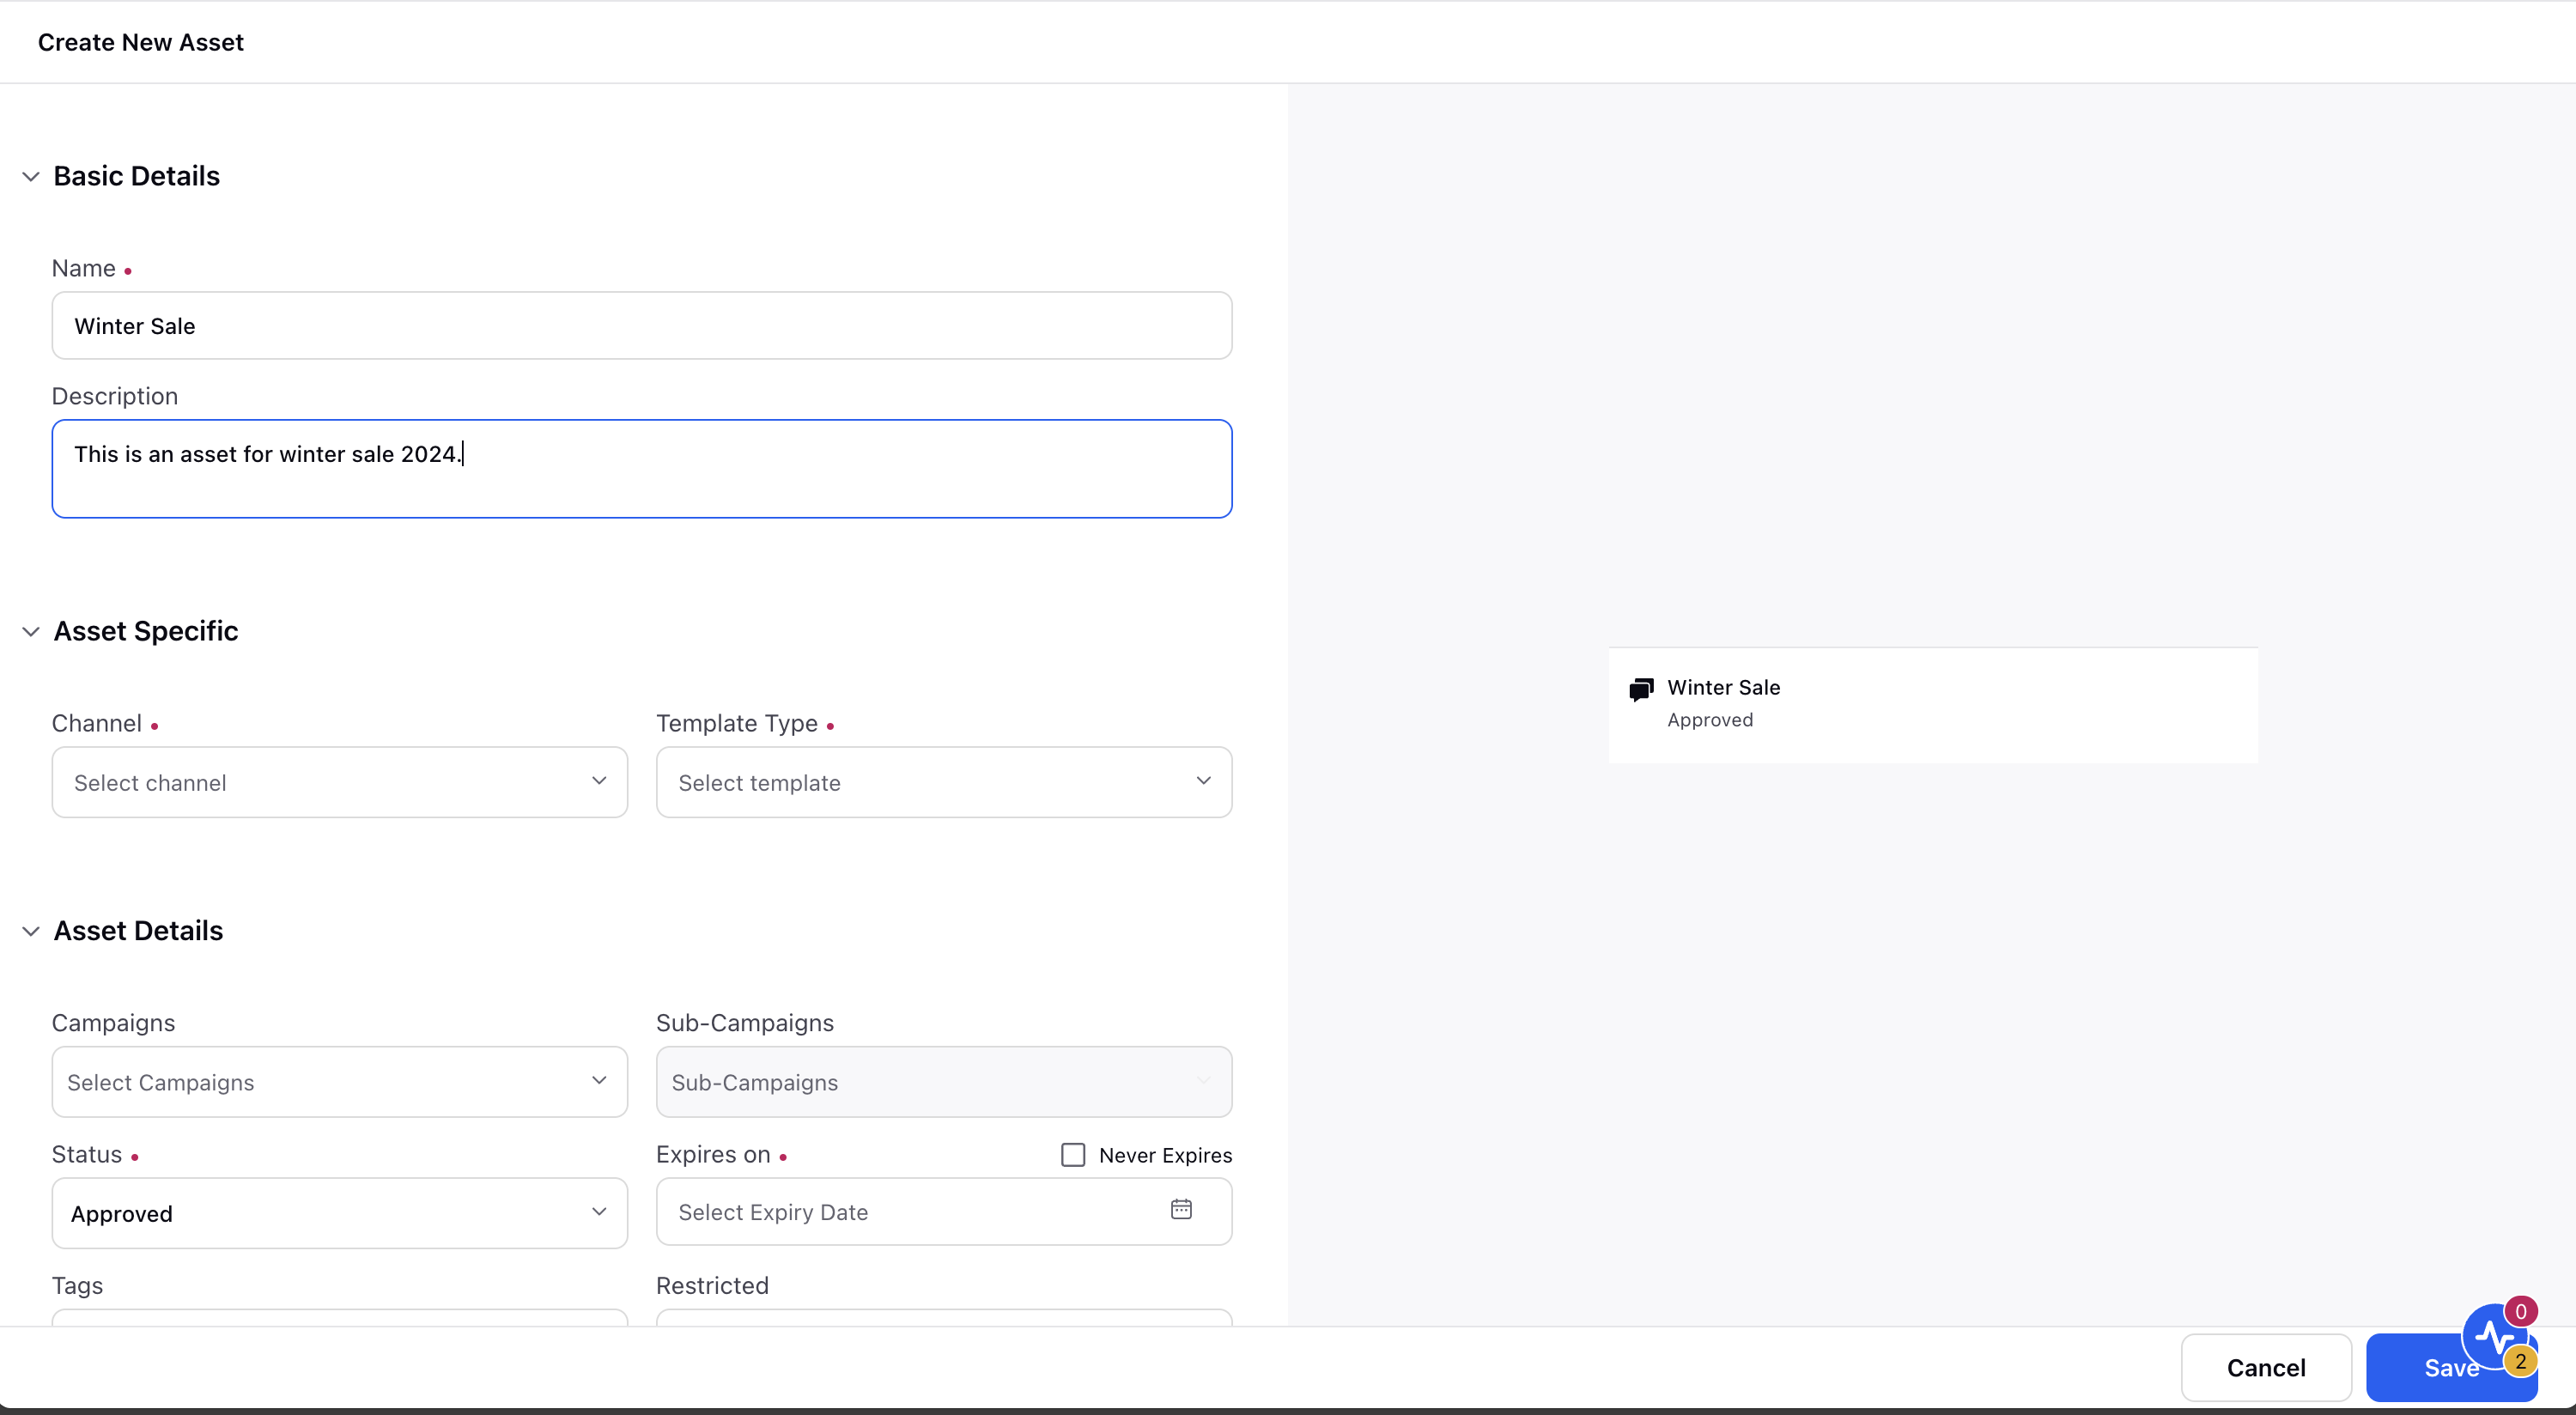
4. Under Asset Specific, select HSM from the Template Type dropdown and WhatsApp Business from the Channel dropdown.
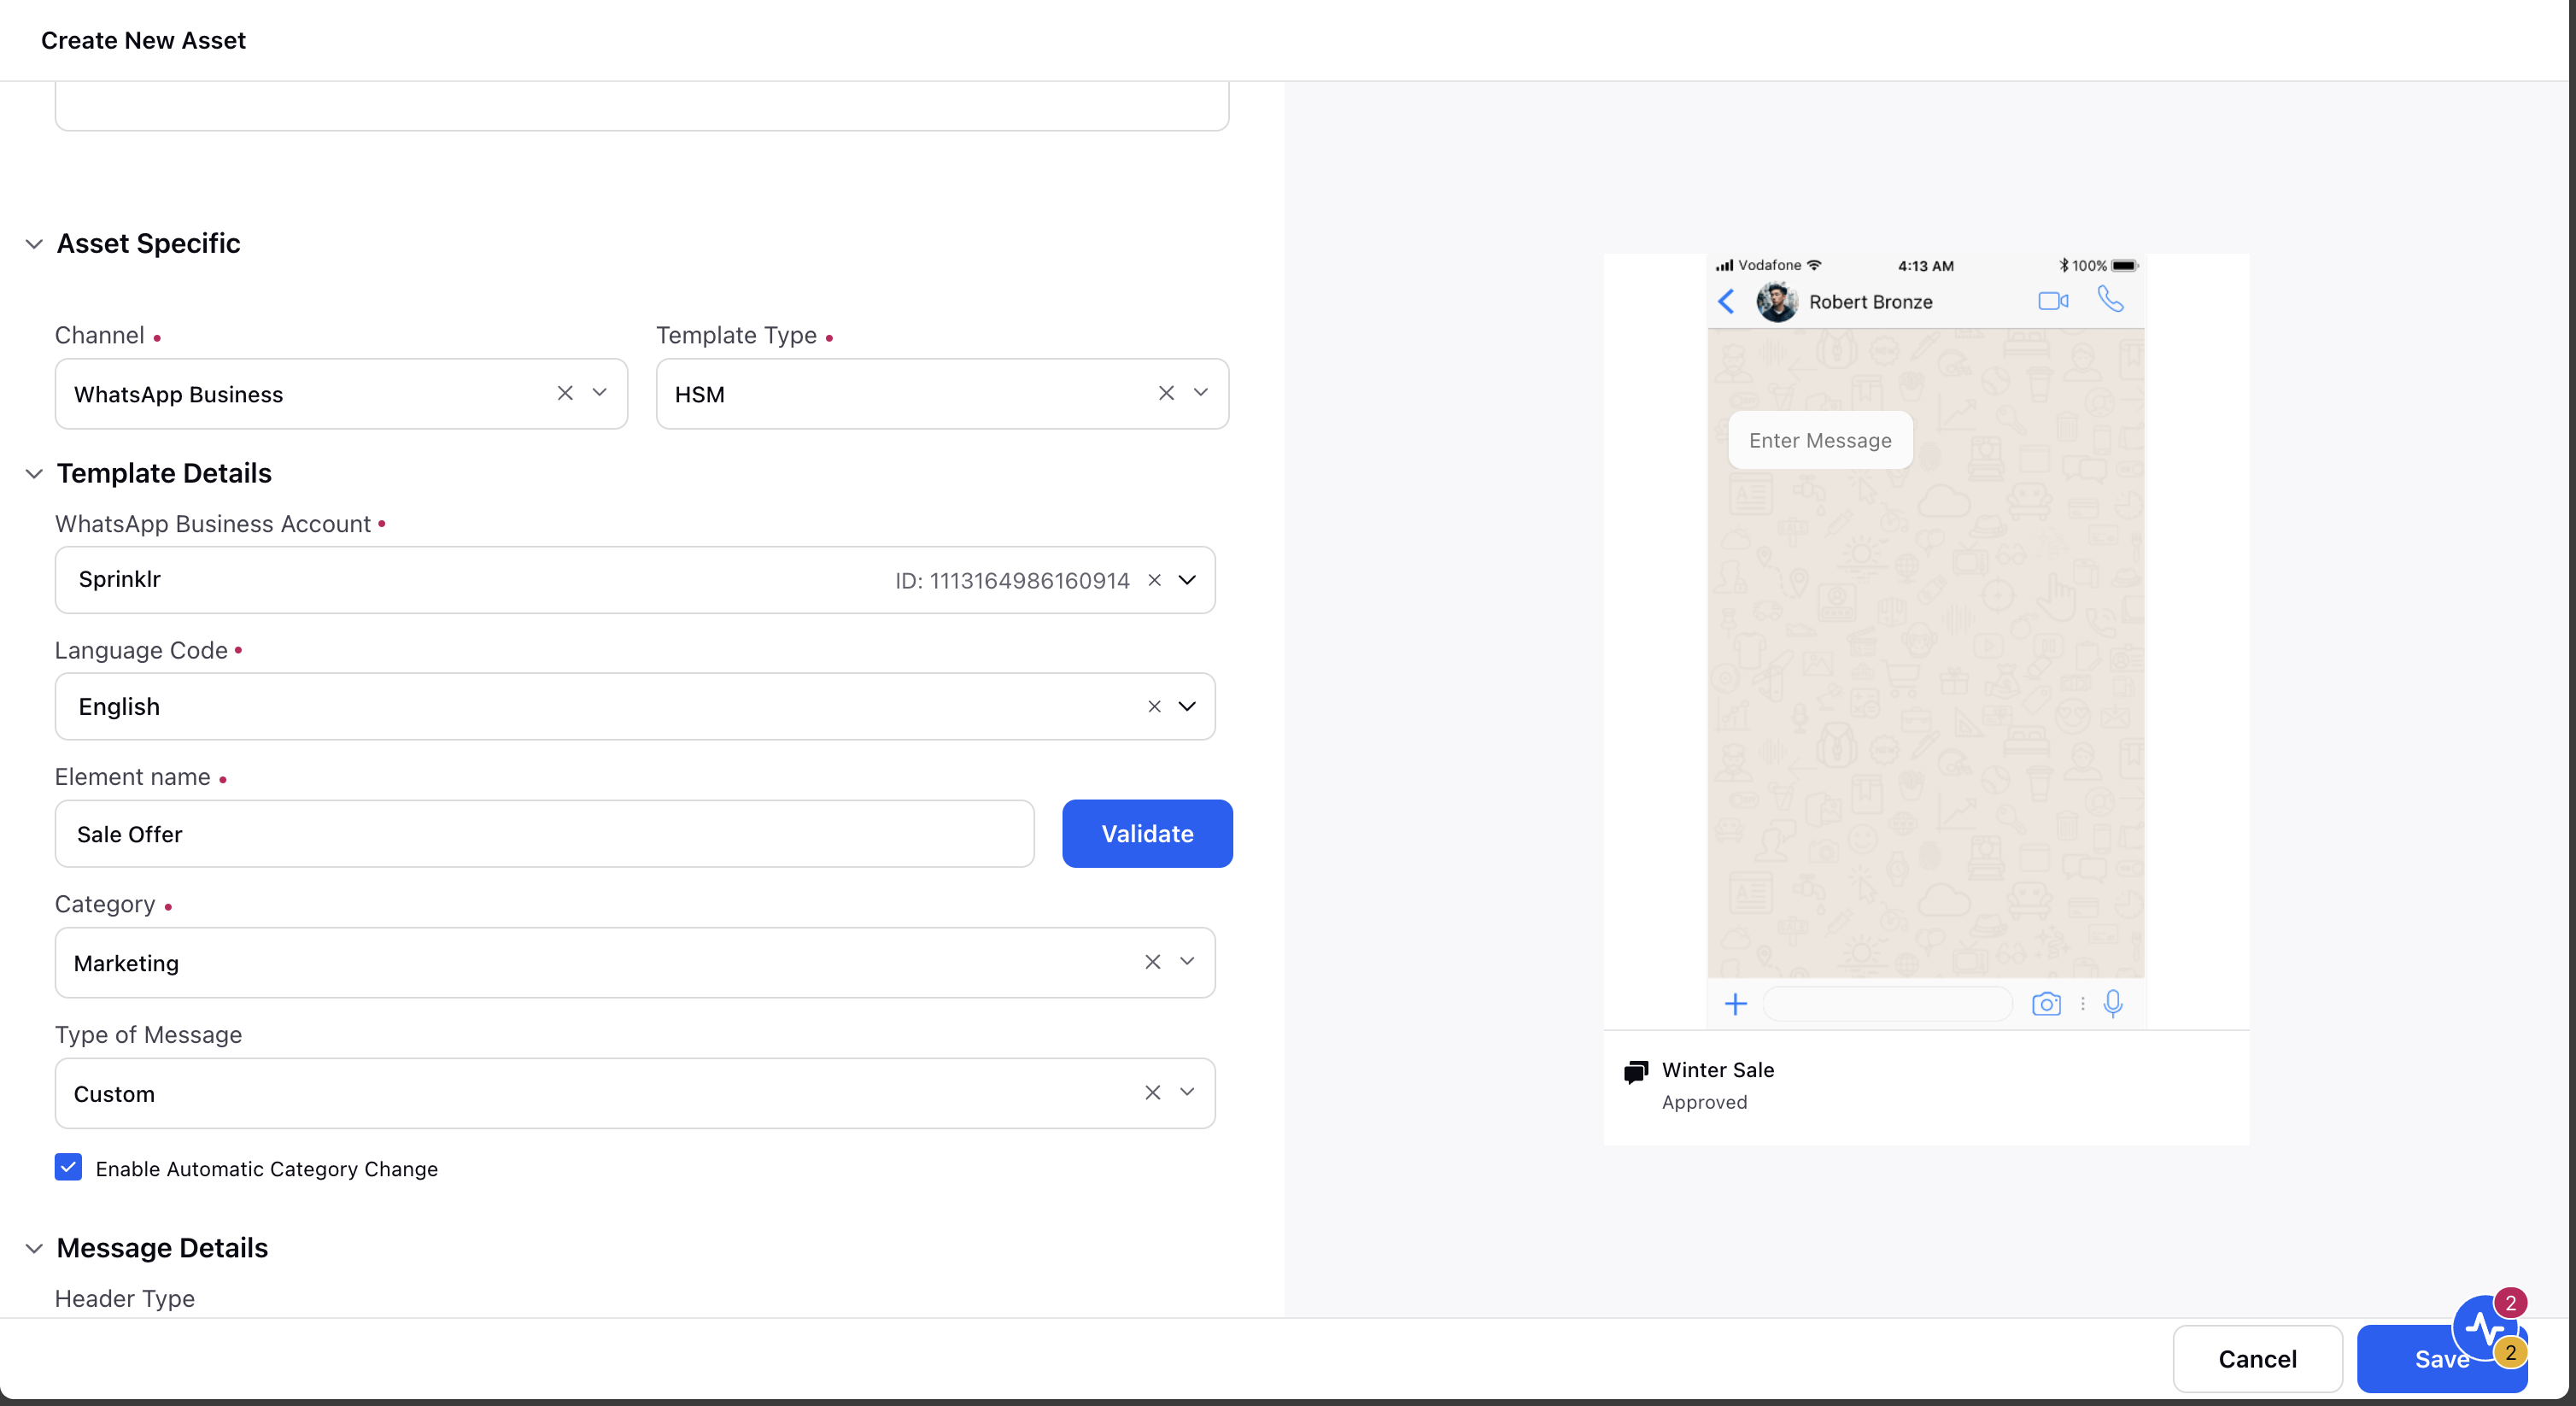
5. Under Message Details, select the Header Type as None, Text, Image.
a. None - Selecting None will provide you a template without the header
b. Text - Enter the text you want to appear as a header
c. Image - Select Add Image - You can either select the image from SAM, Media Valet, or upload it.
6. Next, enter your message content in the Message box. Formatting messages in the template is easy. You can bold, italic, strikethrough, make code blocks, and add emojis.
(You can also create dynamic content using placeholders. To create dynamic content using placeholders, use double curly brackets while creating the content. Use numbers (1, 2, 3, etc.) inside the double curly brackets, which will represent the custom fields below the Message box.)
7. From the Buttons field, select from the following options:
a. None: Select None if you do not want to add any button to the template.
b. Quick reply: Quick reply buttons allow your customers to send a simple text message. Enter a label for the button and a postback message which
is stored at Sprinklr backend whenever a user clicks on quick reply.
c. Call to action: With Call to action, you can allow your customers to call on a phone number and/or visit a URL
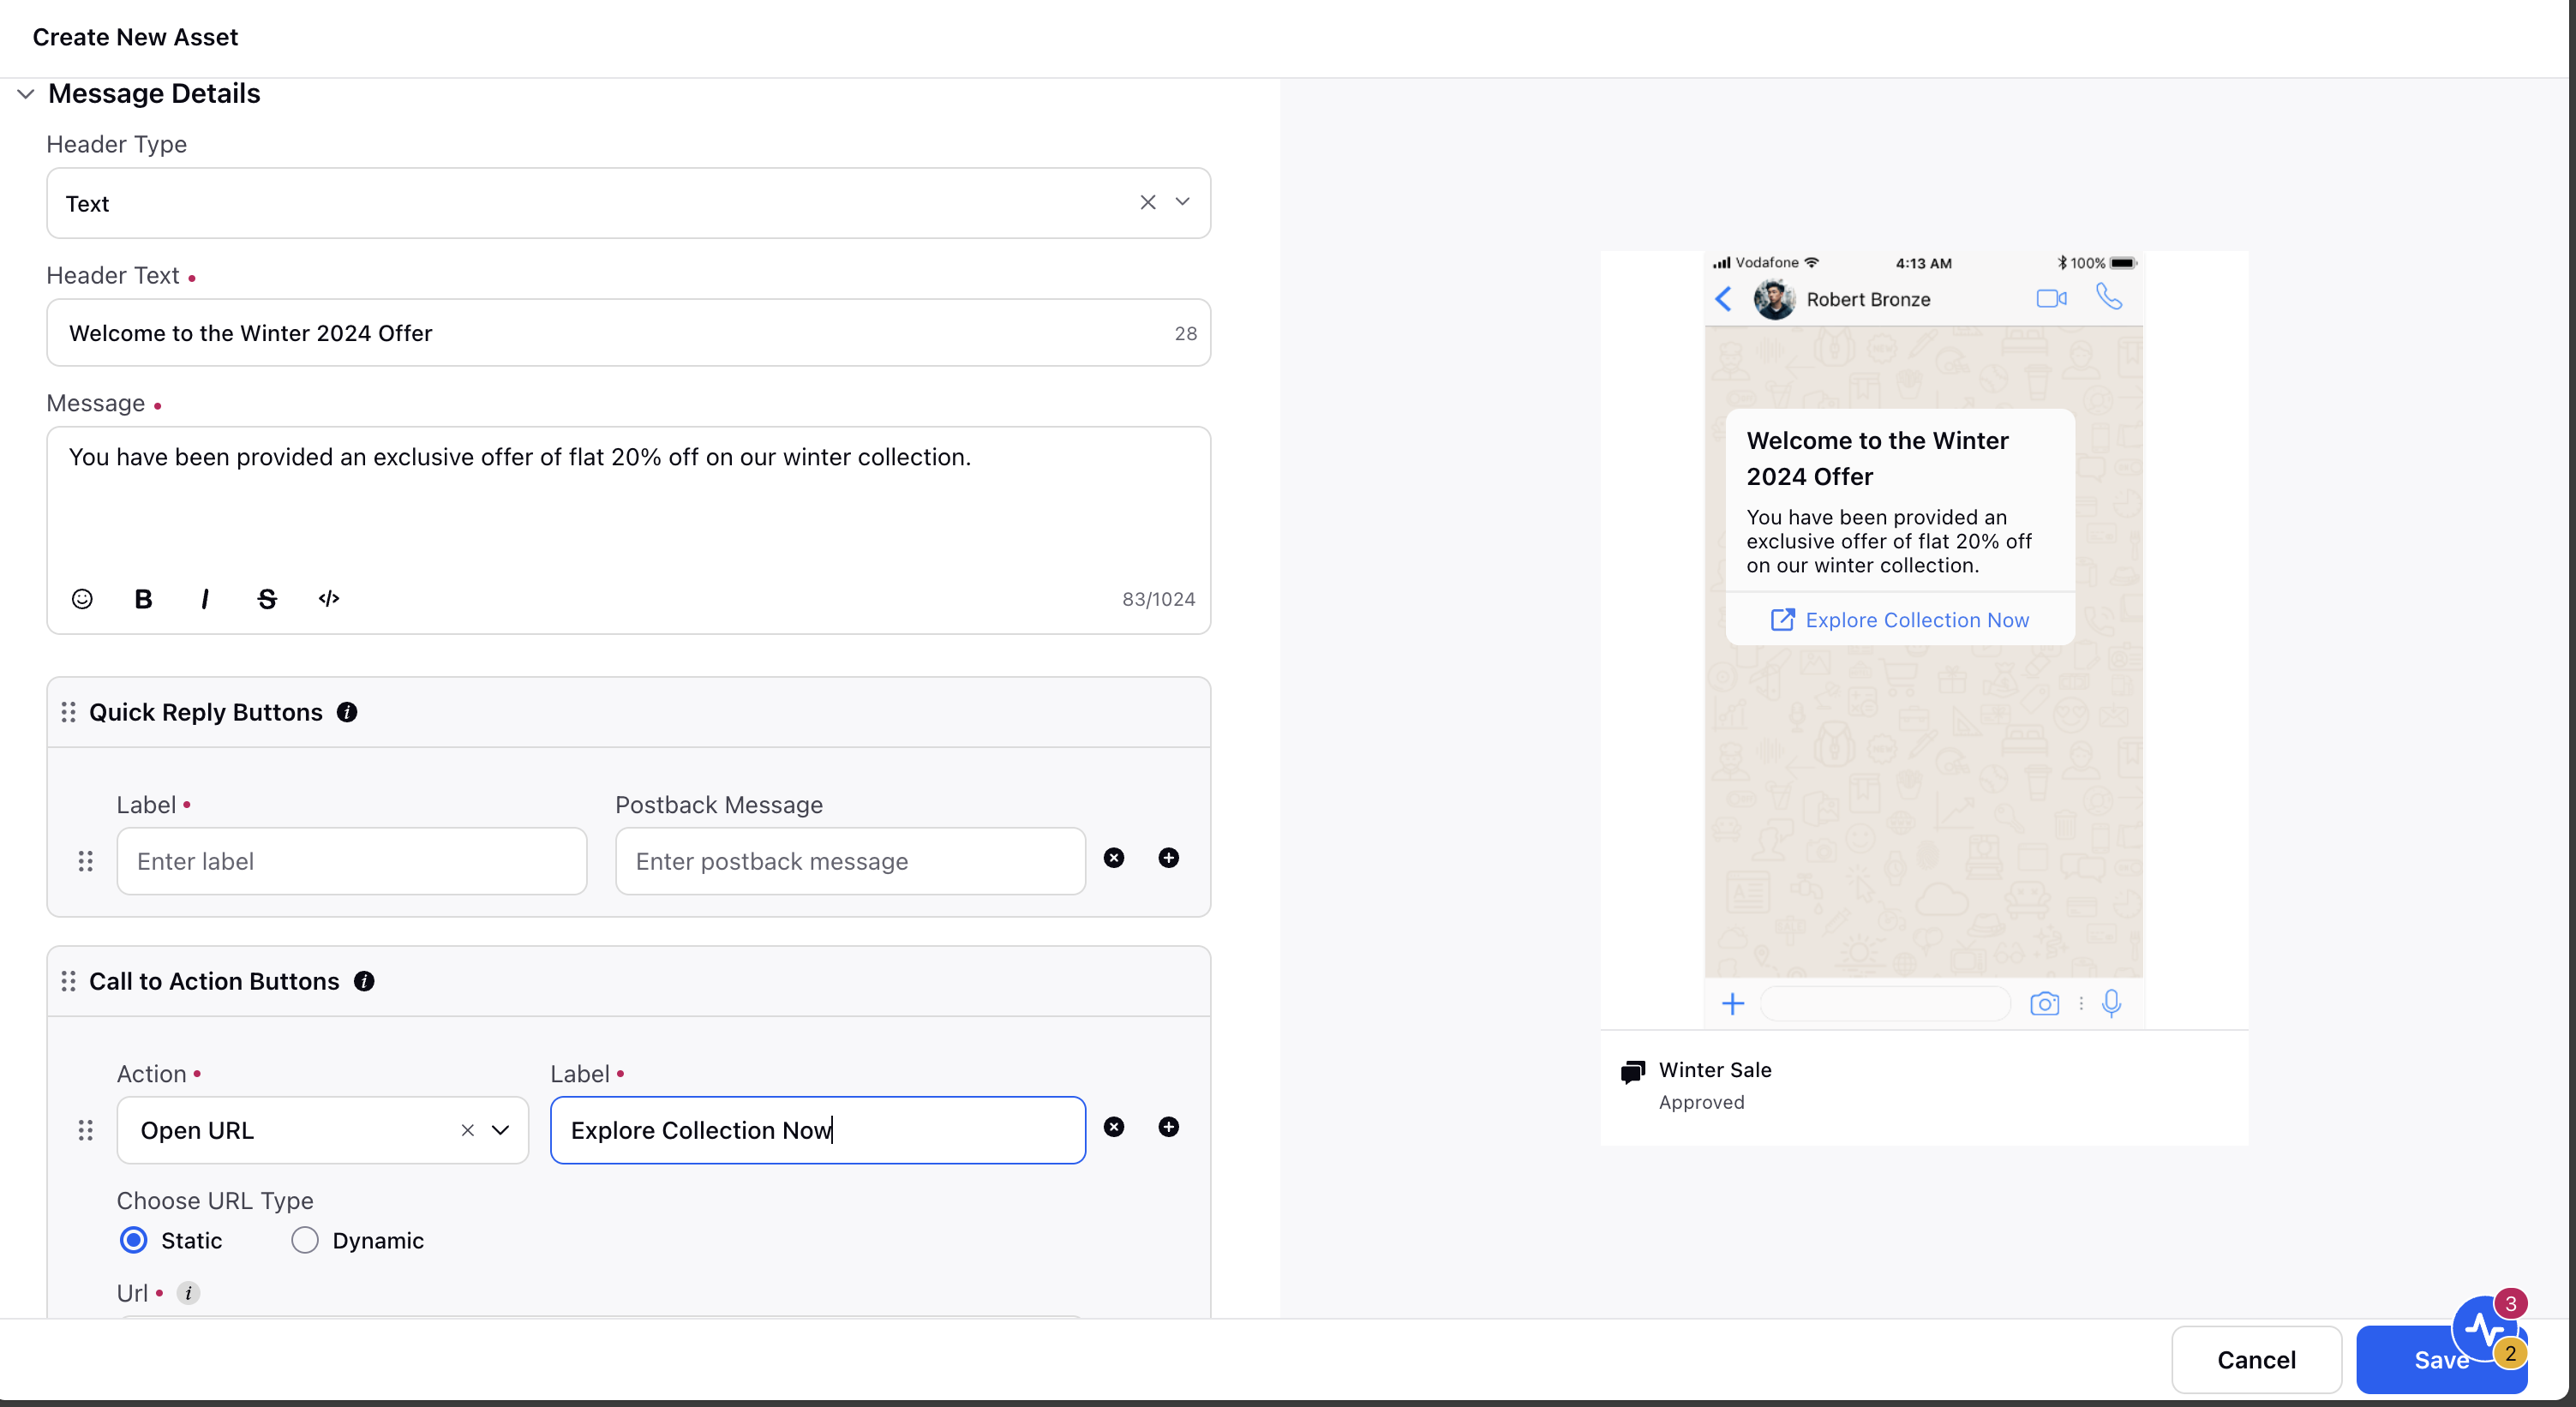
8. Click Save in the bottom right corner to create the template.
After saving, this template will automatically be added to the Facebook Business Manager for approval. You can see the current approval status of the HSM templates in the Digital Asset Manager itself. The status will be visible in the DAM preview as well as in the edit mode of that template.
Upload customer details using Audience profile module
Sprinklr enables you to import user profiles from CSV or Excel files. You can add a CSV or Excel file containing all the audience profiles to be added to specific Profile Lists via Audience Profile in Sprinklr.
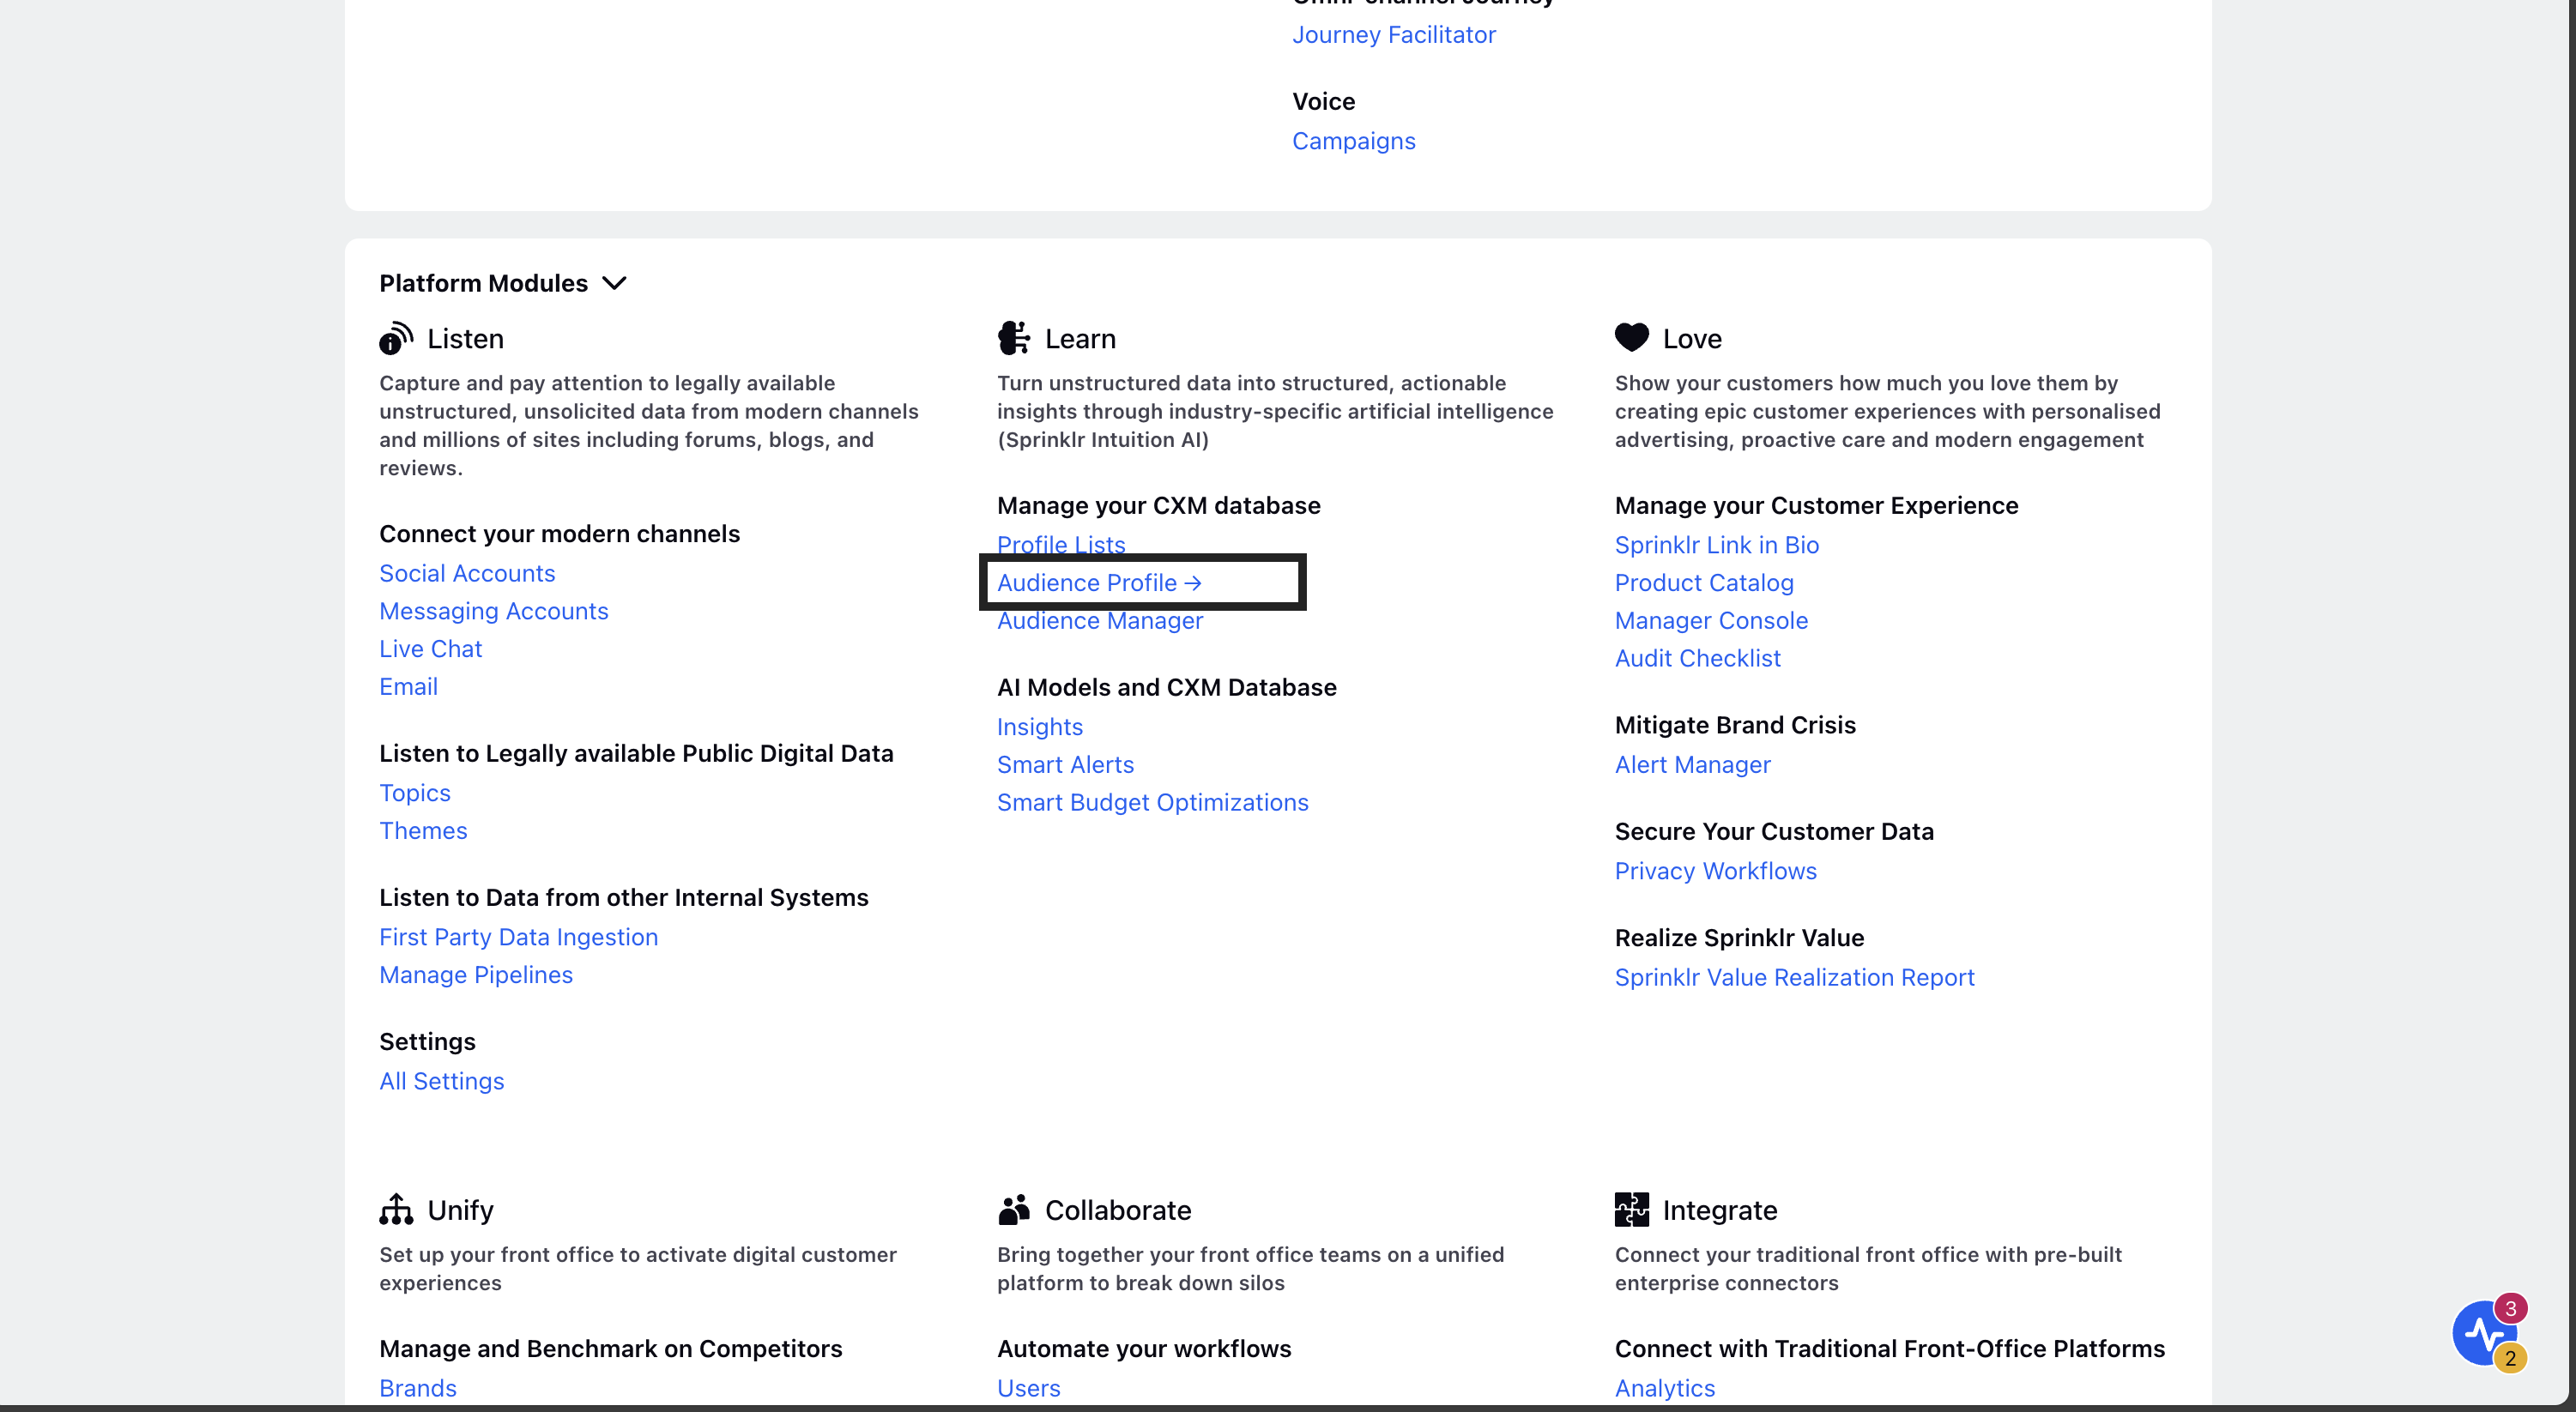
1. In a new tab, select Audience Profiles under Learn.
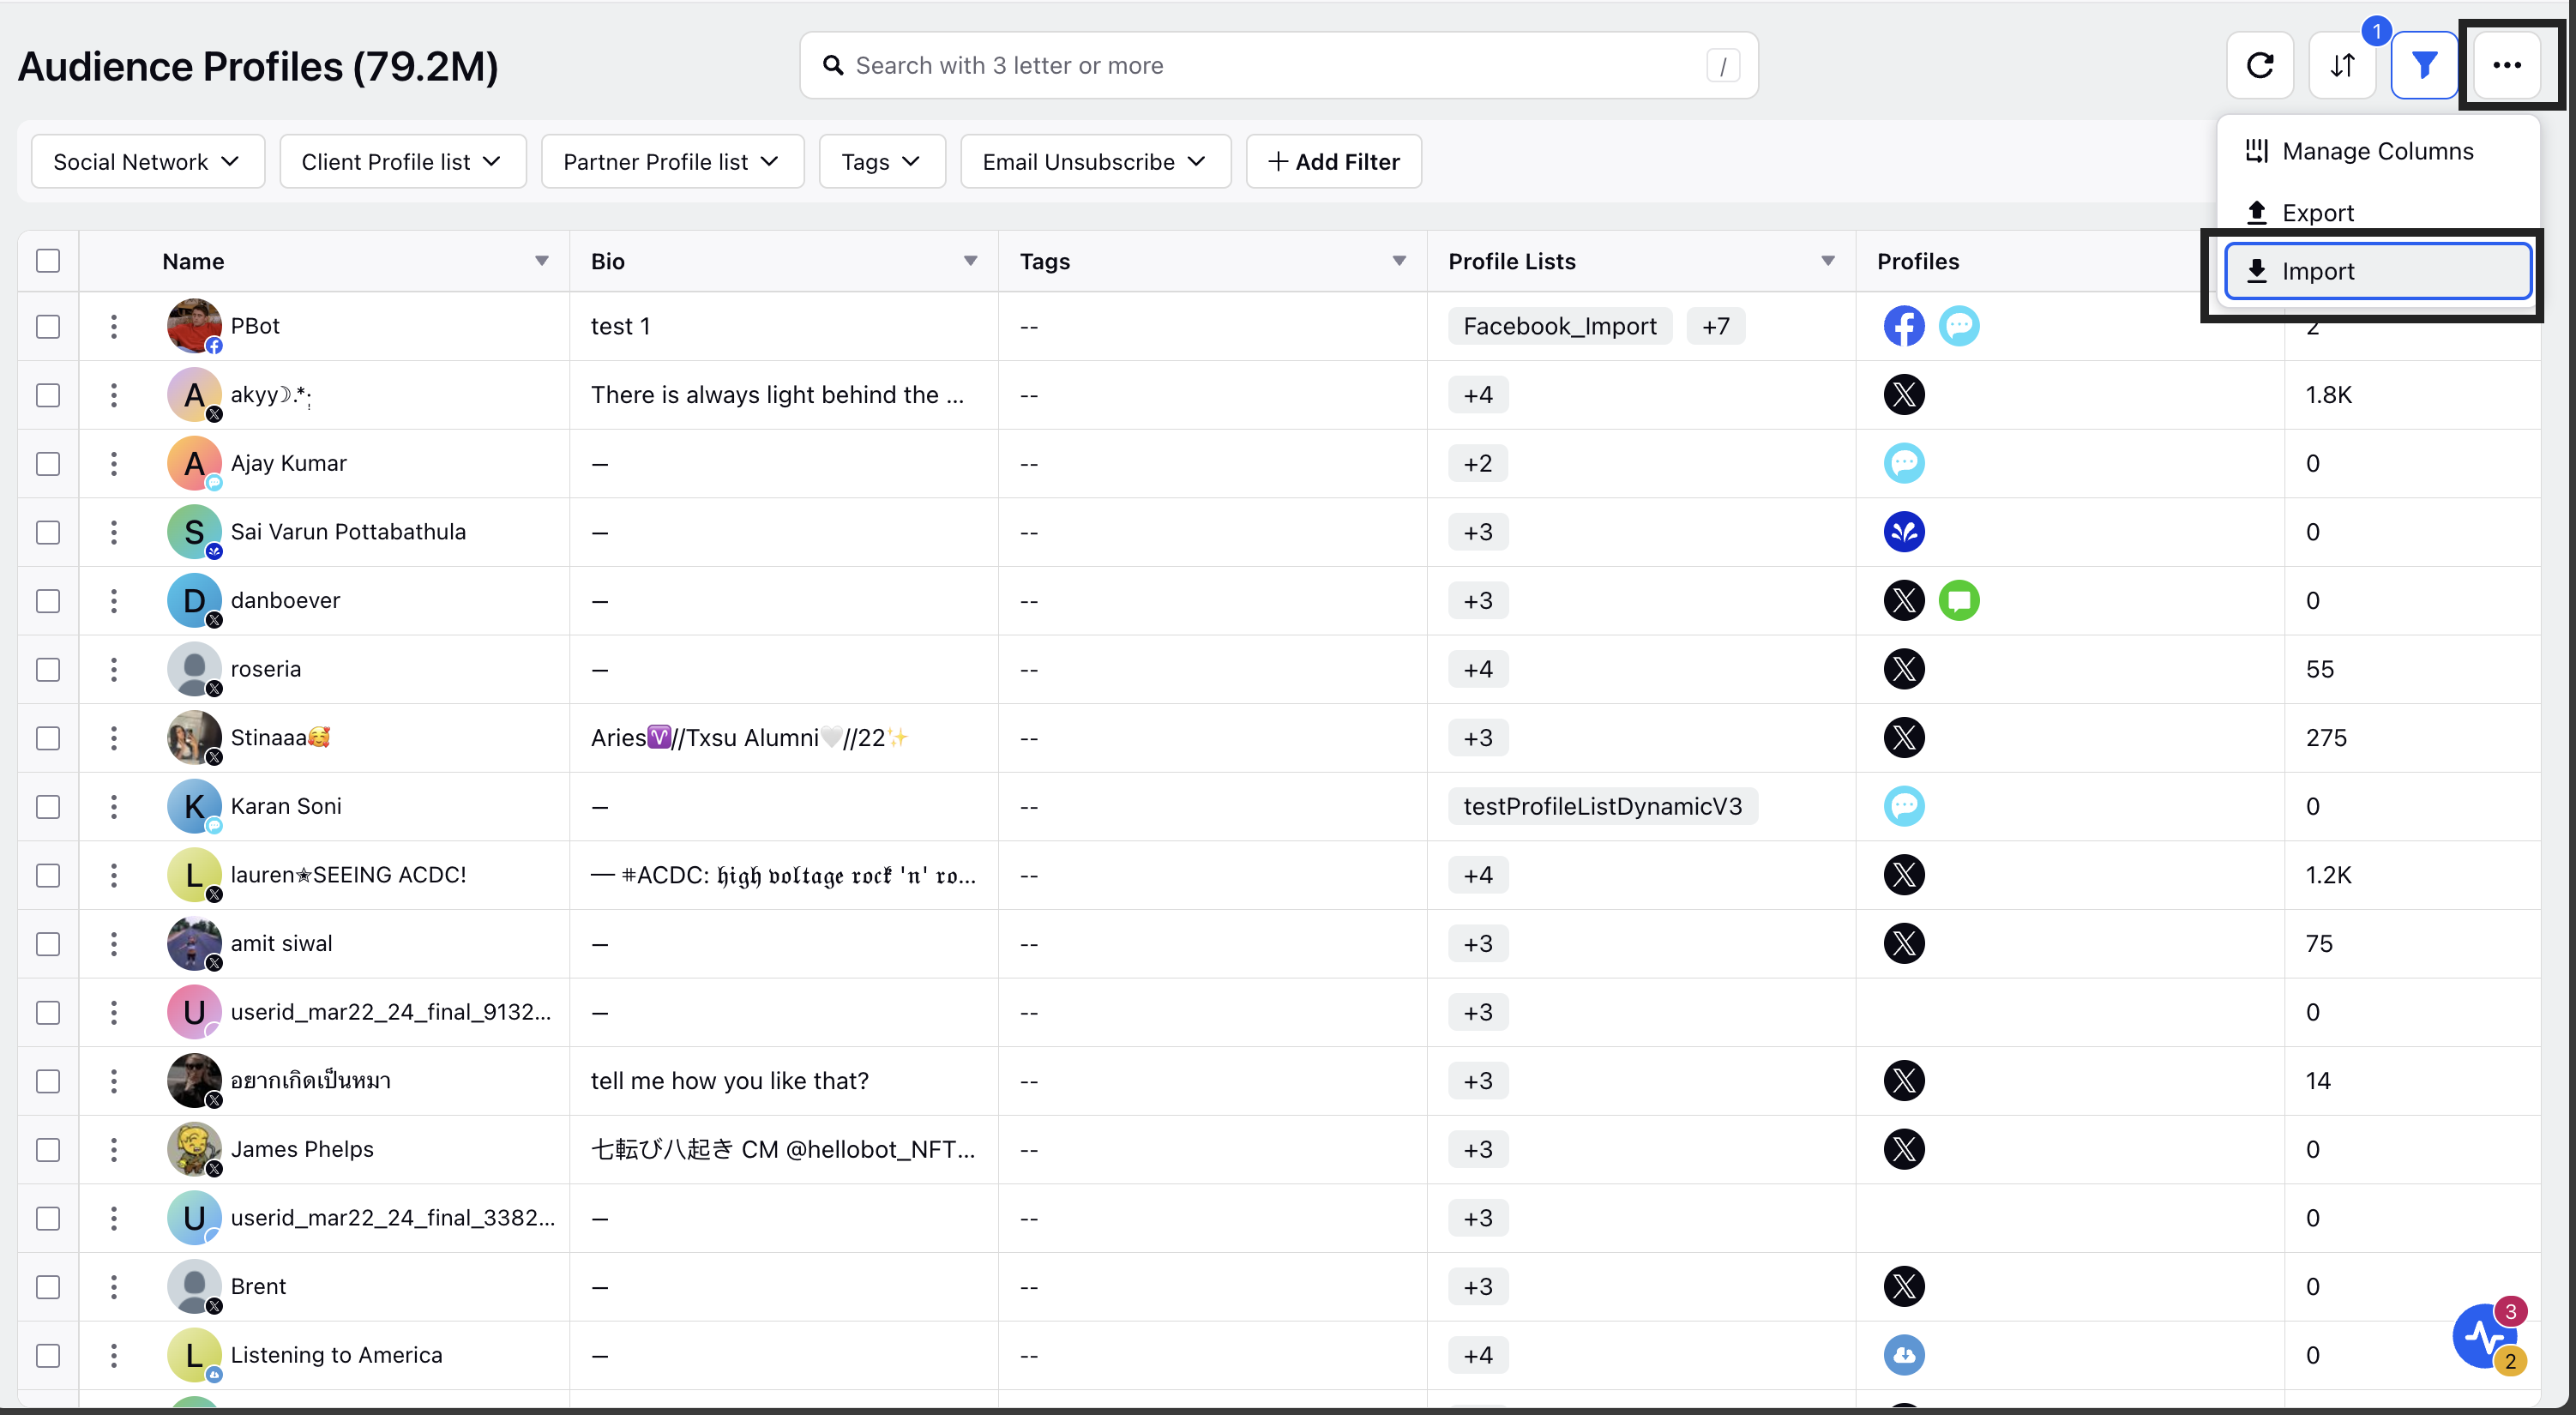
2. Click on the ellipsis (3-dots) on the top right to display and select the Import option.
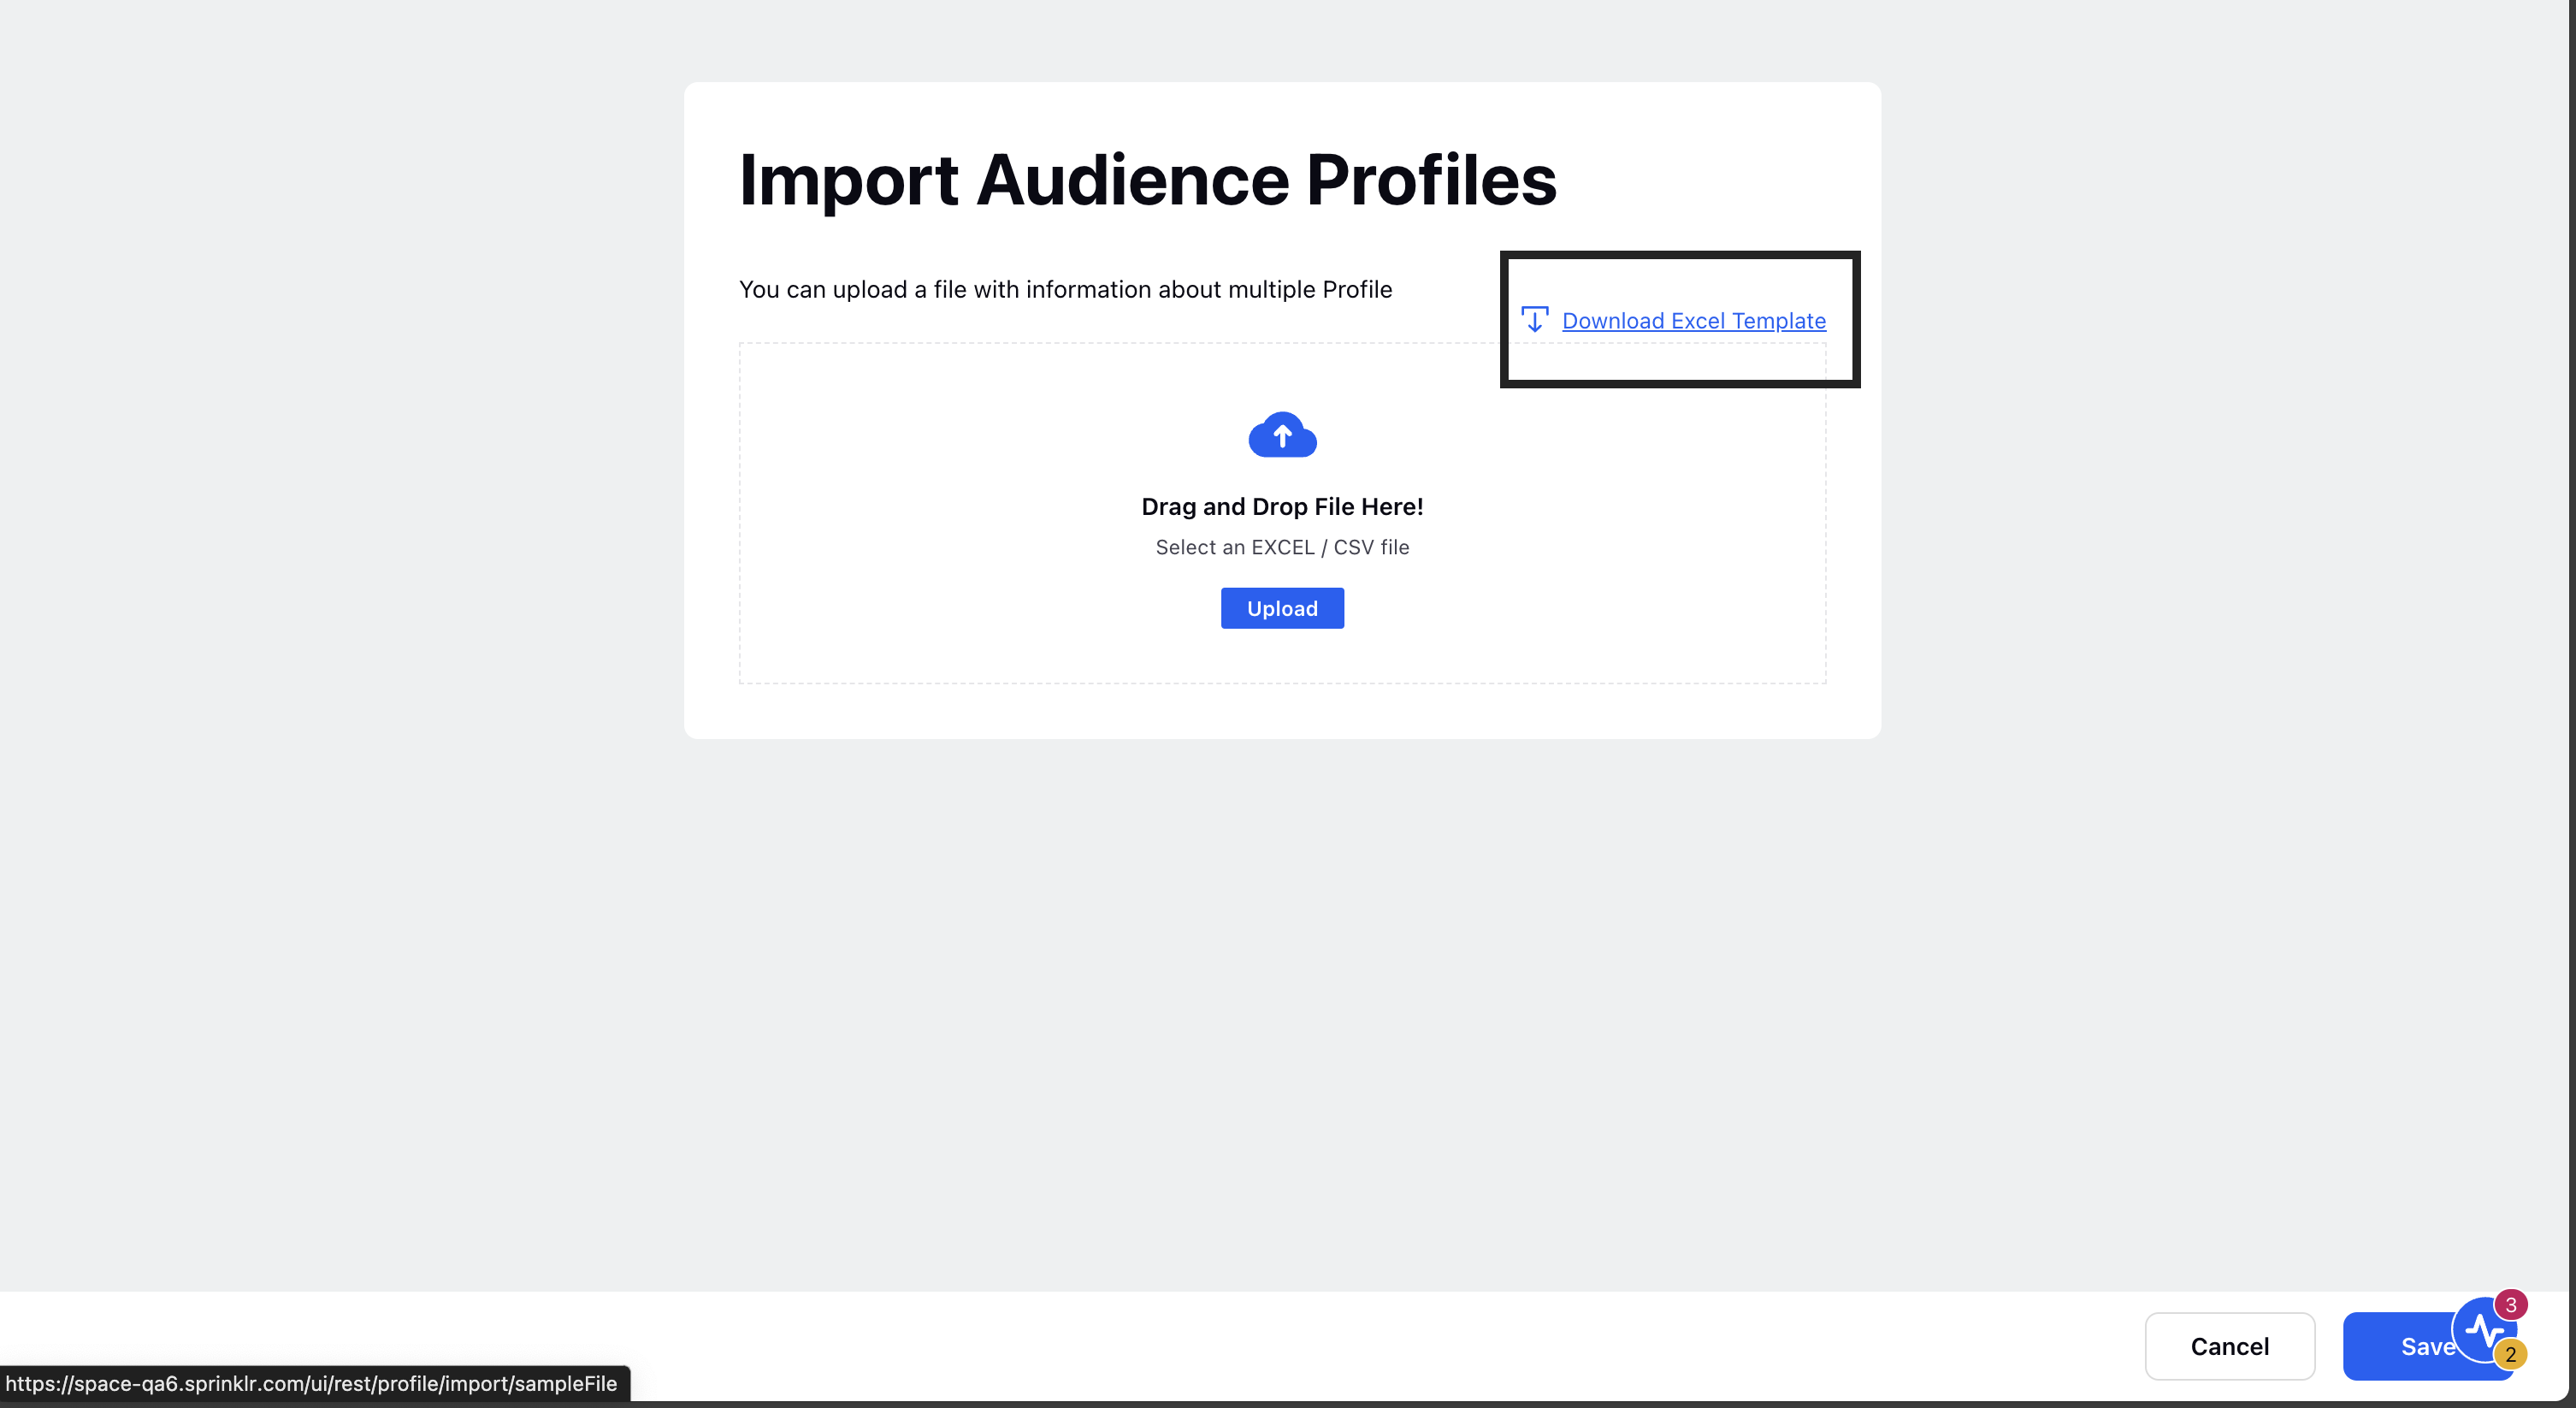
3. On the Import Audience Profiles window, click Download Excel Template.
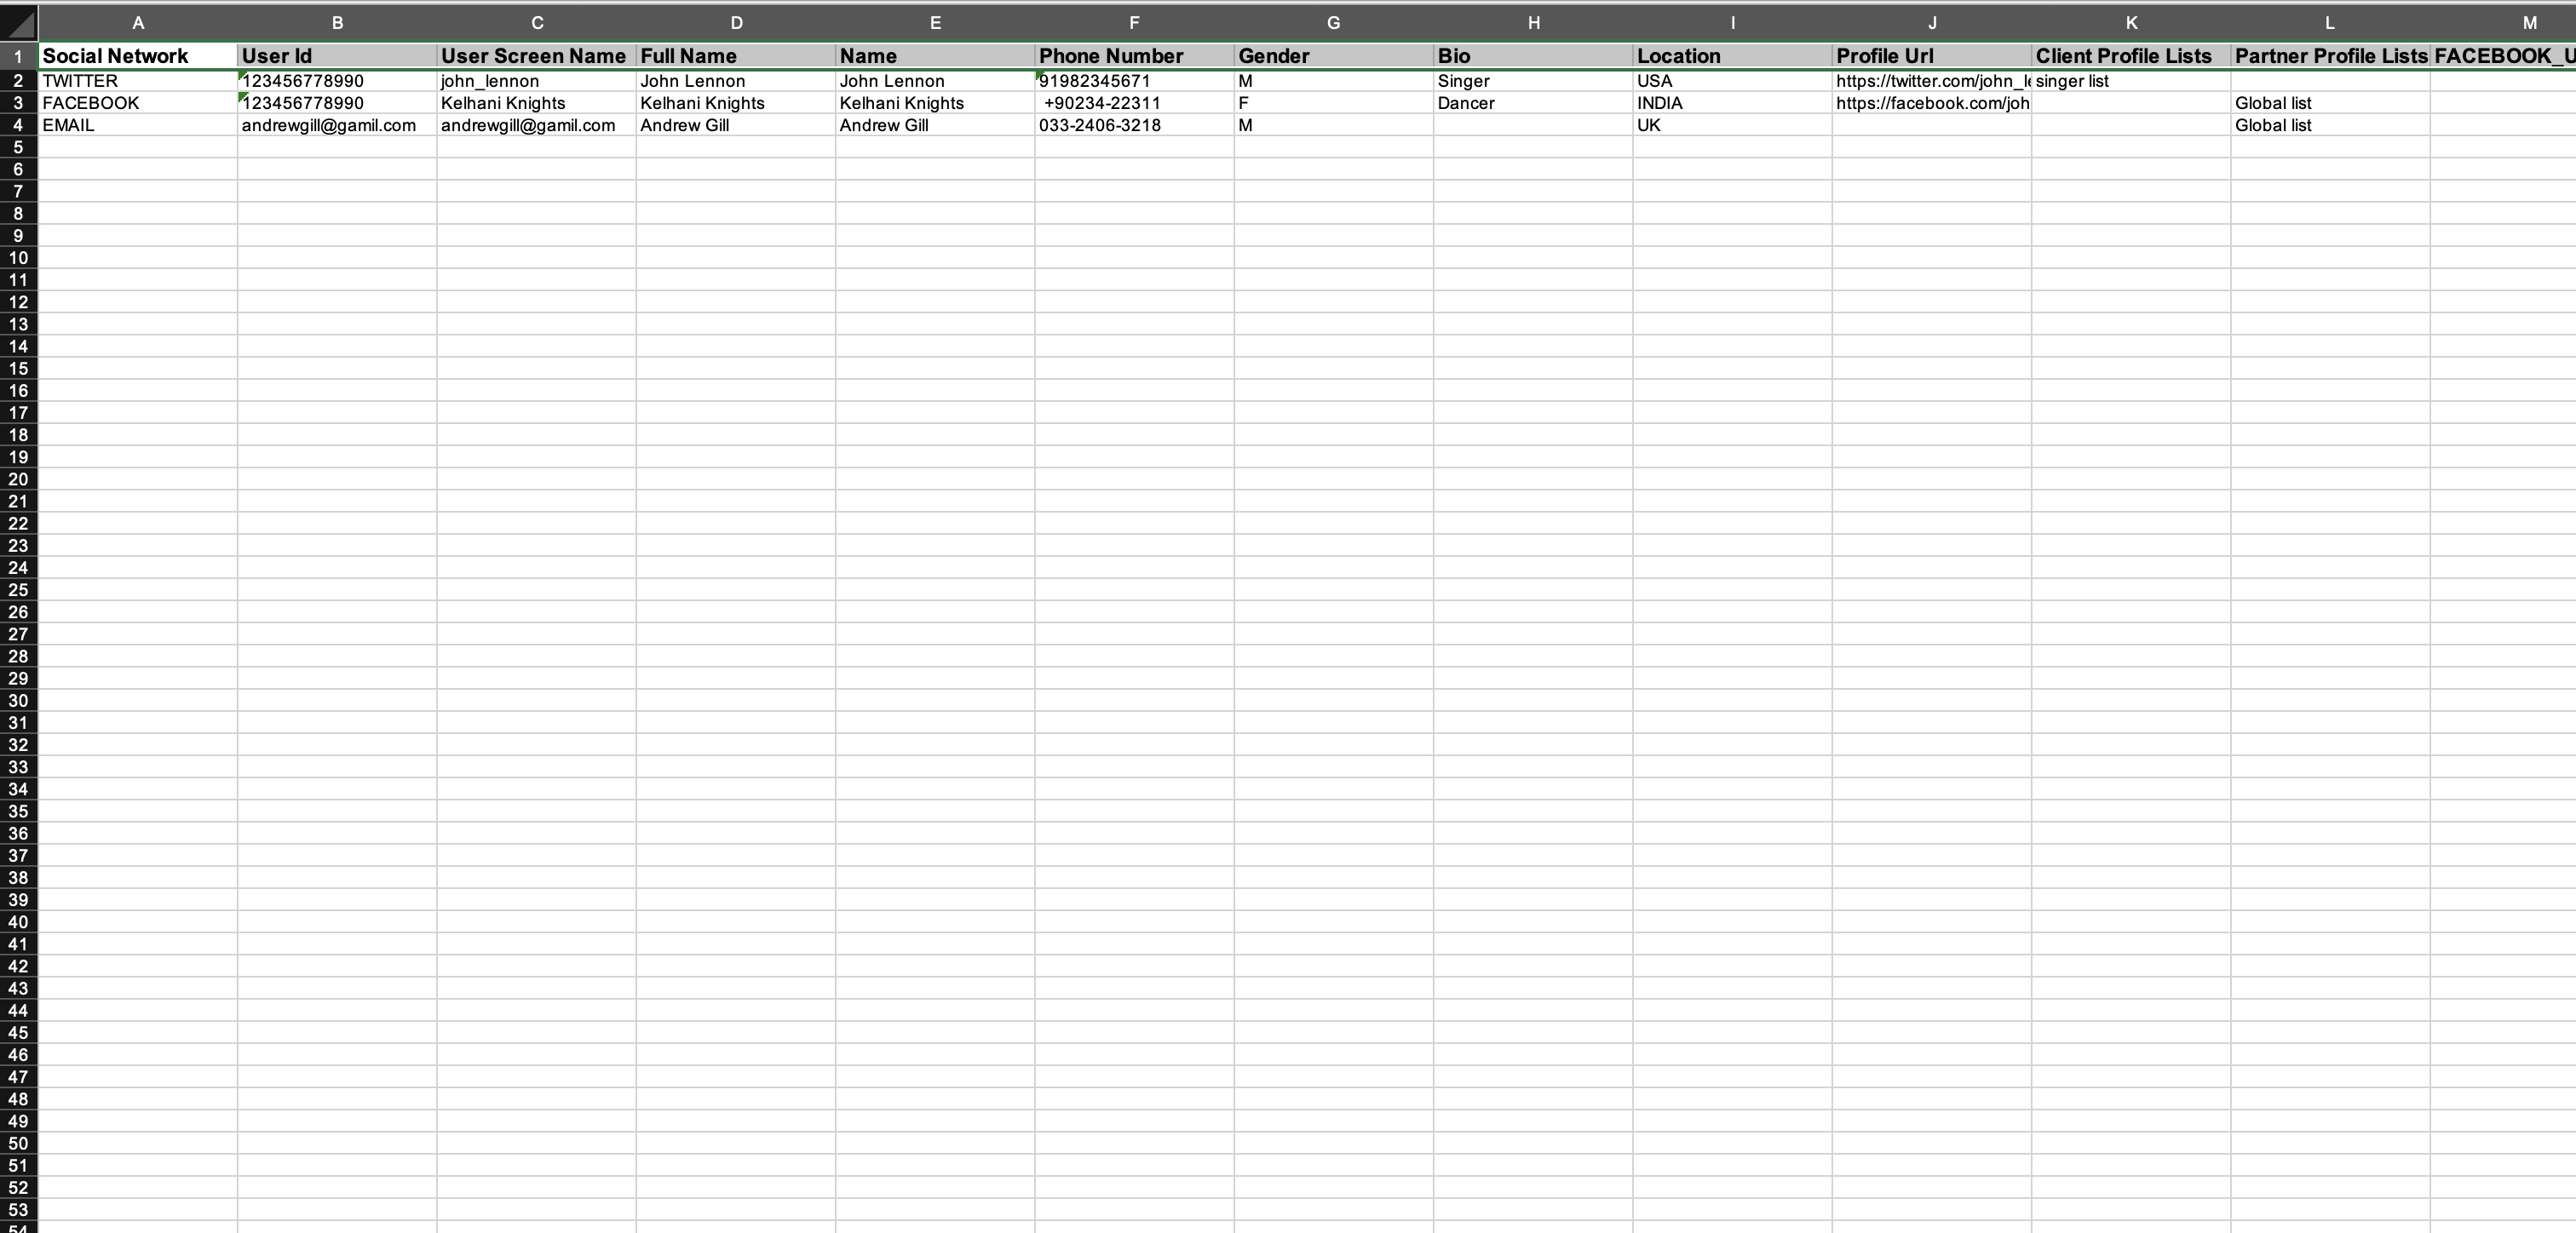
4. Fill in the desired information according to the columns shown in the template.
Mandatory fields are :
a. Social Network (WHATSAPP_BUSINESS, EMAIL, etc)
b. User Id (Contact number : 91XXXXXXXXXX)
c. Full Name
Optional fields are : Used for segmenting the audience based on a value.
a. Partner Profile Lists
b. Custom Fields (e.g CF_WA_Campaign, CF_Language)
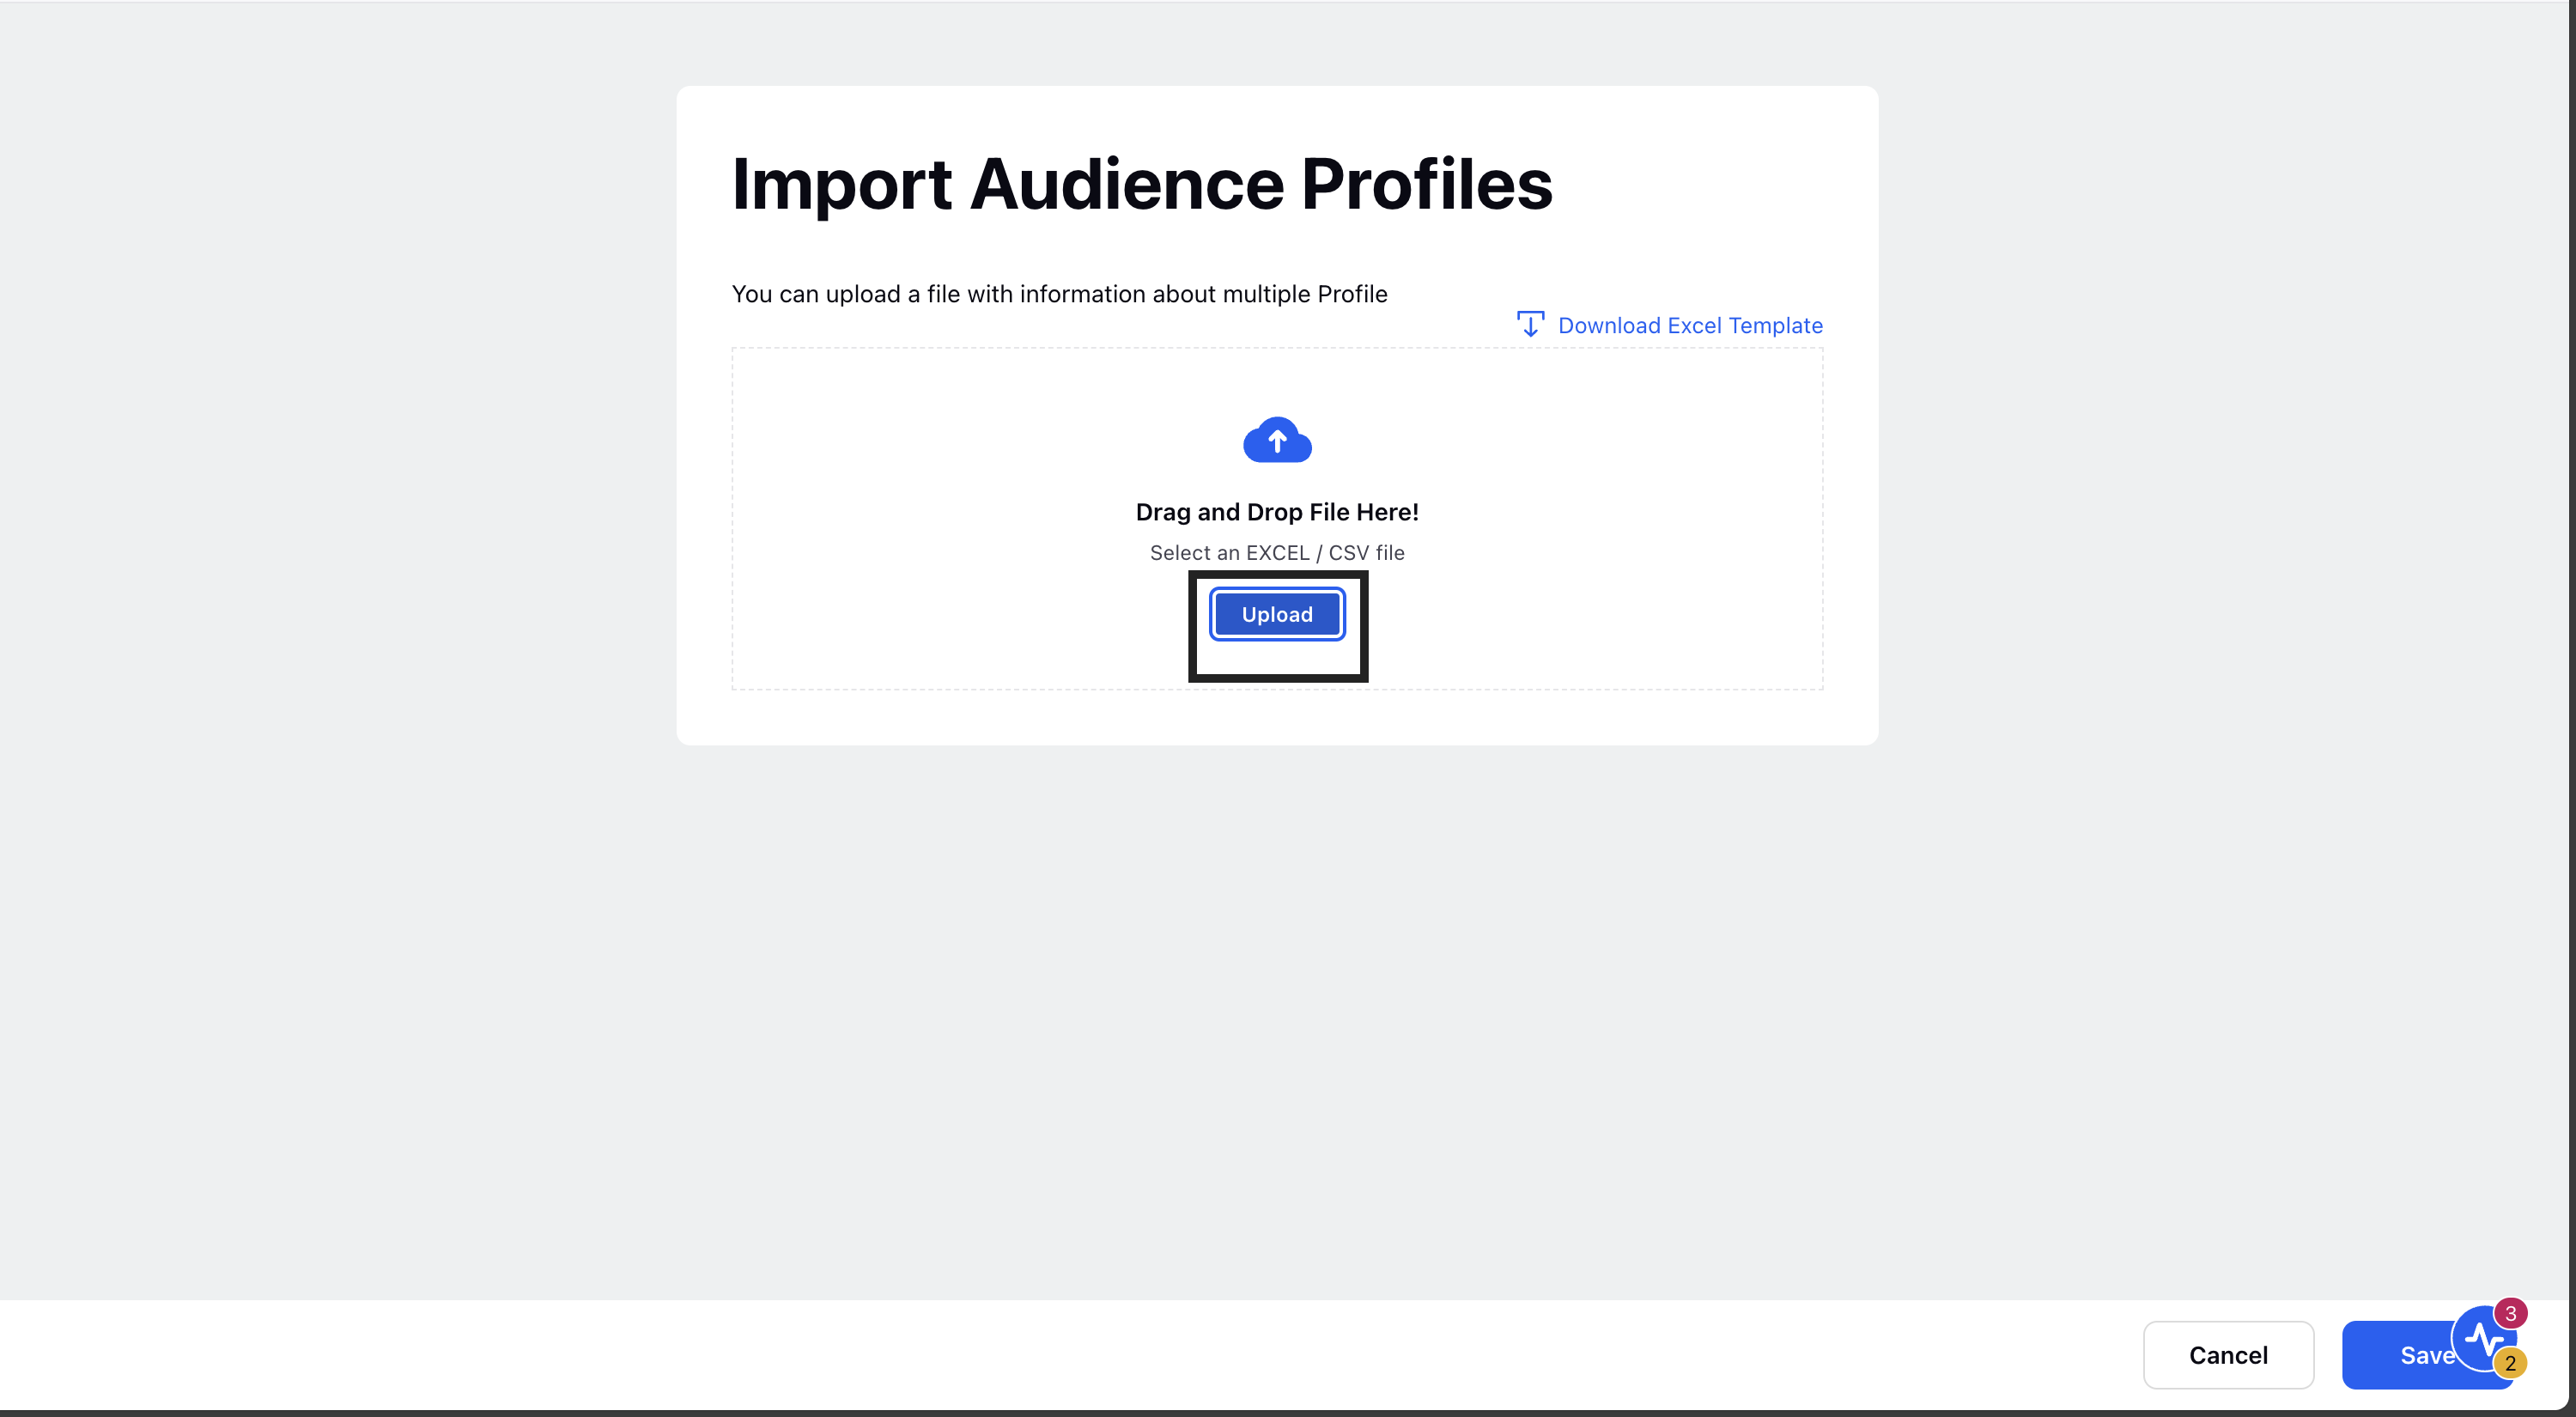
5. Click Upload and select the saved file from your computer.
6. Click Save. You will receive a notification on the notification bell once the after the file is successfully imported.
Note: In the event of any issues with the CSV or excel file, the audience profile will fail to upload or update, and you will receive a notification stating the number of failed profile uploads or updates, with a link to download the error file.
Reasons for failure include:
If you import a profile for an existing user ID with a different screen name that could be the result of incorrect spelling or something else, your import will fail stating the reason for failure.
The custom fields values should match the Custom Fields present in your platform.
Create cohort of target customers using Audience segment module
With Sprinklr's Segment Manager you can narrow your targeting to the desired audience groups by creating segments of your imported audience data based on one or more desired attributes (Partner Profile Lists, Custom fields etc)
1. Click the New Tab icon. Under Governance Console, click Segment Manager within Learn.
2. In the top right corner of the Segment Manager window, click Create Segment.
3. In the Create New Segment window, click on the Select Attribute dropdown under Target section.
4. Under the Target section, select the attribute using which you want to filter in data. Enter the desired value from the list of available options for the filter attribute you selected.
5. Click Save to confirm your Segment.
Create marketing journey using Journey facilitator module
1. Click the New Tab icon Under the Sprinklr Service tab, click Journey Facilitator within Voice.
2. Click Create Journey in the top right corner
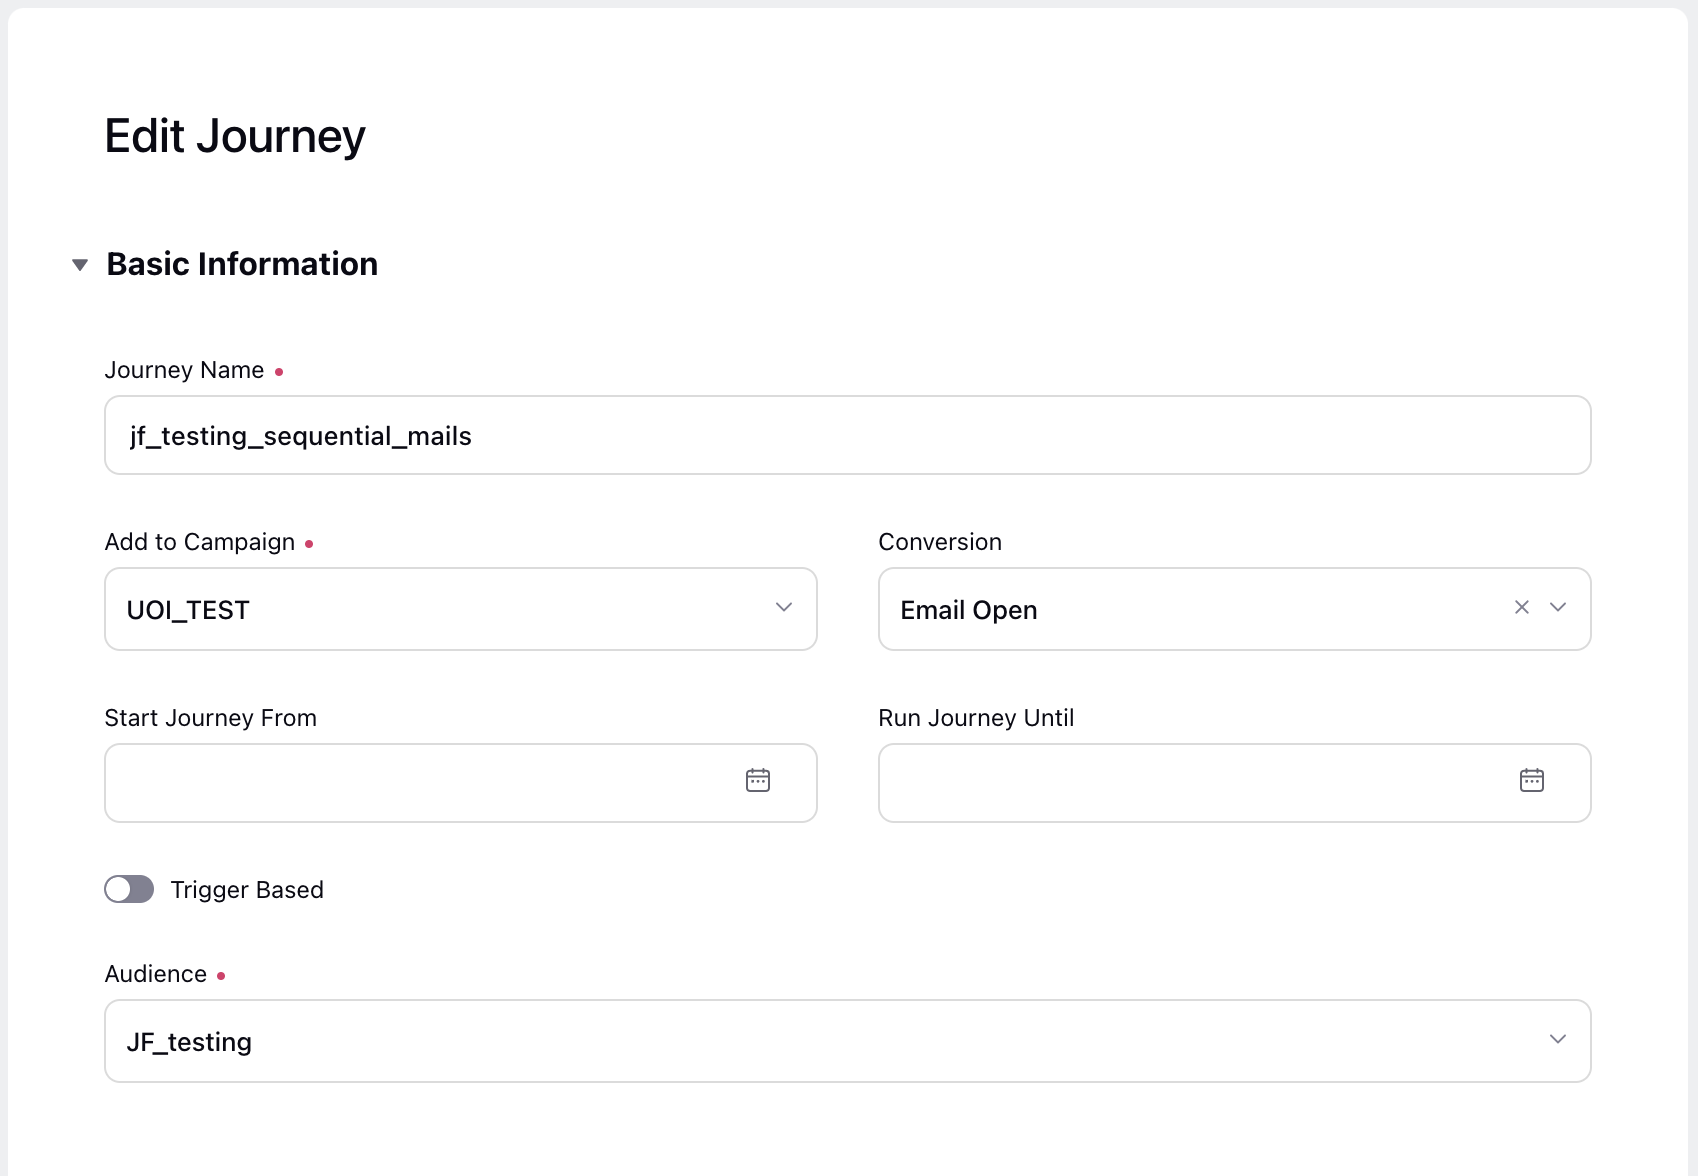
3. In the Create Journey window, write a Journey Name in the given field under Basic Information.
4. Under Add to Campaign, select Campaign from the dropdown.
5. Select Journey Audience from the Select Audience (custom audience) dropdown.
6. On the Journey Builder window, click the Addition icon to add Actions and Conditions to your journey flow.
7. Click on ‘Send Message’ after clicking on the Addition icon.
8. Select the asset from the ‘Add from DAM’ section.
9. Click on Addition icon and select the End Event button.
10. Click Save as draft (does not make a journey live) or Save & Deploy (make a journey live)
Basic operations on a journey
1. How to stop a Marketing Journey
On the Journey Facilitator window, hover over the Options icon of an Active (status) journey and select Stop Journey.
2. How To delete a Marketing Journey
On the Journey Facilitator window, hover over the Options icon of a journey (irrespective of its status) and select Delete.
3. How to deploy a Marketing Journey immediately
On the Journey Facilitator window, hover over the Options icon of a journey and select Deploy.
4. How to deploy a Marketing Journey for a future time
On the Journey Facilitator window, hover over the Options icon of a journey, then click Edit Settings.
The settings will open up. Under setting, you can specify the timestamp when you want the journey to star by choosing the Start Journey From
