Create an Inline Editable Table widget in Listening for quick actionability.
Sprinklr provides you with the Inline Editable Table widget in Social Listening that allows you to make upfront, inline edits to widgets and filter, sort, search, and take bulk actions on the go, imparting quick actionability. A revamped tabular view helps you visualize your messages, enabling you to take quick inline actions like changing the sentiment, adding tags, etc. You can also filter and sort the conversations from the widget without going into edit mode.
To create an Inline Editable Table widget
To plot the Inline Editable Table widget, you can use any existing editable dashboard or create a new one. Refer to this article to learn how to set up a Custom Dashboard.
Once you have the dashboard where you want to add the visualization widget, follow the steps below –
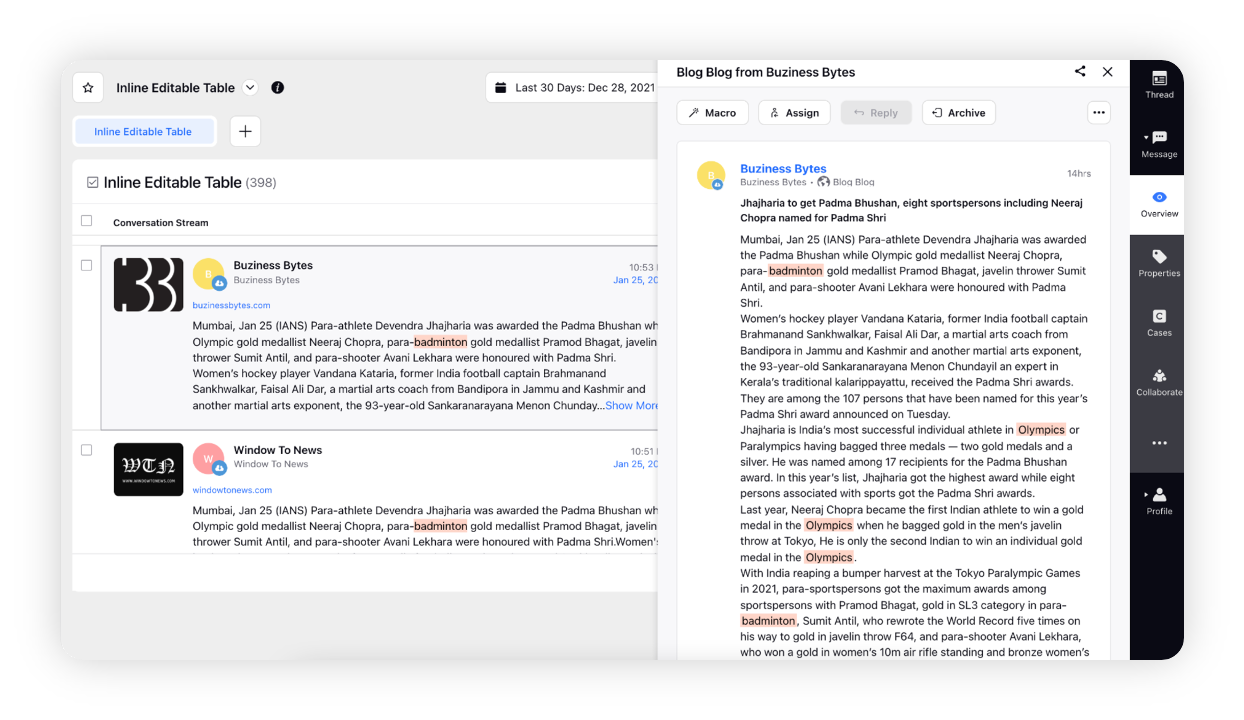
On the custom dashboard, click Add Widget in the top right corner.
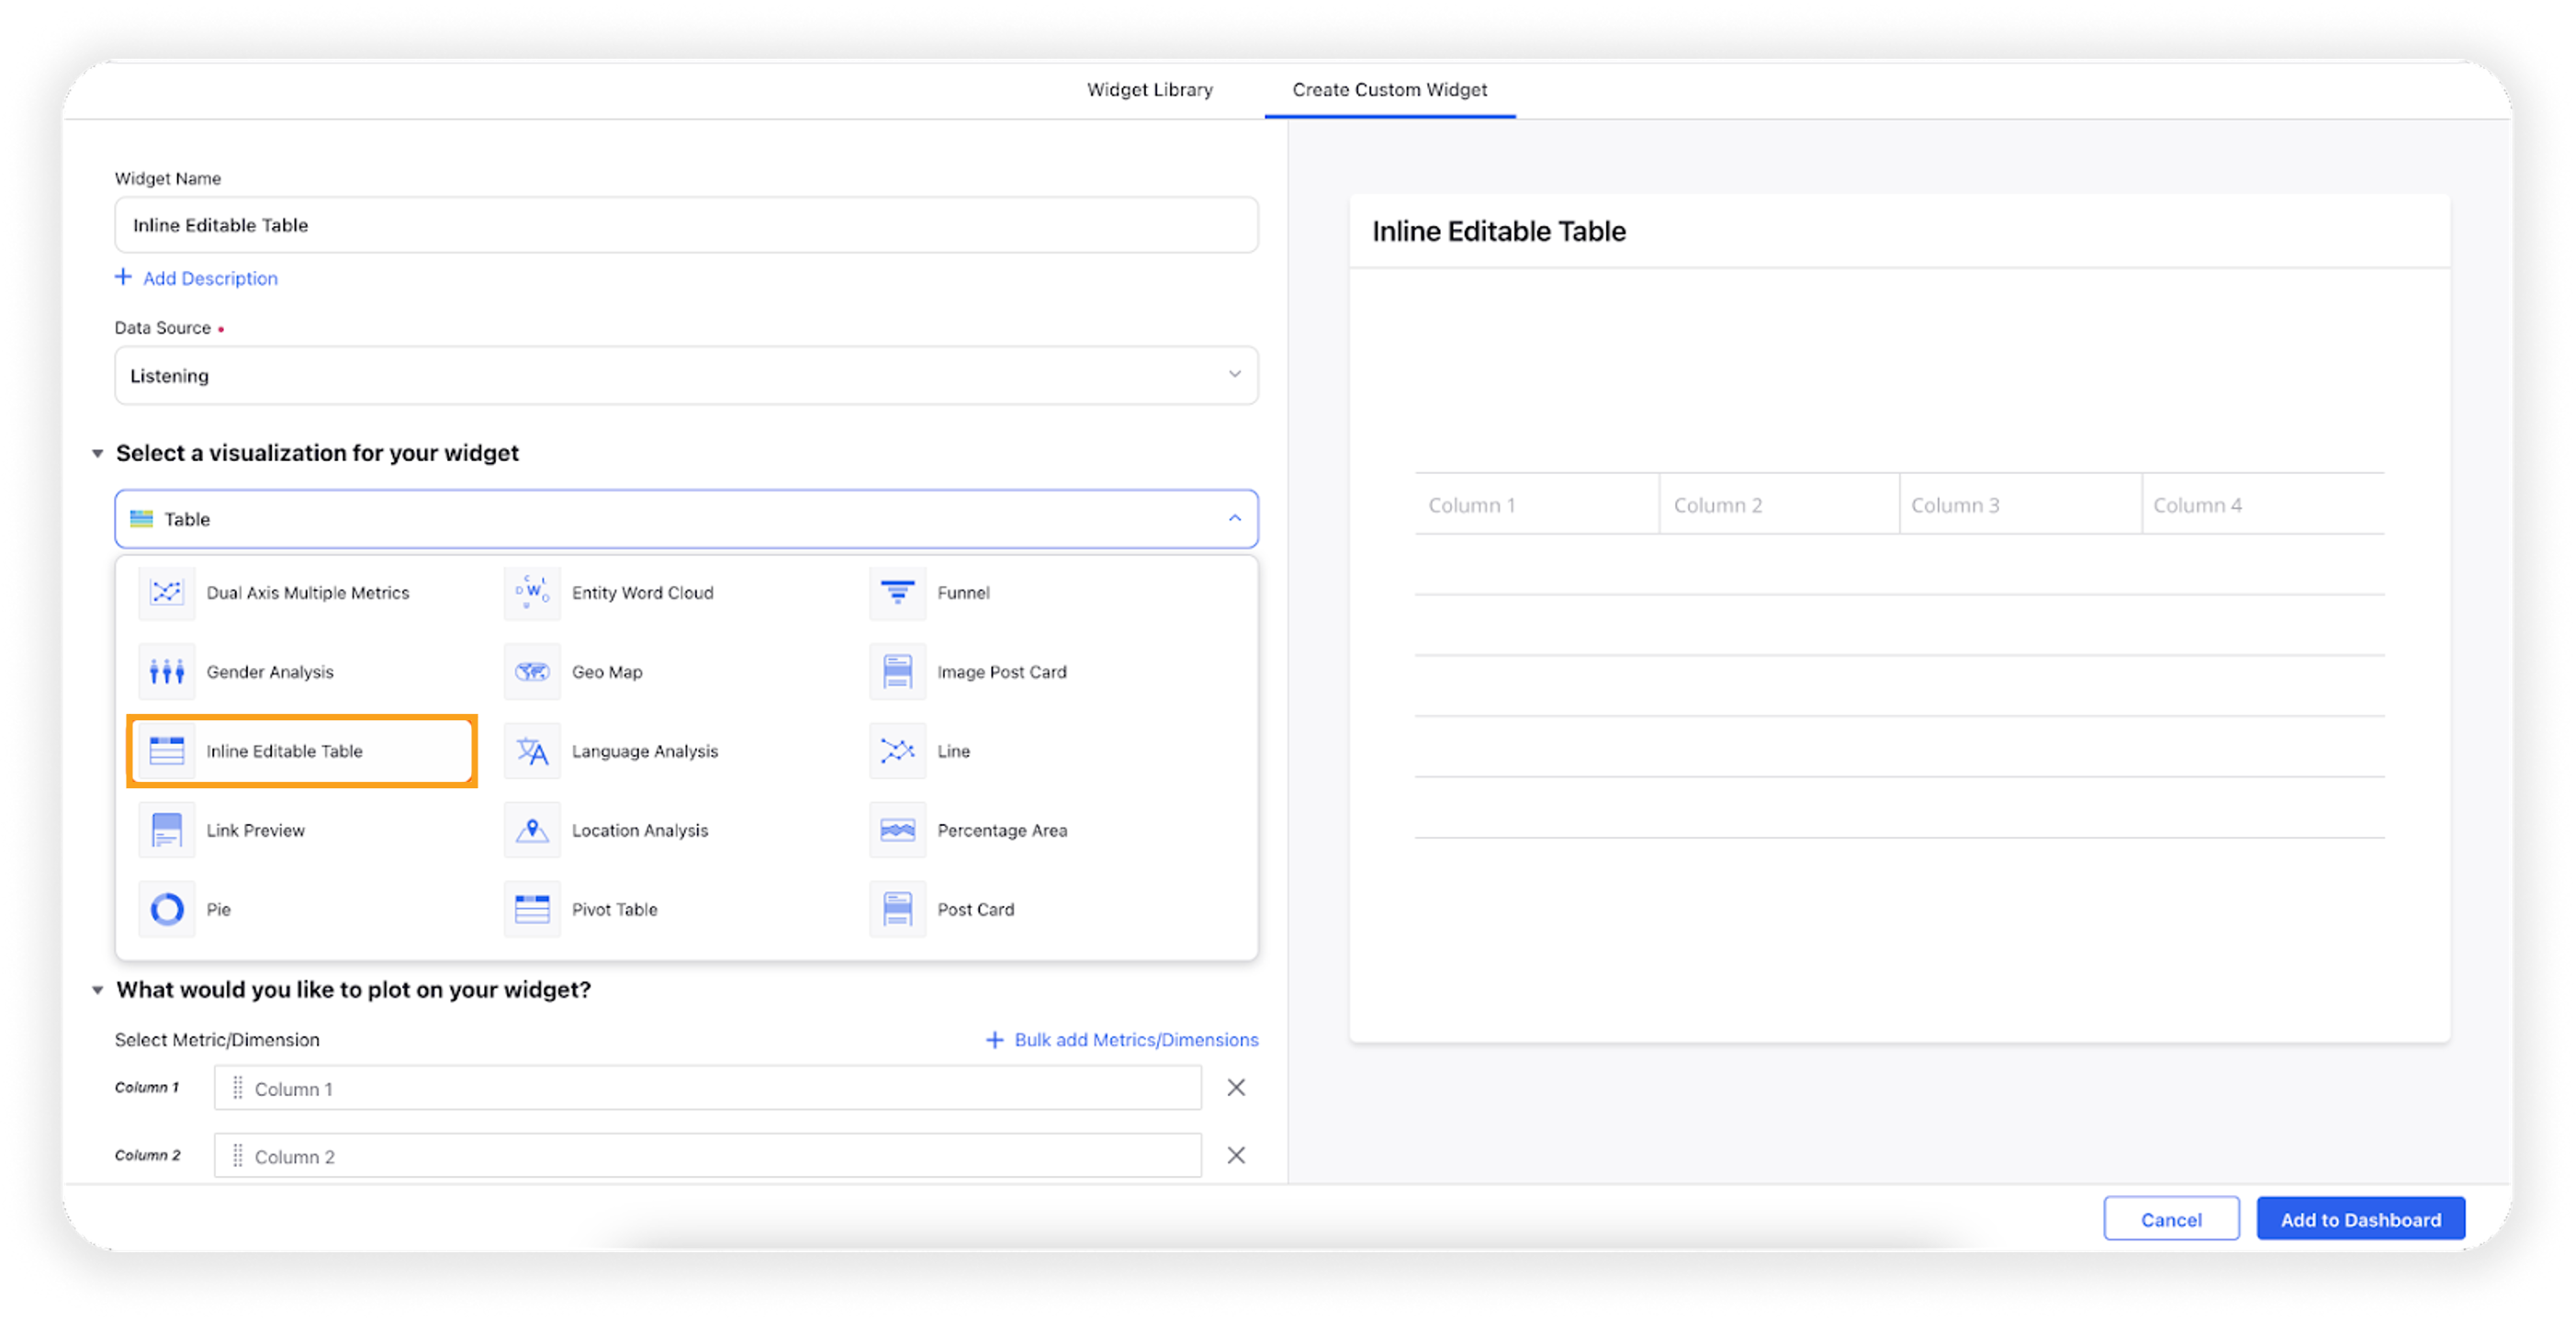
On the widget builder, enter the widget's name.
Select Inline Editable Table as a visualization type for your widget.
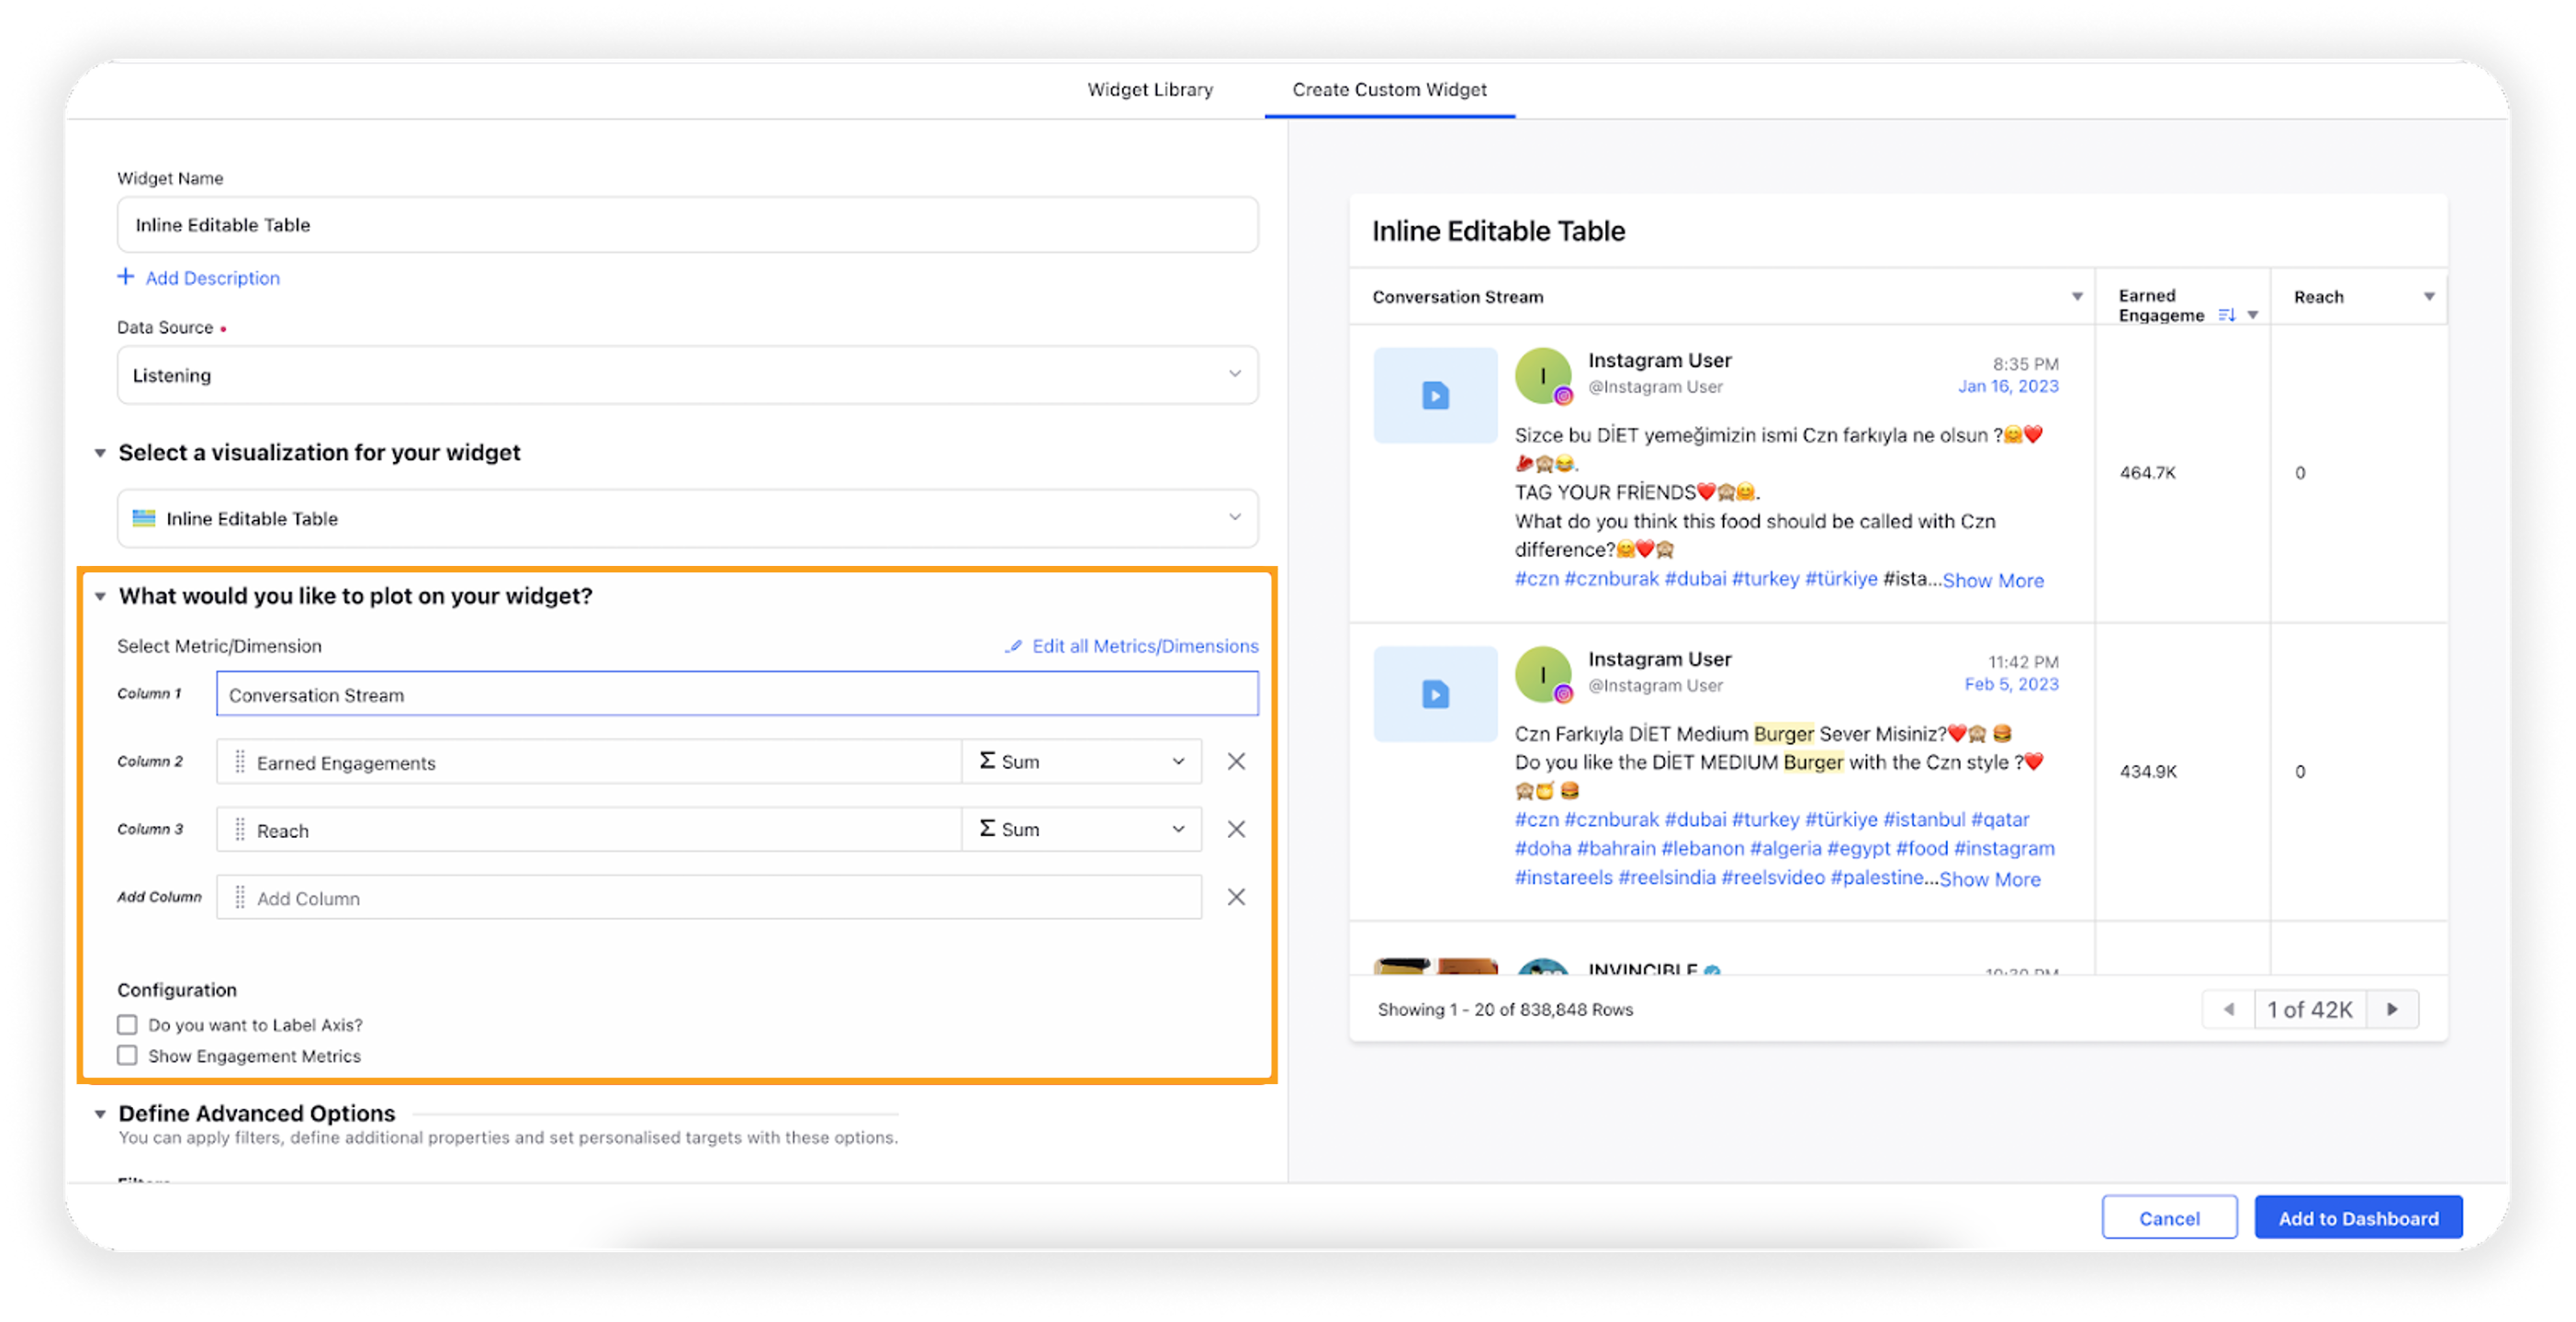
Under the What would you like to plot on your widget section, a dimension Conversation Stream will be prefilled.
You can choose any dimensions and metrics to plot and choose configuration options as desired.
Select the configuration options as desired –
Configuration Option
Action
Do you want to Label Axis?
If you want to add names for your Axis, you can select this configuration option, and then you can enter the desired names as labels.
Under the Defined Advanced Options section, you can apply filters, define additional properties and set personalized targets with these options.
Click Add to Dashboard on the bottom right corner to create your new widget.
Note: All the custom fields supported in the Inline Table widget are editable The custom fields that support edit functionality are – Picklist, Text, Picklist Multiselect, Number, Date, Text Area, and Text Multi.
Features and scope of the Inline Editable Table widget
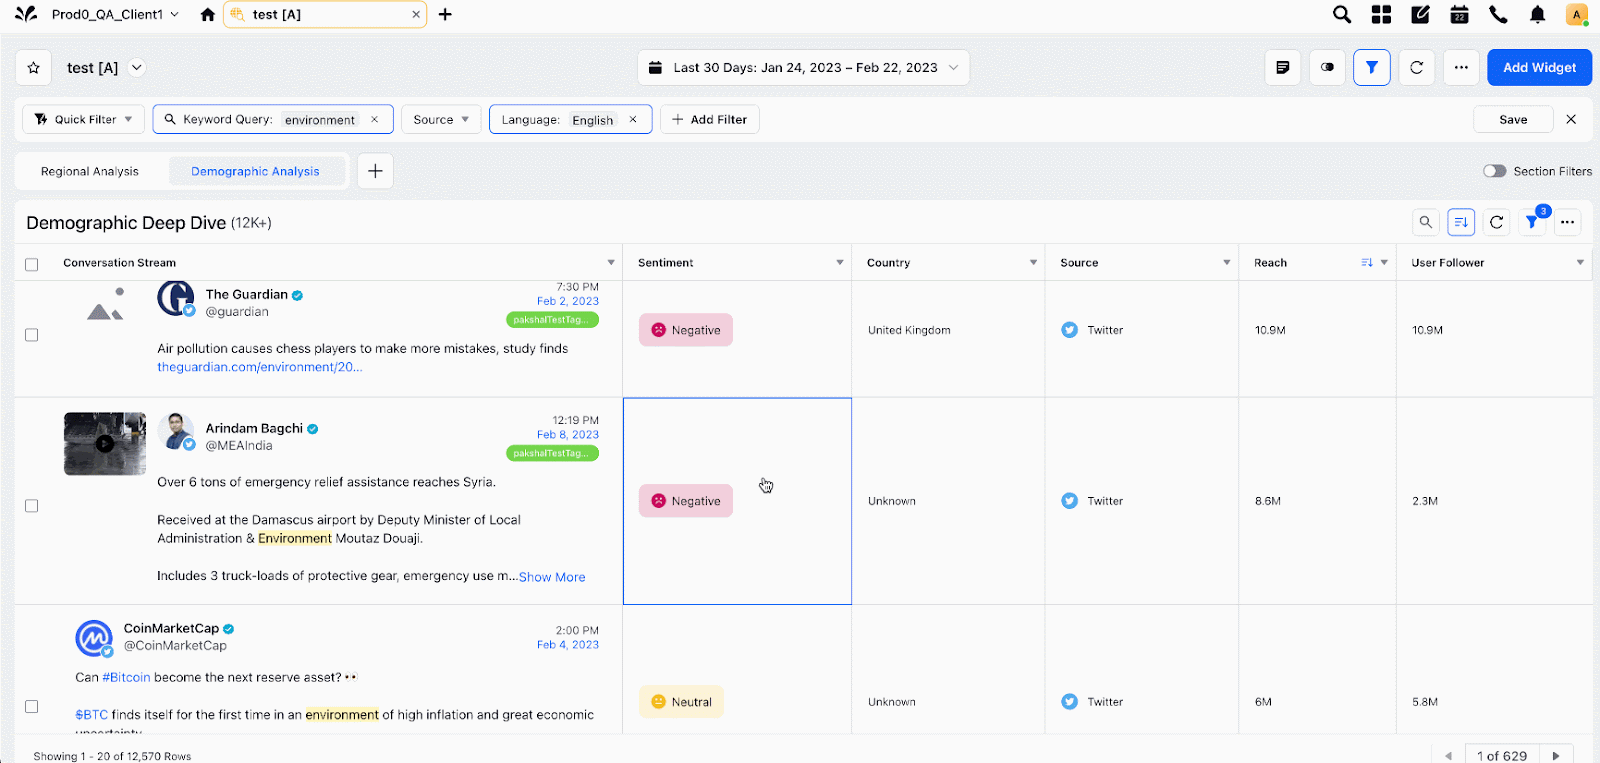
On columns having specific metrics such as Reach, you can sort the order of the results either in ascending or descending with a single click, as shown below. You can select the dimension you want the sorting to be applied to. This helps you to surface the highest-performing messages according to desired KPIs.
With the sort feature, you can easily view the highest or lowest-performing messages according to the dimension you have selected. By hovering the cursor on the Descending icon in the top right corner of the column and selecting either Sort Ascending or Sort Descending, you can select your sorting preference without entering the edit mode. This is demonstrated by the GIF below –
Note: All the metrics added to the Inline Editable Table widget will be available in the sorting options upfront. So you will have more sorting options to sort the order of your Inline Editable Table widget.
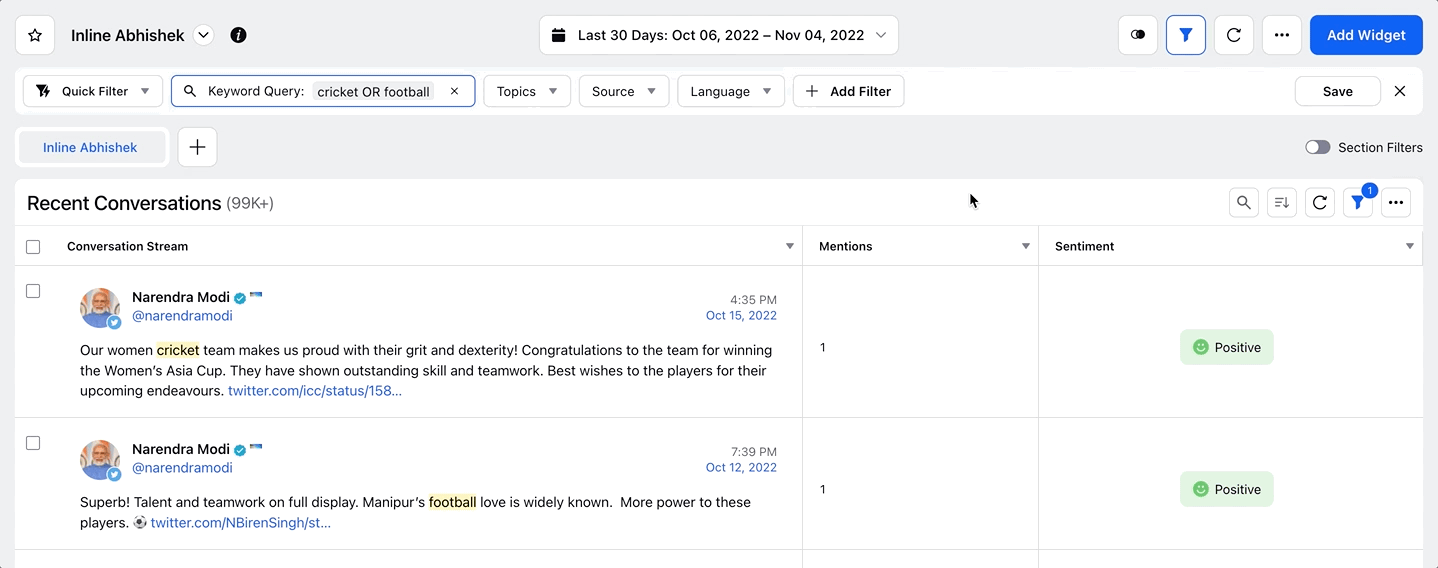
You can easily assign sentiment to a message in the Inline Editable Table widget without entering edit mode. To perform this, click the Sentiment alongside the message you want to be changed, and select your sentiment from the dropdown. This is demonstrated by the GIF below –
You can easily update the tags of a message by selecting the Update Tags option, as shown below. You can also create your tags on the go. Similarly, by selecting the Message Properties action, you can edit the custom properties of that message. This is demonstrated by the GIF below –
The Inline Editable Table widget provides you with the ability to search for specific messages within the widget using Keywords, Tags, or the Sender name. You can pull up messages containing specific keywords to take action if required. You can also Exclude the keywords from messages to further narrow down your results by omitting irrelevant data. This is demonstrated by the GIF below –
You can perform bulk actions on messages, such as applying macros to multiple messages at once, archiving the message/s, etc. without entering edit mode and working with each message separately. This is demonstrated by the GIF below –
When bulk selecting messages in an Inline Editable Table widget, whenever you update sentiment, message tag, and or any custom field (single picklist & multi picklist) in one of the rows within the table, the changes will be applied to all the selected messages. This is demonstrated by the GIF below –
Just like Conversation Streams, you can choose to highlight additional entities within the Inline Editable Table widget. Get more use out of Topics, Themes, and Keyword Lists by seeing where their keywords show up in your Listening messages or identify the phrases and locations users are mentioning.
Note: We also support consistent keyword highlighting within the third pane of the Inline Editable Table widget. When you select the Highlight option for Topic, Theme, or Keyword List within the Inline Editable Table, it highlights the keywords associated with the selected Listening entity (Topic, Theme, or Keyword List). And when you open the message in the third-pane, the same behavior will now be seen there too, i.e. the keyword(s) will be highlighted in the third-pane also.
In the Inline Editable Table widget, you can see snippets around the first topic/keyword query. The snippet gives you the context of the message without reading the full content. It renders the text around the first keyword match that is detected. This is demonstrated by the GIF below –
You can bulk-select all messages in an Inline Editable Table widget. As a result, you can now bulk select all messages in the widget with the Select All option to perform a bulk action, such as applying a Macro or archiving the messages. This is demonstrated by the GIF below –
The Inline Editable Table widget can show Engagement Metric. In this mode, the messages will be mapped with the predefined engagement stats and shown in a single column (or cell) instead of each taking up a separate column.
You can enable engagement metric cells.
From the Widget editor by selecting the Show Engagement Metrics option under Configuration.
On the Widget option (3 dots), select Show Engagement Metrics. To revert, click Hide Engagement Metrics in the options.
This is demonstrated by the GIF below –
To perform quick actions in the Inline Editable Table widget, the following keyboard shortcuts have been implemented –
Users can navigate the cells in the table using arrow keys ← ↑ ↓ →.
Users can scroll through the rows in the table with the up arrow ↑ and down arrow ↓.
Users can select a row using (Shift + Spacebar).
Users can select multiple consecutive rows using (Shift + ↓) or (Shift + ↑).
Users can also select multiple consecutive by selecting the first row, pressing the Shift key, and then selecting the last row.
Users can cherry-pick and select rows by pressing the Ctrl (in Windows) or Command (in Mac) key and clicking on the required rows.
Users can select all rows available in the inline editable widget (max 300 rows) using Ctrl (in Windows) or Command + A (in Mac).
When rows are selected, the entire rows will be highlighted.
Keyboard navigations can be used to select and update a value of a custom field (pressing Enter will open all options in the custom field).
Similarly, by using Keyboard navigations, users can quickly update a custom field for multiple selected rows.
Users can easily change the message's sentiment within an Inline Editable Table widget using these keyboard shortcuts:
Press cmd/ctrl + shift + s to change the sentiment to Positive
Press cmd/ctrl + shift + d to change the sentiment to Neutral
Press cmd/ctrl + shift + f to change the sentiment to Negative
Note:
Shortcuts will be active when the Sentiment cell is selected within the Inline Editable Table widget.
Ability to change the sentiment of messages in bulk is also supported with the above keyboard shortcuts.
Users must select a cell in the Inline Editable Table widget to activate shortcuts.


.gif)
.gif)
.gif)
.gif)
.gif)
.gif)
.gif)
.gif)