What are Website and In-App Surveys?
Updated
This feature provides users the ability to gather solicited customer feedback via Websites and In-App, enabling brands to capture insights at every customer touchpoint. It will help to improve the rate of response and the quality of feedback.
Website and In-Apps enables one to gather feedback on digital platforms at critical points in the user journey.
Users can explore a library of pre-built creatives such as pop-ups, feedback buttons and micro surveys or tailor their surveys as per brand requirements.
You can deploy surveys on digital platforms using 30 pre-defined conditions like browsing behaviours and session length or create custom triggers for targeted event-based feedback.
User Benefits:
Users can embed code or SDK on their websites and mobile apps and effortlessly handle all survey management, creative updates and trigger settings directly from Sprinklr.
Surveys | Website Surveys
Steps
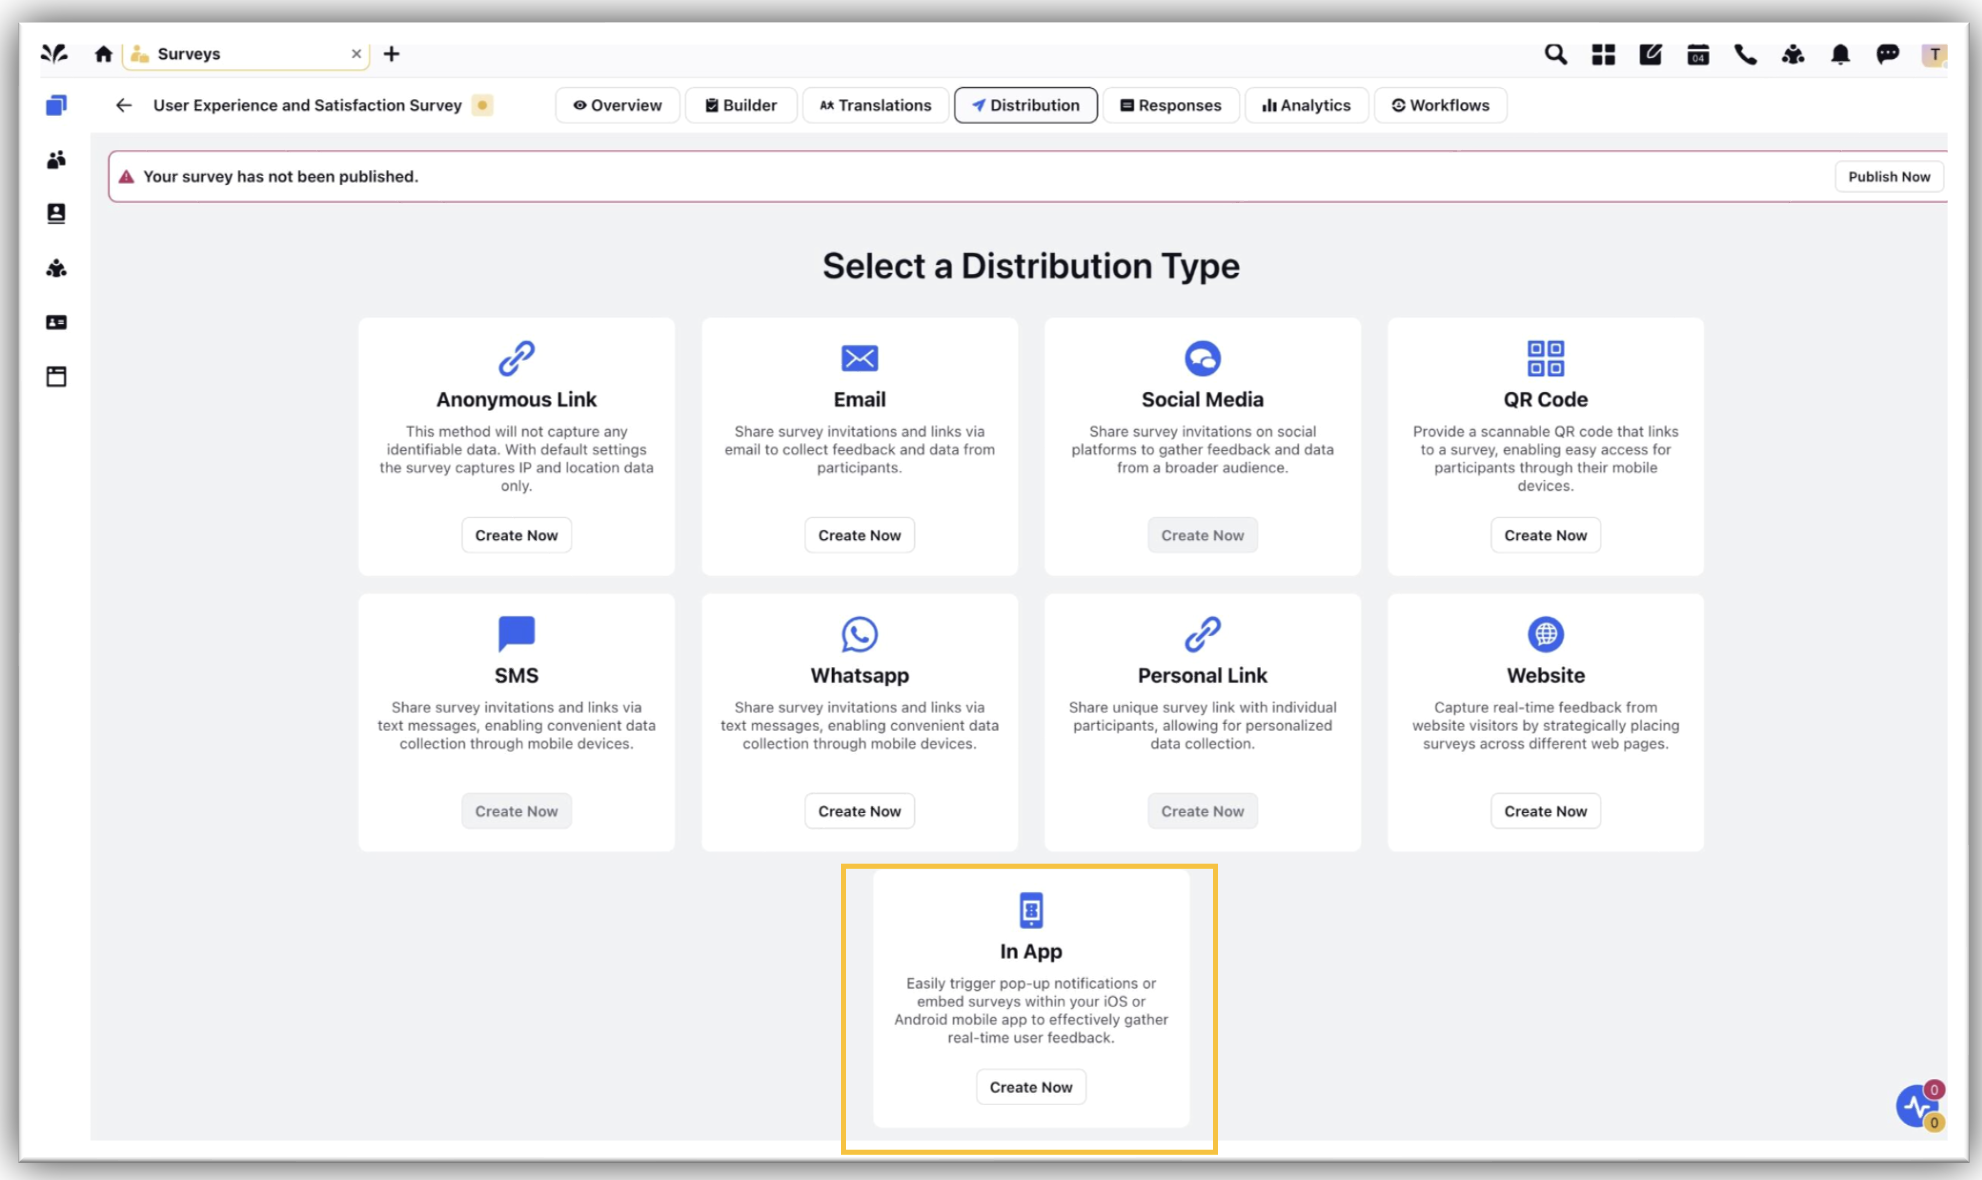
Click Distribution from the menu bar and select Website in the distribution type.
.png)
Click Update

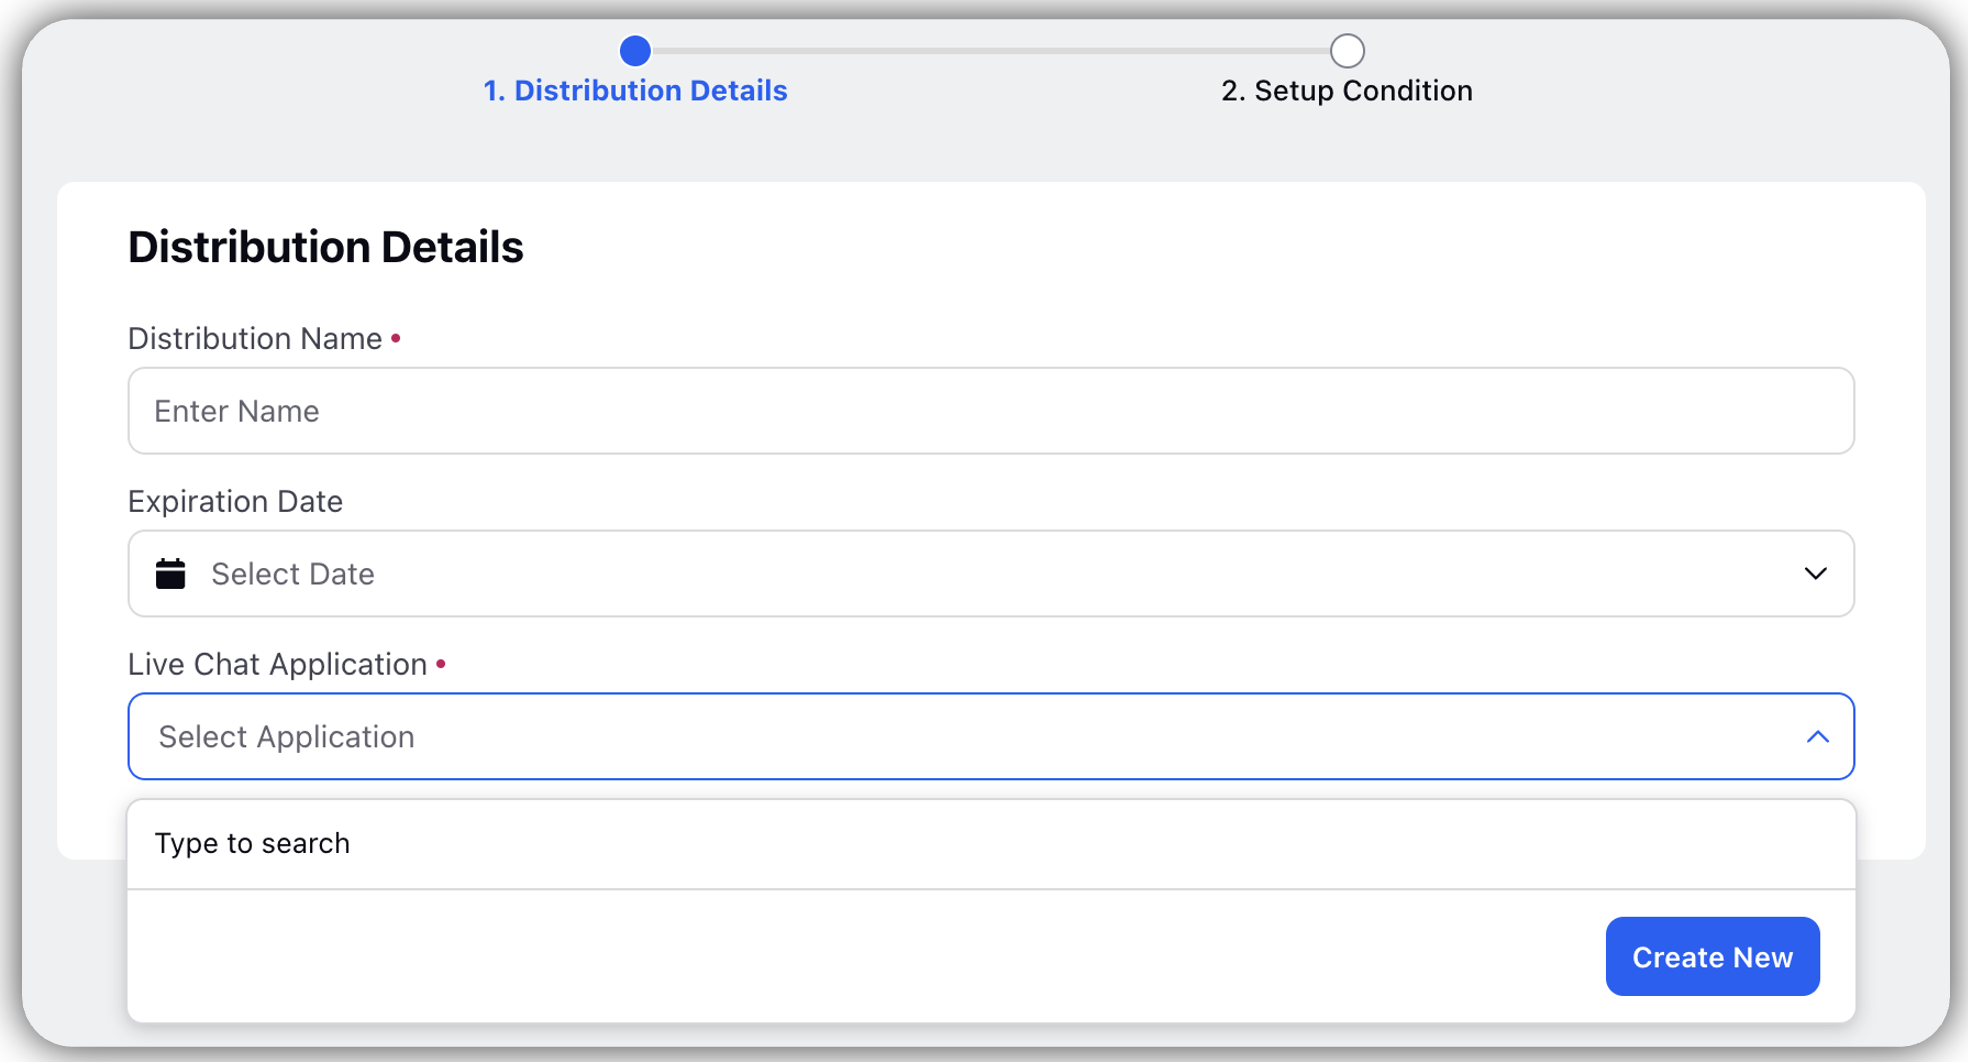
Click Distribution Details and fill all the details:
Distribution Name: Enter a name.
Expiration Date: Select survey expiry date.
Live Chat Application: Create live chat application on clicking Create New and Add Name and Website URL (for the survey to appear).

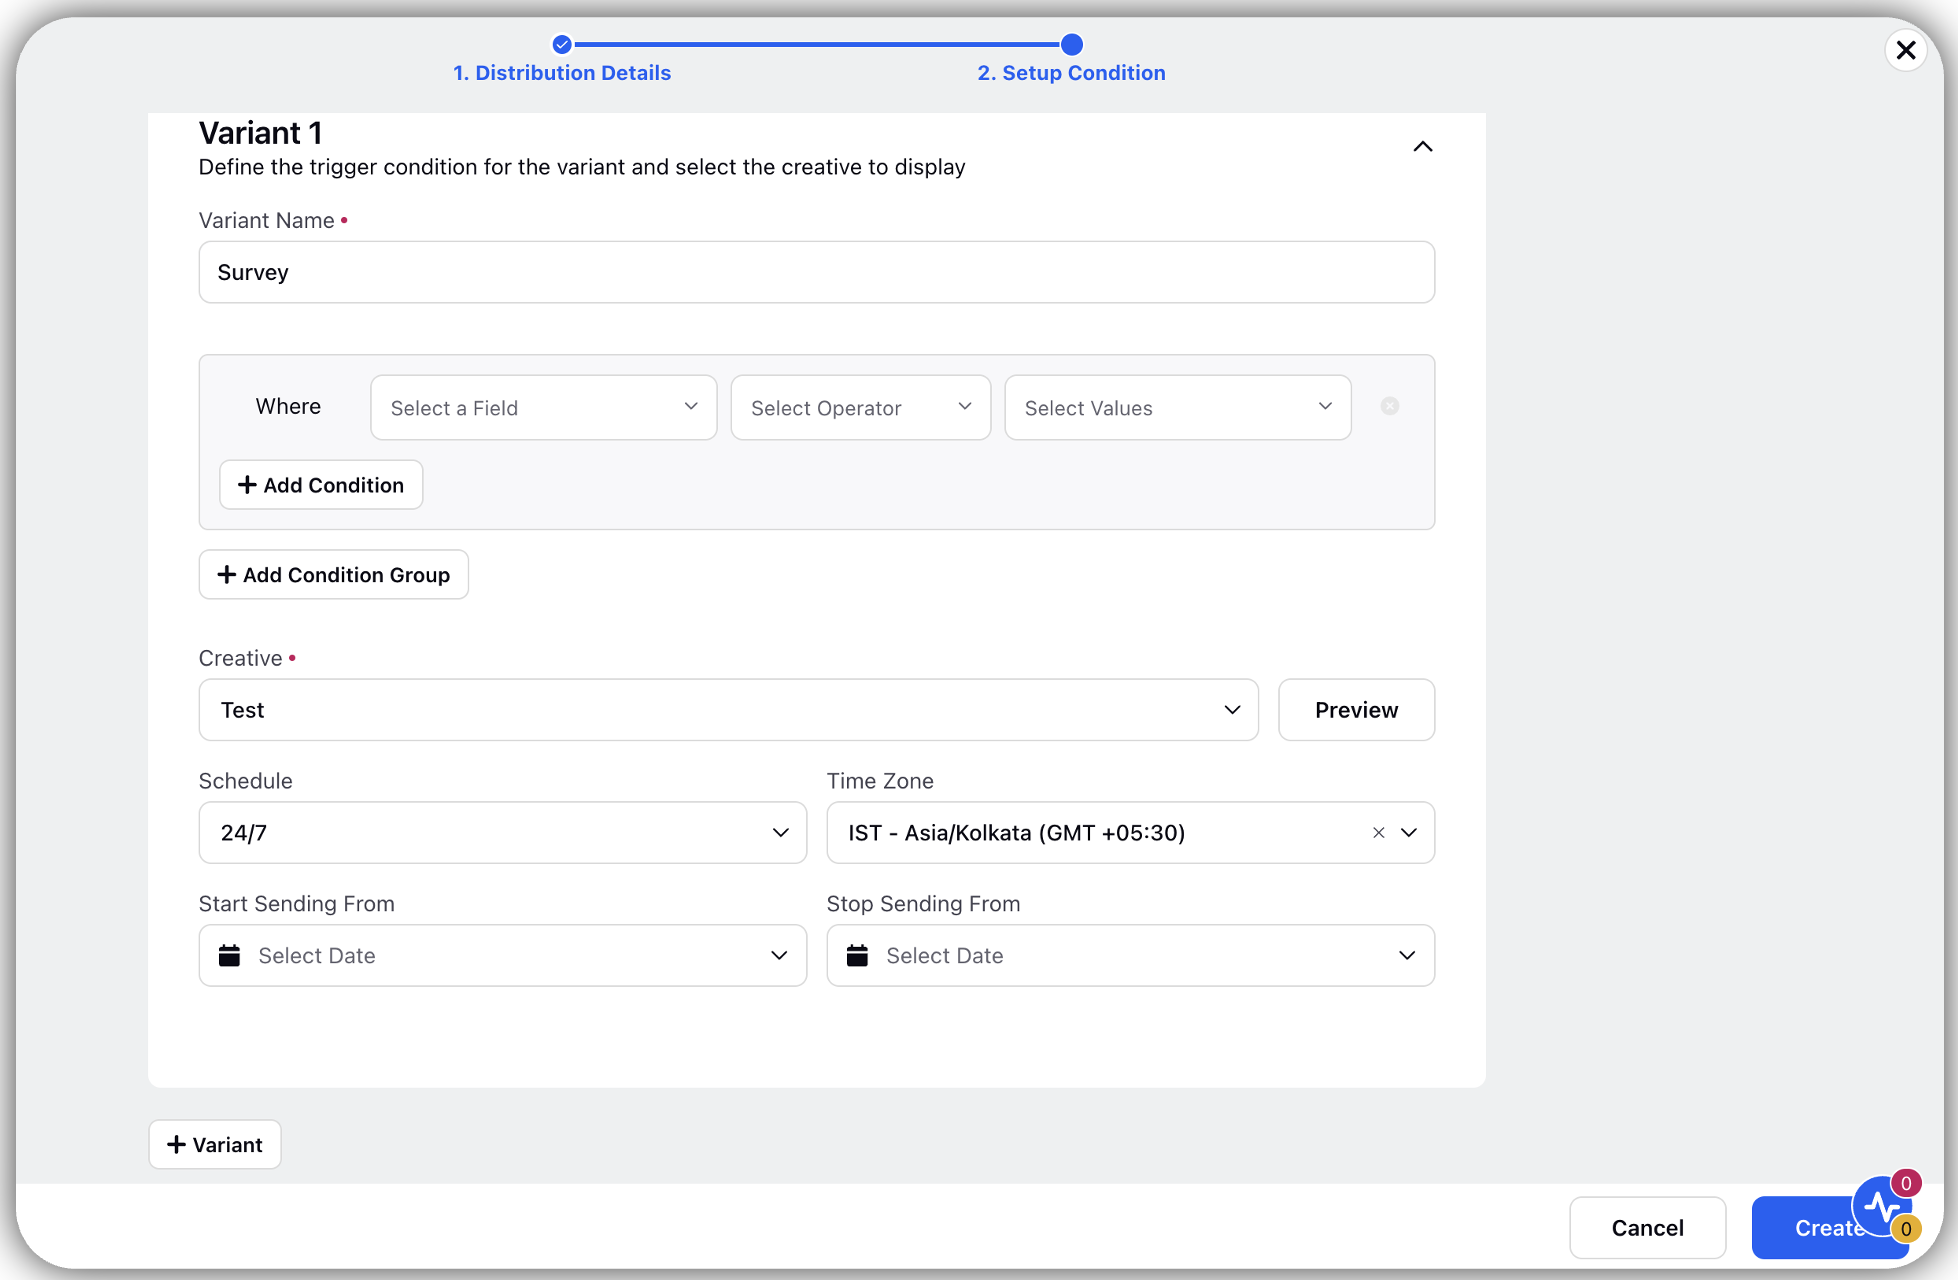
Click Setup Condition:
Variant Name: Enter Name
Where: Select field, operator and value (you can add more conditions)
Creative: Select creative (click Preview for a glance)
Schedule: Select schedule and time zone
Start Sending From: Select start date
Stop Sending From: Select end date

Click Create (at the bottom right corner)
Click +Variant to add more variants
Surveys | In-App Surveys
Steps
Create a survey in the Builder and click on In-App on the Create Distribution Tab.

Click Update
.png)
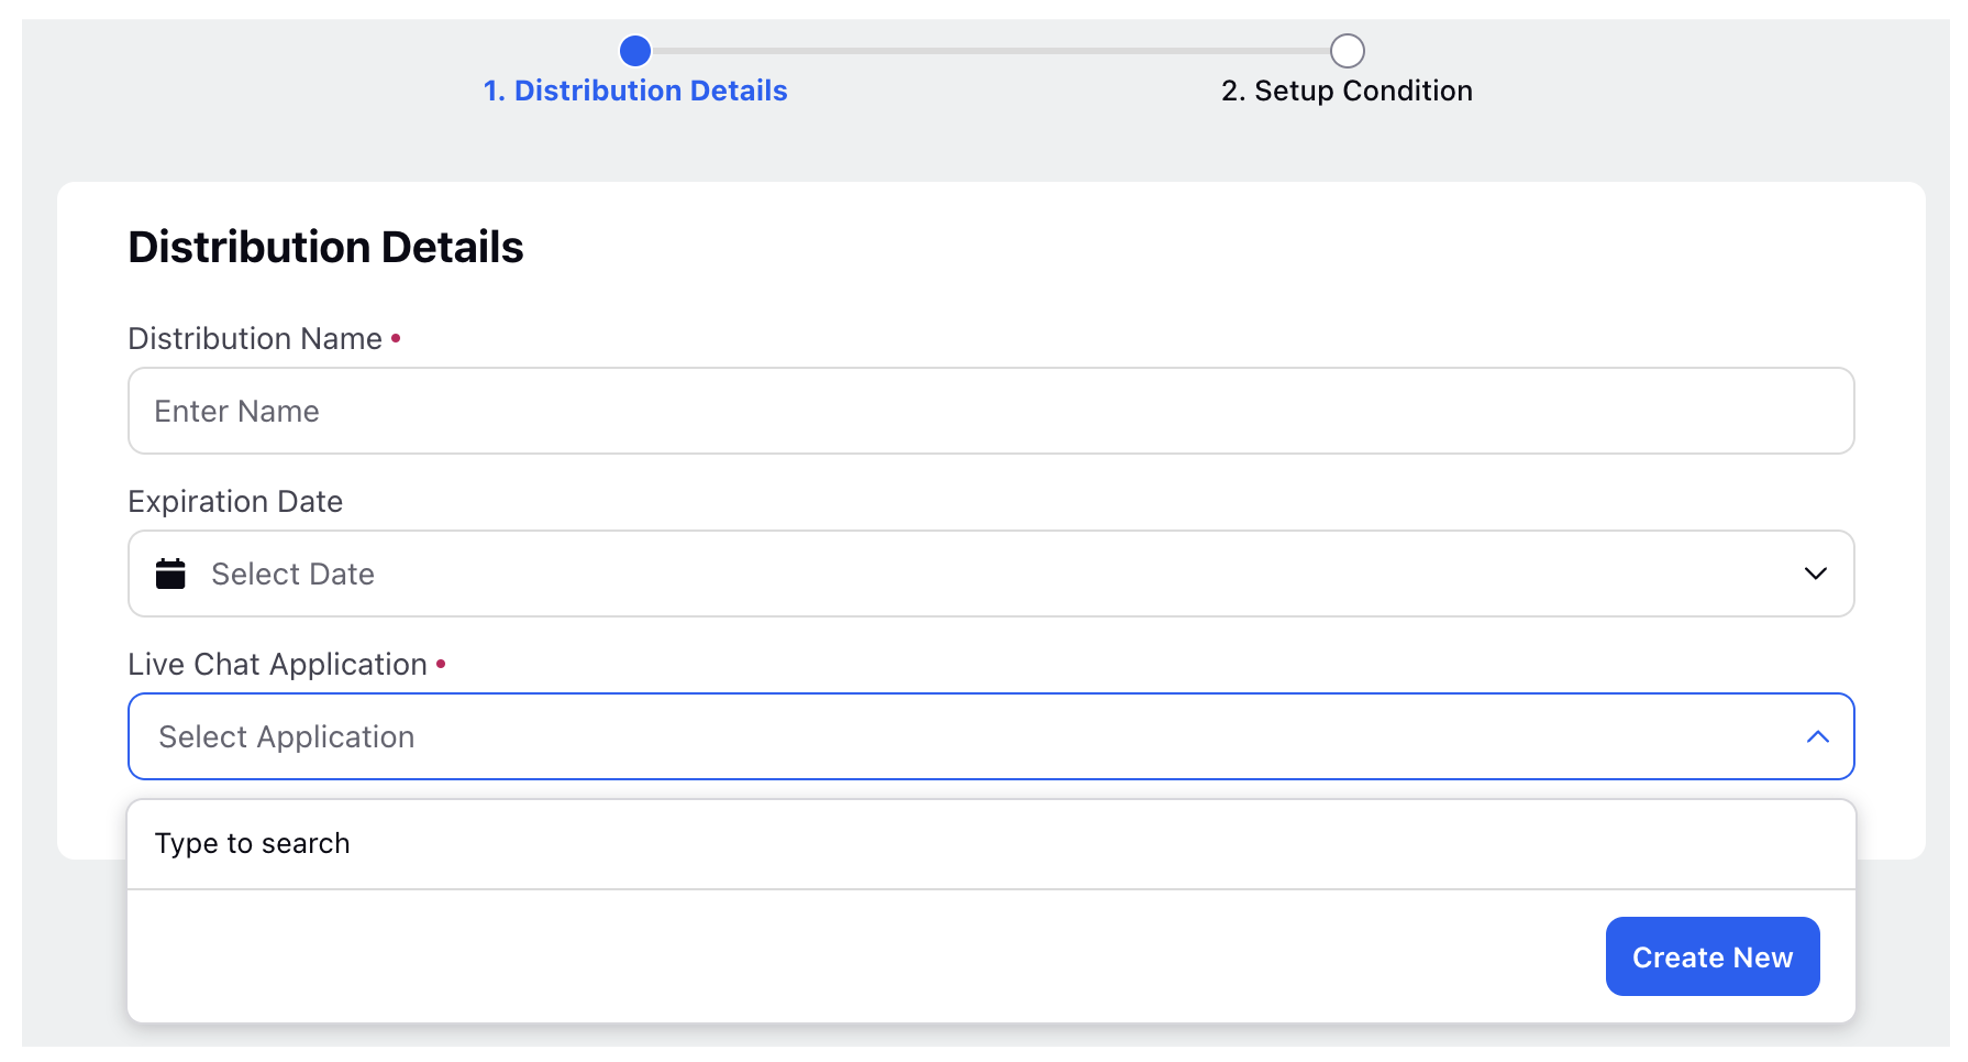
Click Distribution Details and fill all the details:
Distribution Name: Enter a name
Expiration Date: Select survey expiry date
Live Chat Application: Create live chat application on clicking Create New enter Name

Click Setup Condition and under Variant 1 fill other details:
Variant Name: Enter Name
Where: Select field, operator and value (you can add more conditions)
Creative: Select creative (click Preview for a glance)
Schedule: Select schedule and time zone
Start Sending From: Select start date
Stop Sending From: Select end date
.png)
Click Create (at the bottom right corner).
Click +Variant to add more variants.