Scheduled Reports
Updated
Scheduled Reports in Social Listening enables you to receive automated reports in the form of email and PDF (as a downloadable report).
By setting up a Scheduled Report, you can get emails that show Listening Insights based on the criteria you select. Besides email, you also have the option to embed insights data as a downloadable report. This is really useful when you want to view Listening Insights on your mobile device without visiting Sprinklr. When setting up your report, you can add your preferred time intervals like Minutes, Hourly, Daily, Weekly, and Monthly.
![]() Note: Choose "In Email" to get the whole report in one comprehensive email, or "Downloadable Report" for a PDF that you can easily download and share.
Note: Choose "In Email" to get the whole report in one comprehensive email, or "Downloadable Report" for a PDF that you can easily download and share.
Use cases
As a Marketing Manager, I want to receive a daily report that summarizes the key metrics like engagement, reach, and conversion rates for each campaign. This will help me to identify areas for improvement and make informed decisions for future campaigns.
As a Sales Manager, I want to receive a monthly report that shows the number of deals closed and the revenue generated. This way, I can quickly review my team’s performance and adjust the strategy if necessary.
As a Brand Manager, I want to check insights about how my brand is performing against competitors every week.
To create a Scheduled Report
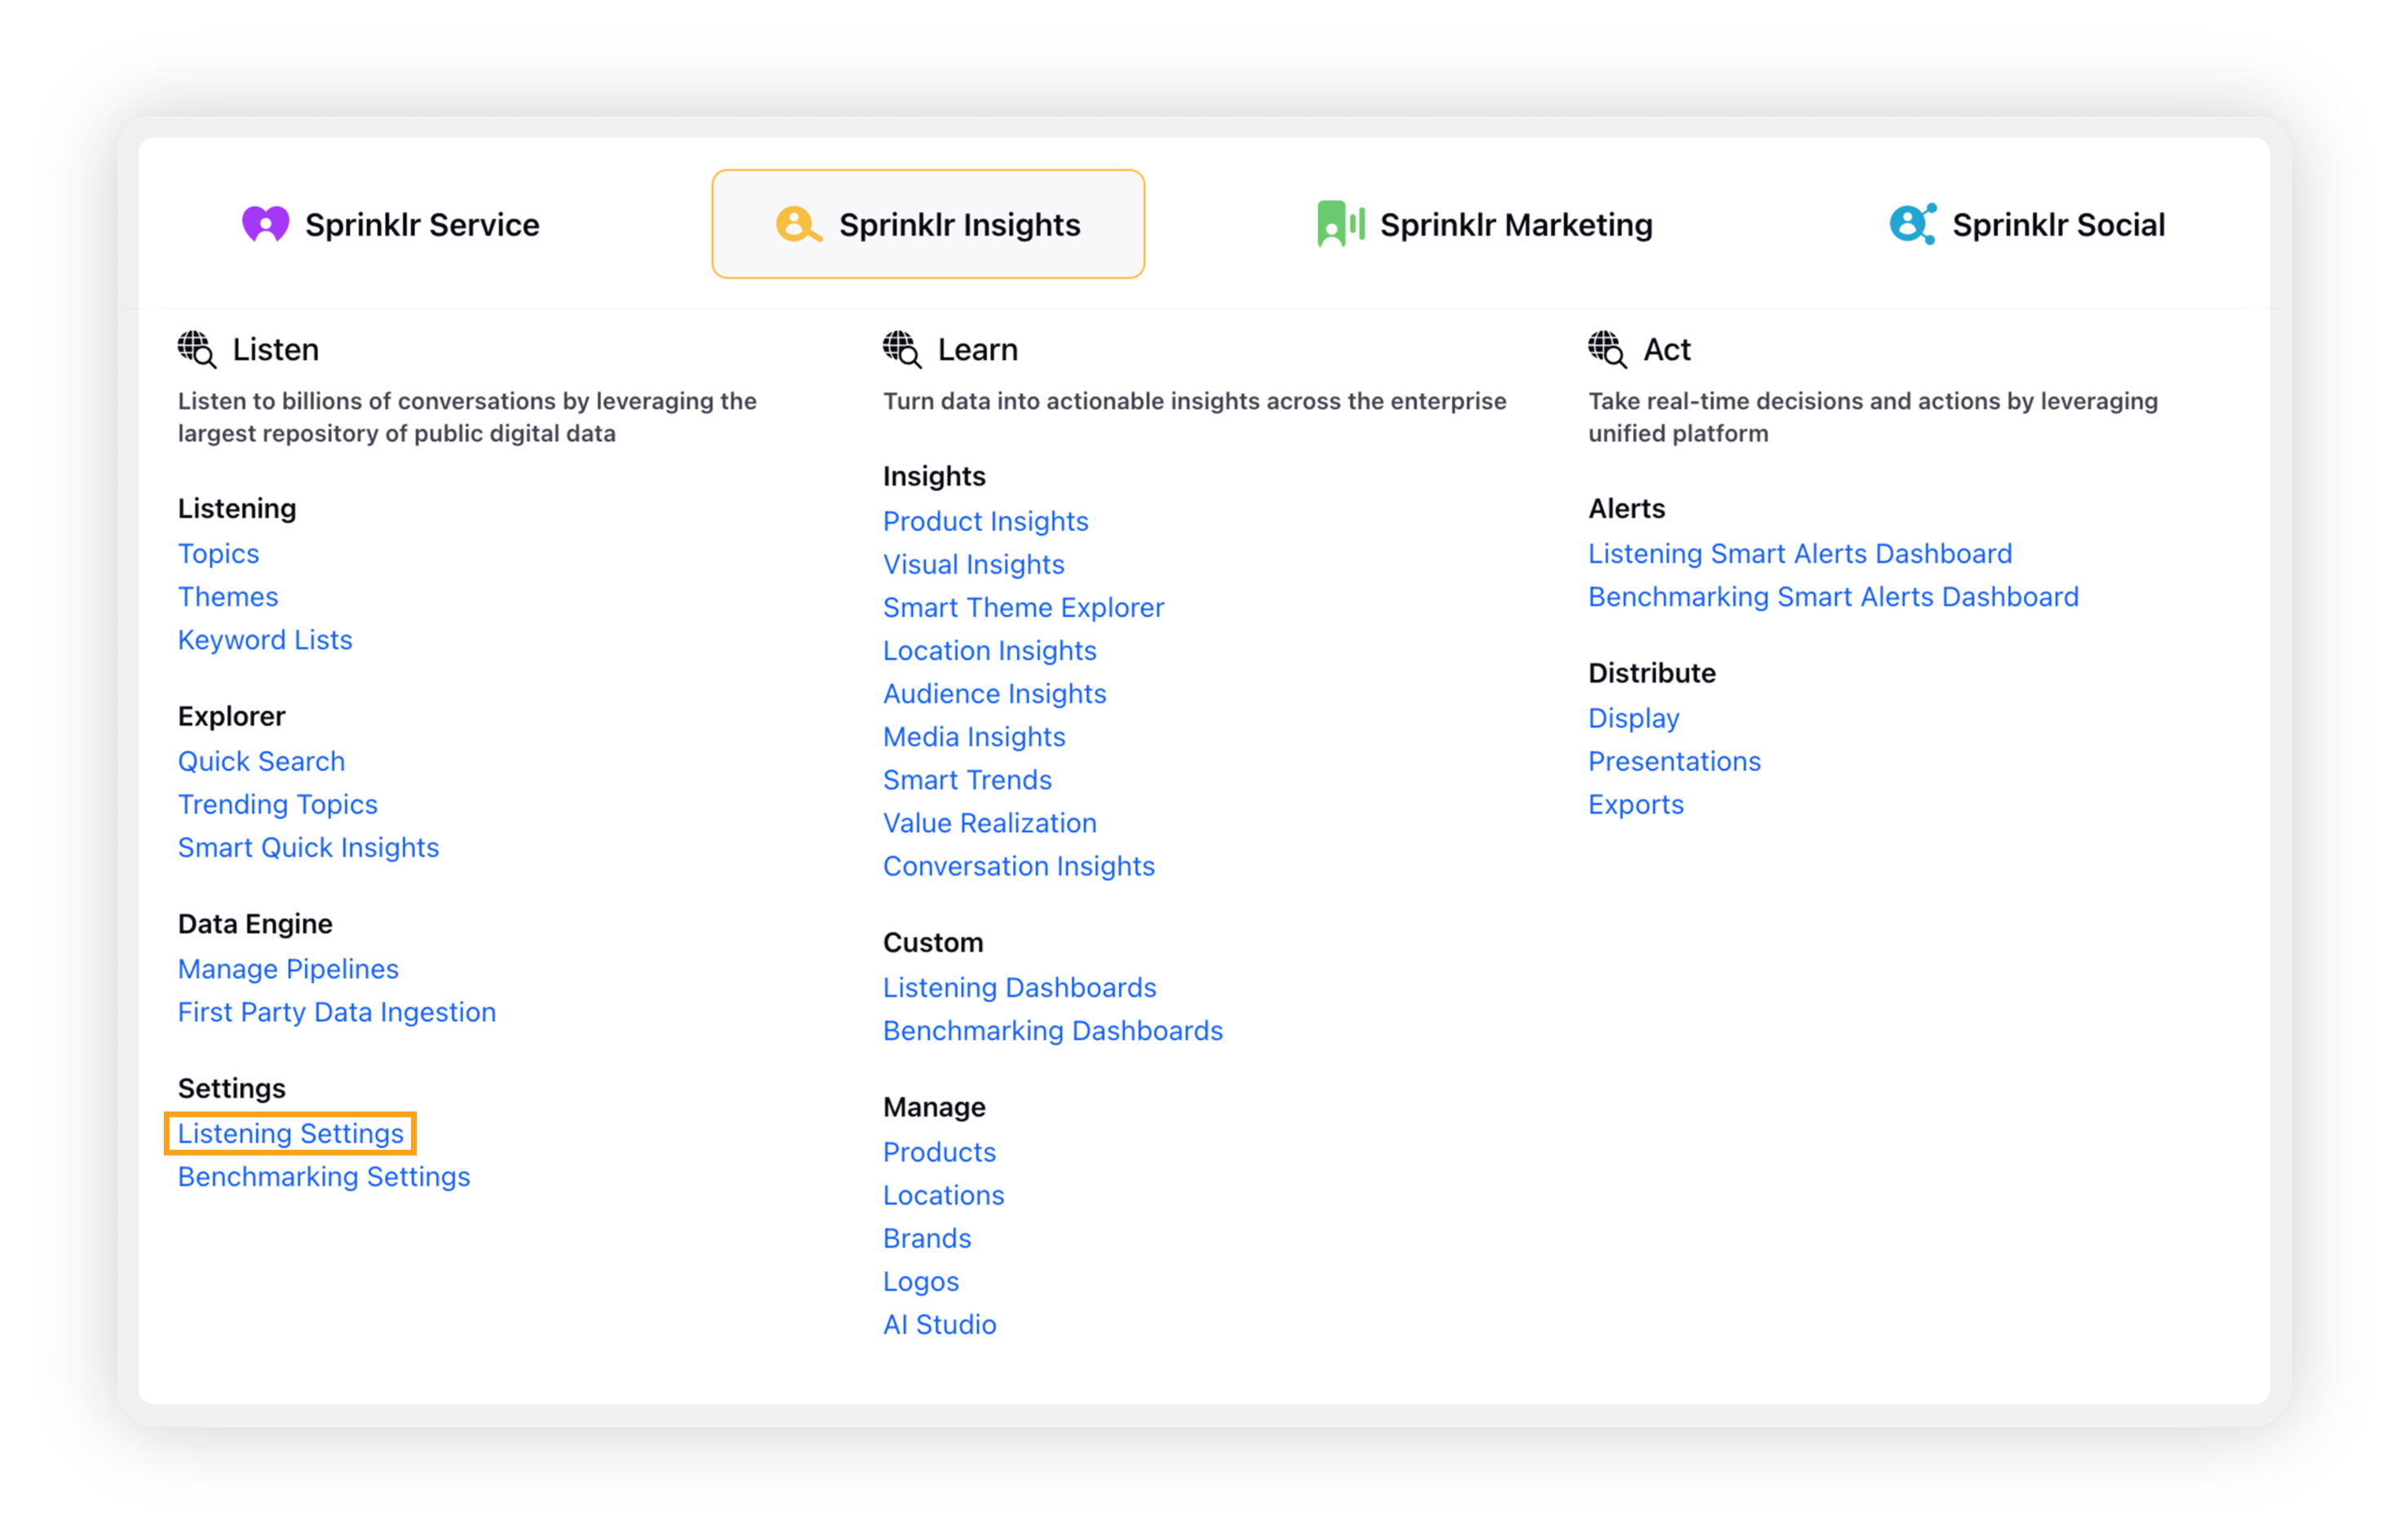
Click the New Tab icon. Under Sprinklr Insights, select Listening Settings within Listen.
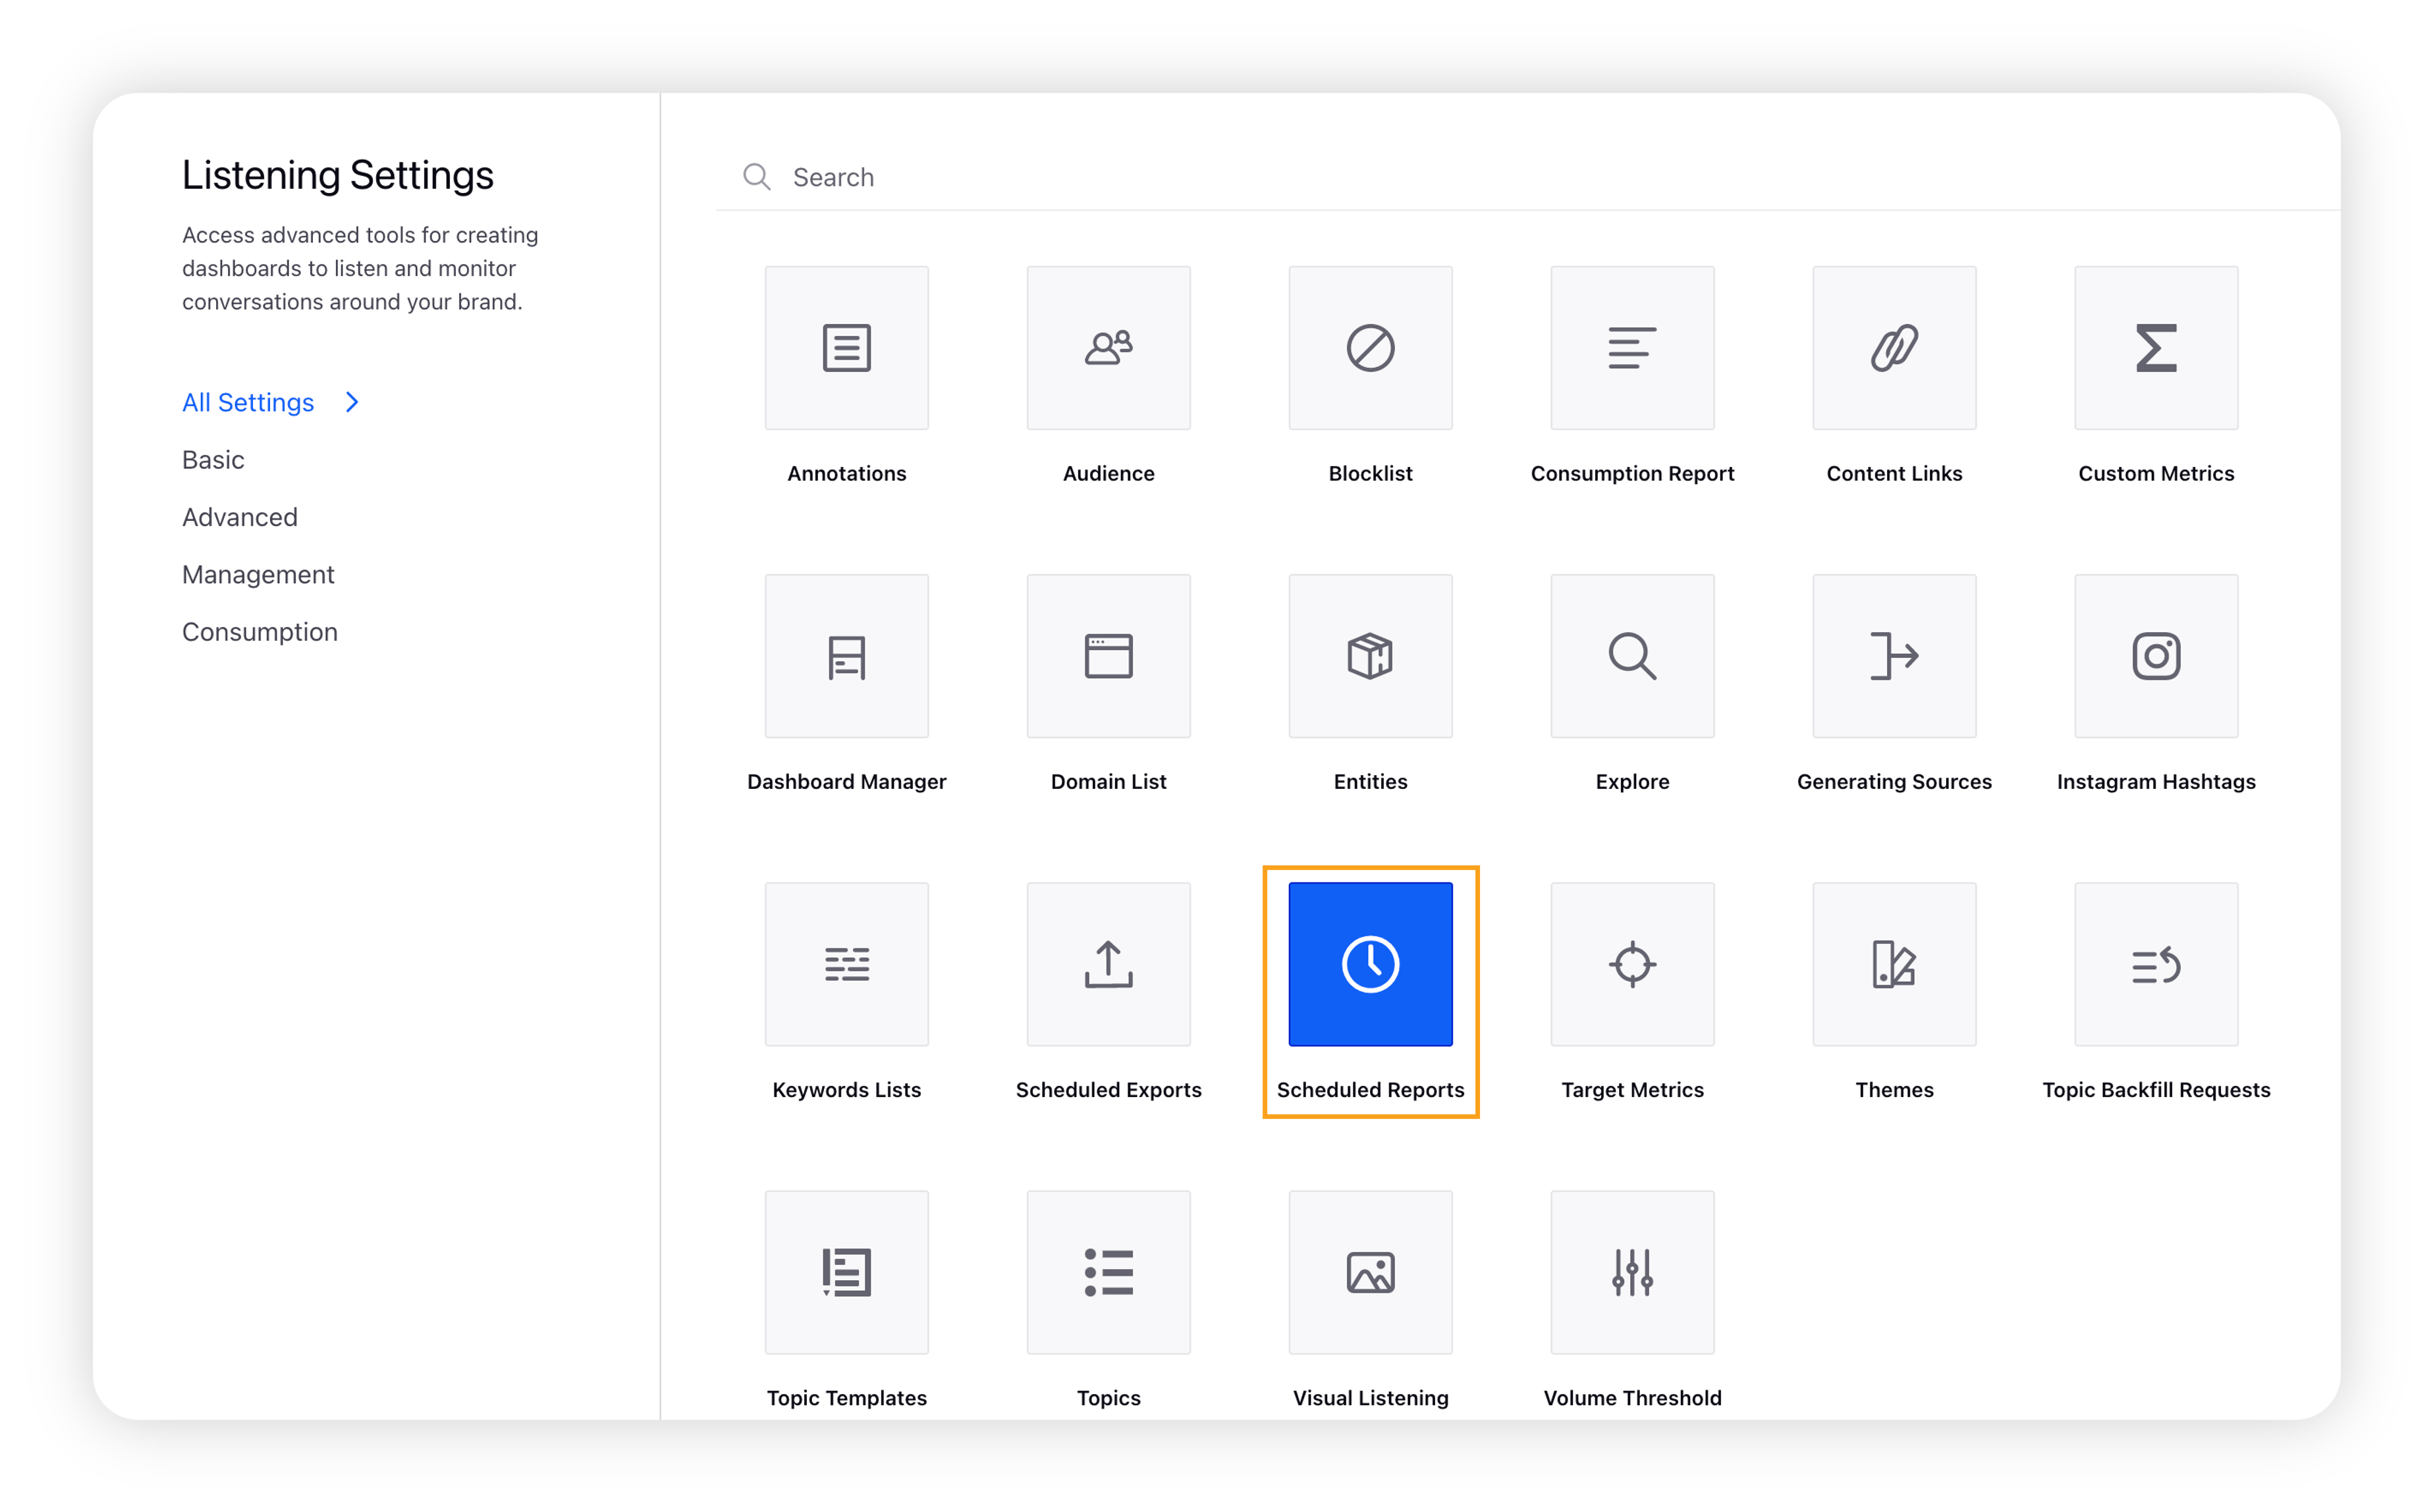
On the Listening Settings window, search for Scheduled Reports and click it.
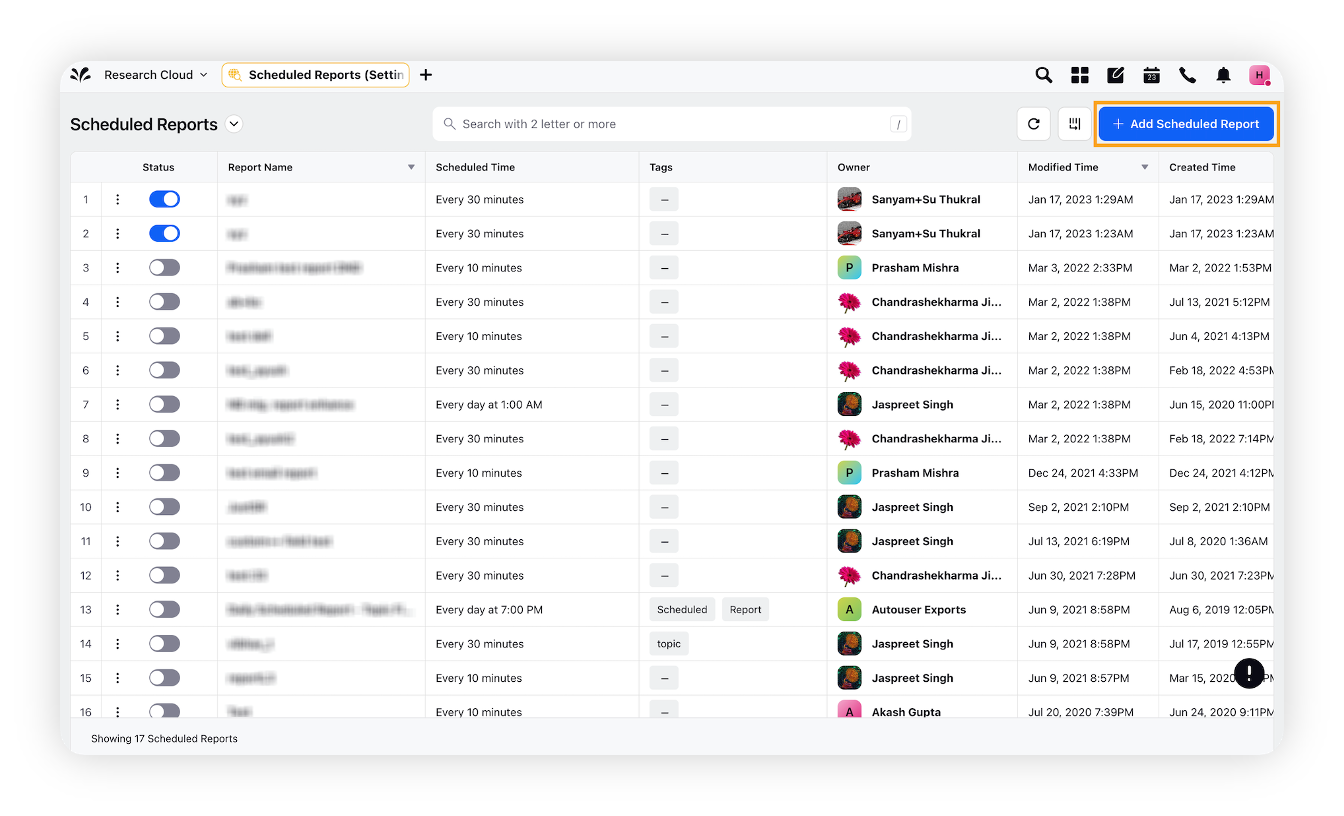
On the Scheduled Reports window, click the Add Scheduled Report button in the top right corner.
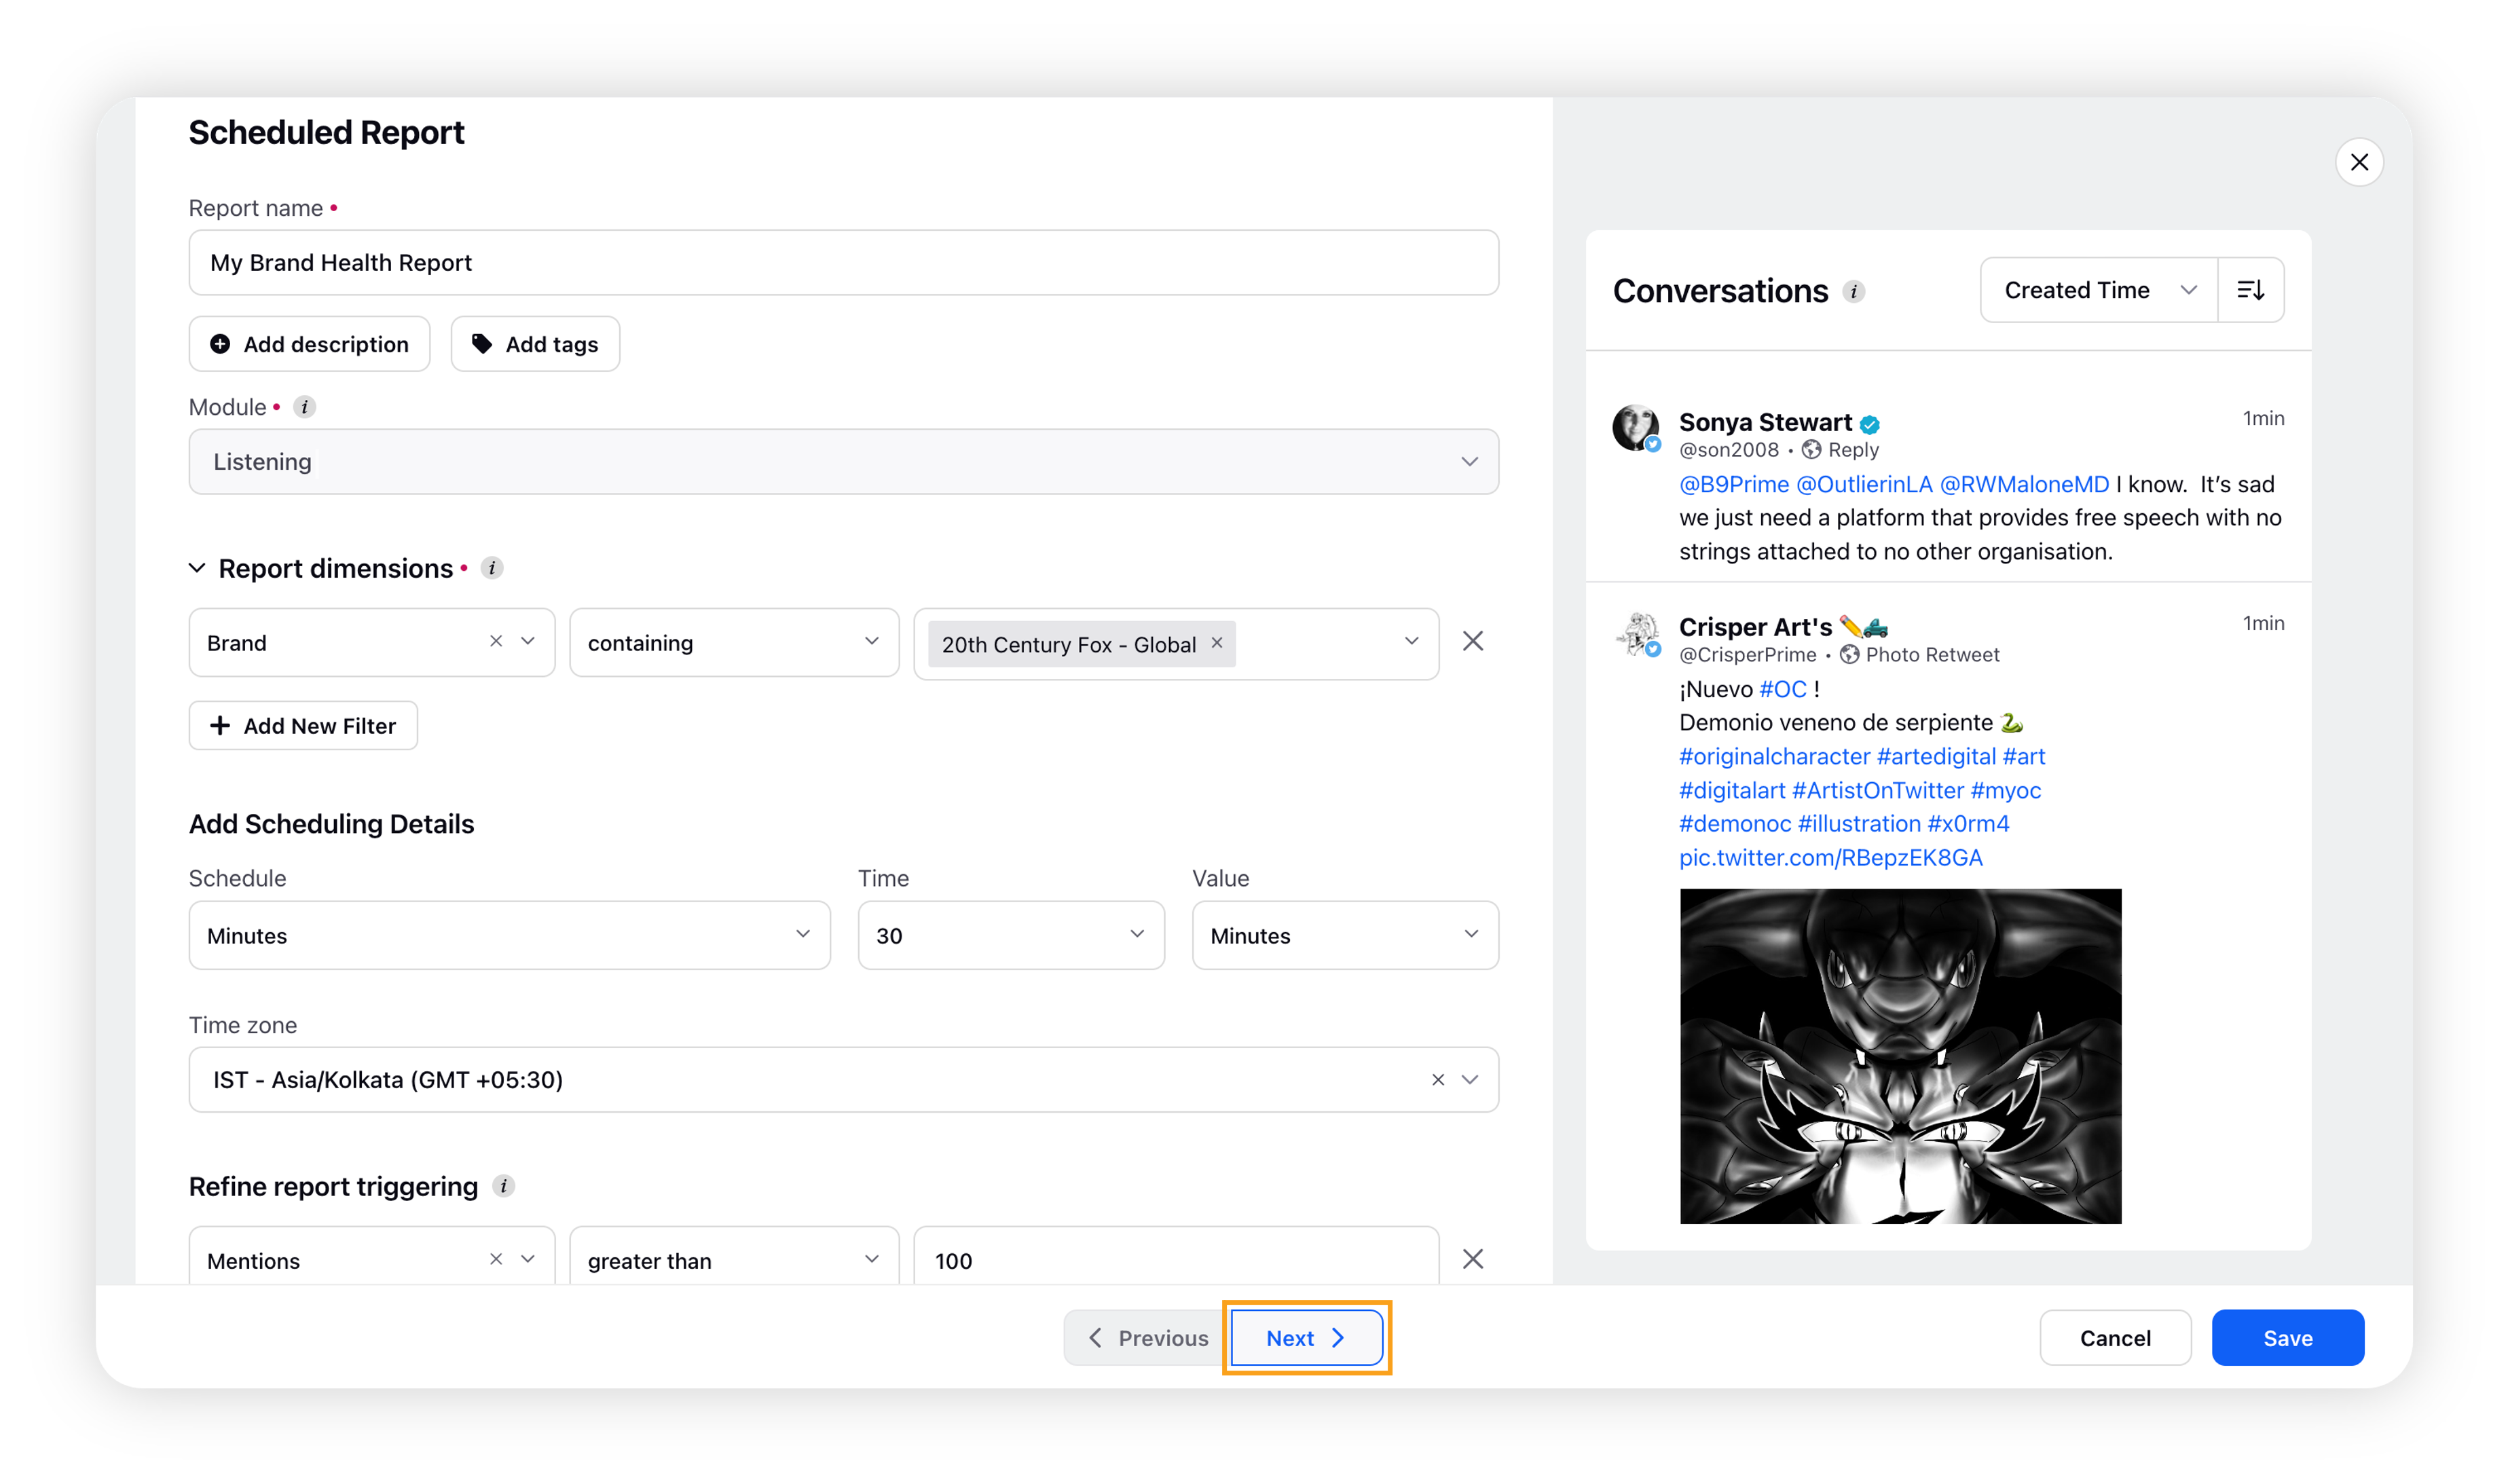
On the Create Scheduled Report window, enter the details to create scheduled report. Click Next to go to the Details tab.
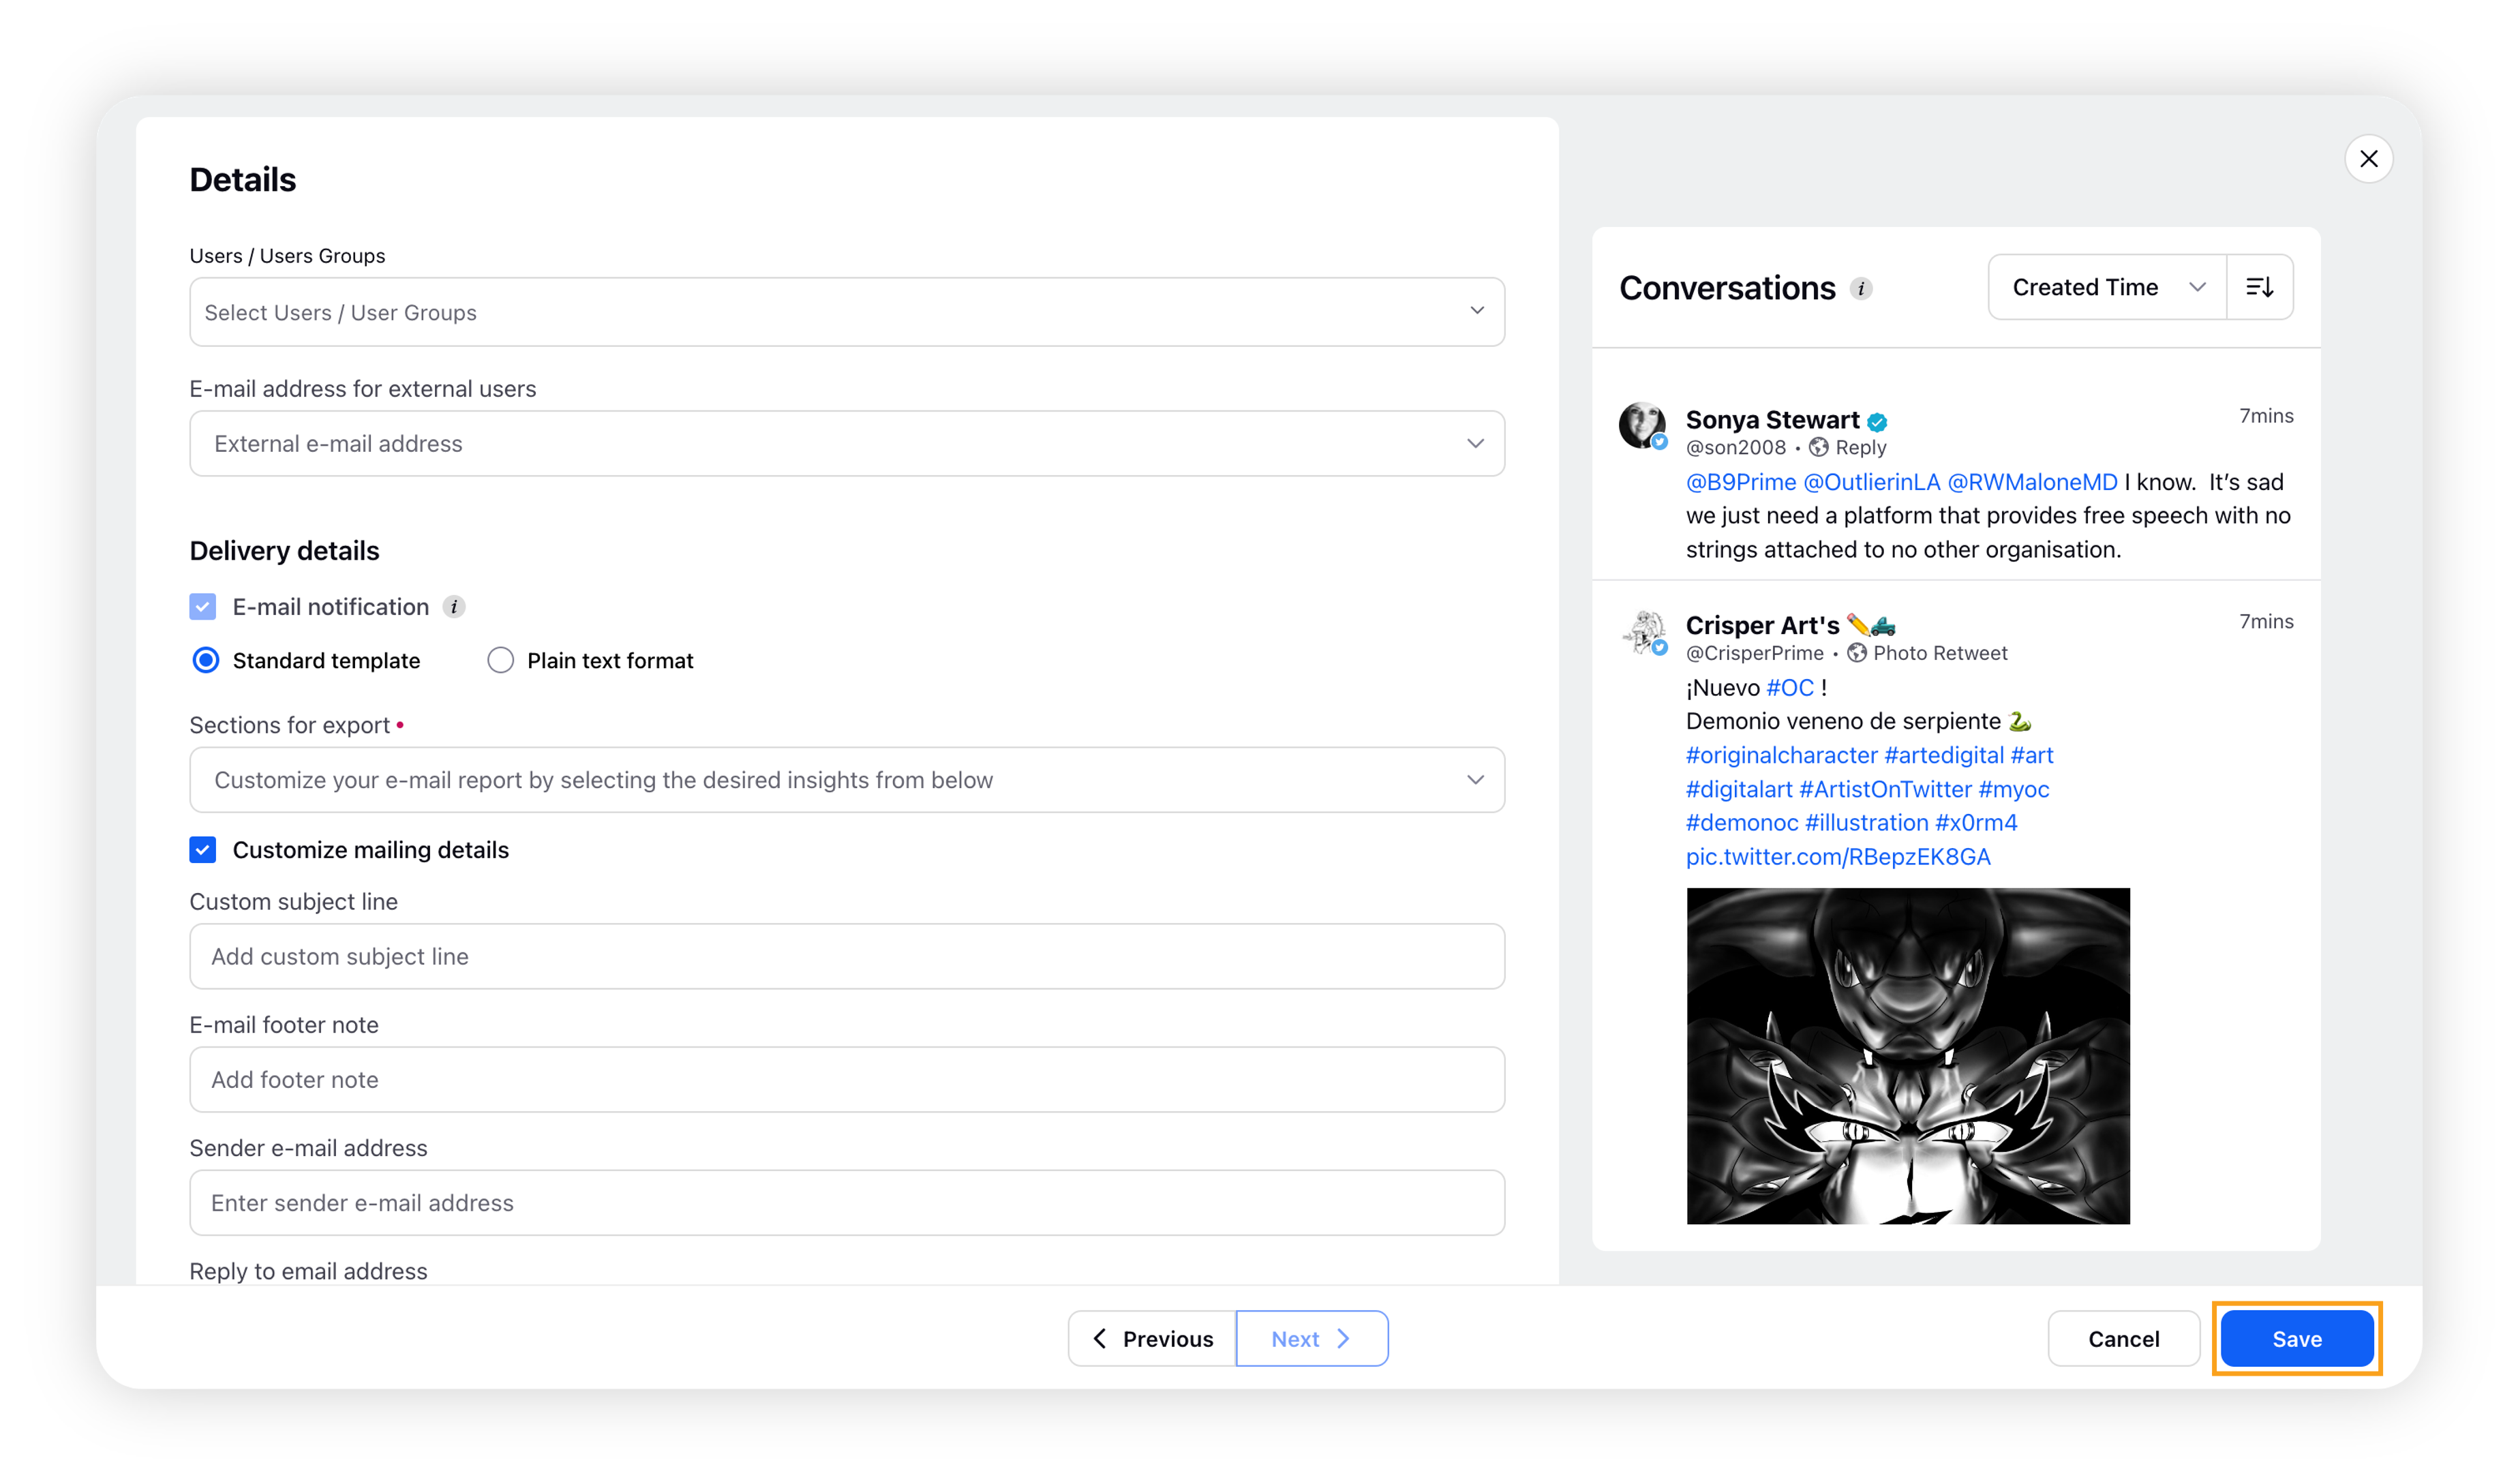
On the Details screen, enter the delivery details. For more information, refer to Scheduled Report Delivery Details.
Click Save in the bottom right corner to complete the process.
Scheduled Report – Fields Description
Tab #1 – Create a Scheduled Report
Term | Description |
Report Name | Enter a name for the report you are configuring. |
Add description | Enter the description (optional) for the report you are creating. |
Add tags | Select the tags (optional) for the report you are configuring. |
Module | Select the module you want to create a report for; only supported for the Listening module. |
Report Dimensions The report dimension filters will power the data on which reports will be triggered in your inbox | |
Select Filter | Select the desired dimension as a filter.
For example, if you select the Topic dimension, the values would be the topics. Or, if you select the Sentiment dimension, the values would be Negative, Neutral, Positive, and Uncategorized. |
Add New Filter | Click this option to add a new filter. You can add as many filters as you want to source the data and narrow it down to only the most relevant set. |
Add scheduling Details | This section allows the user to add details on the schedule of the summary report –
|
Refine report triggering | Refine the reports which you receive in your inbox. Enter the minimum number of mentions you at least need the report to capture before triggering an email to your inbox. |
Click Next to add of the Distribution details.
Tab #2 – Distribution details
Term | Description |
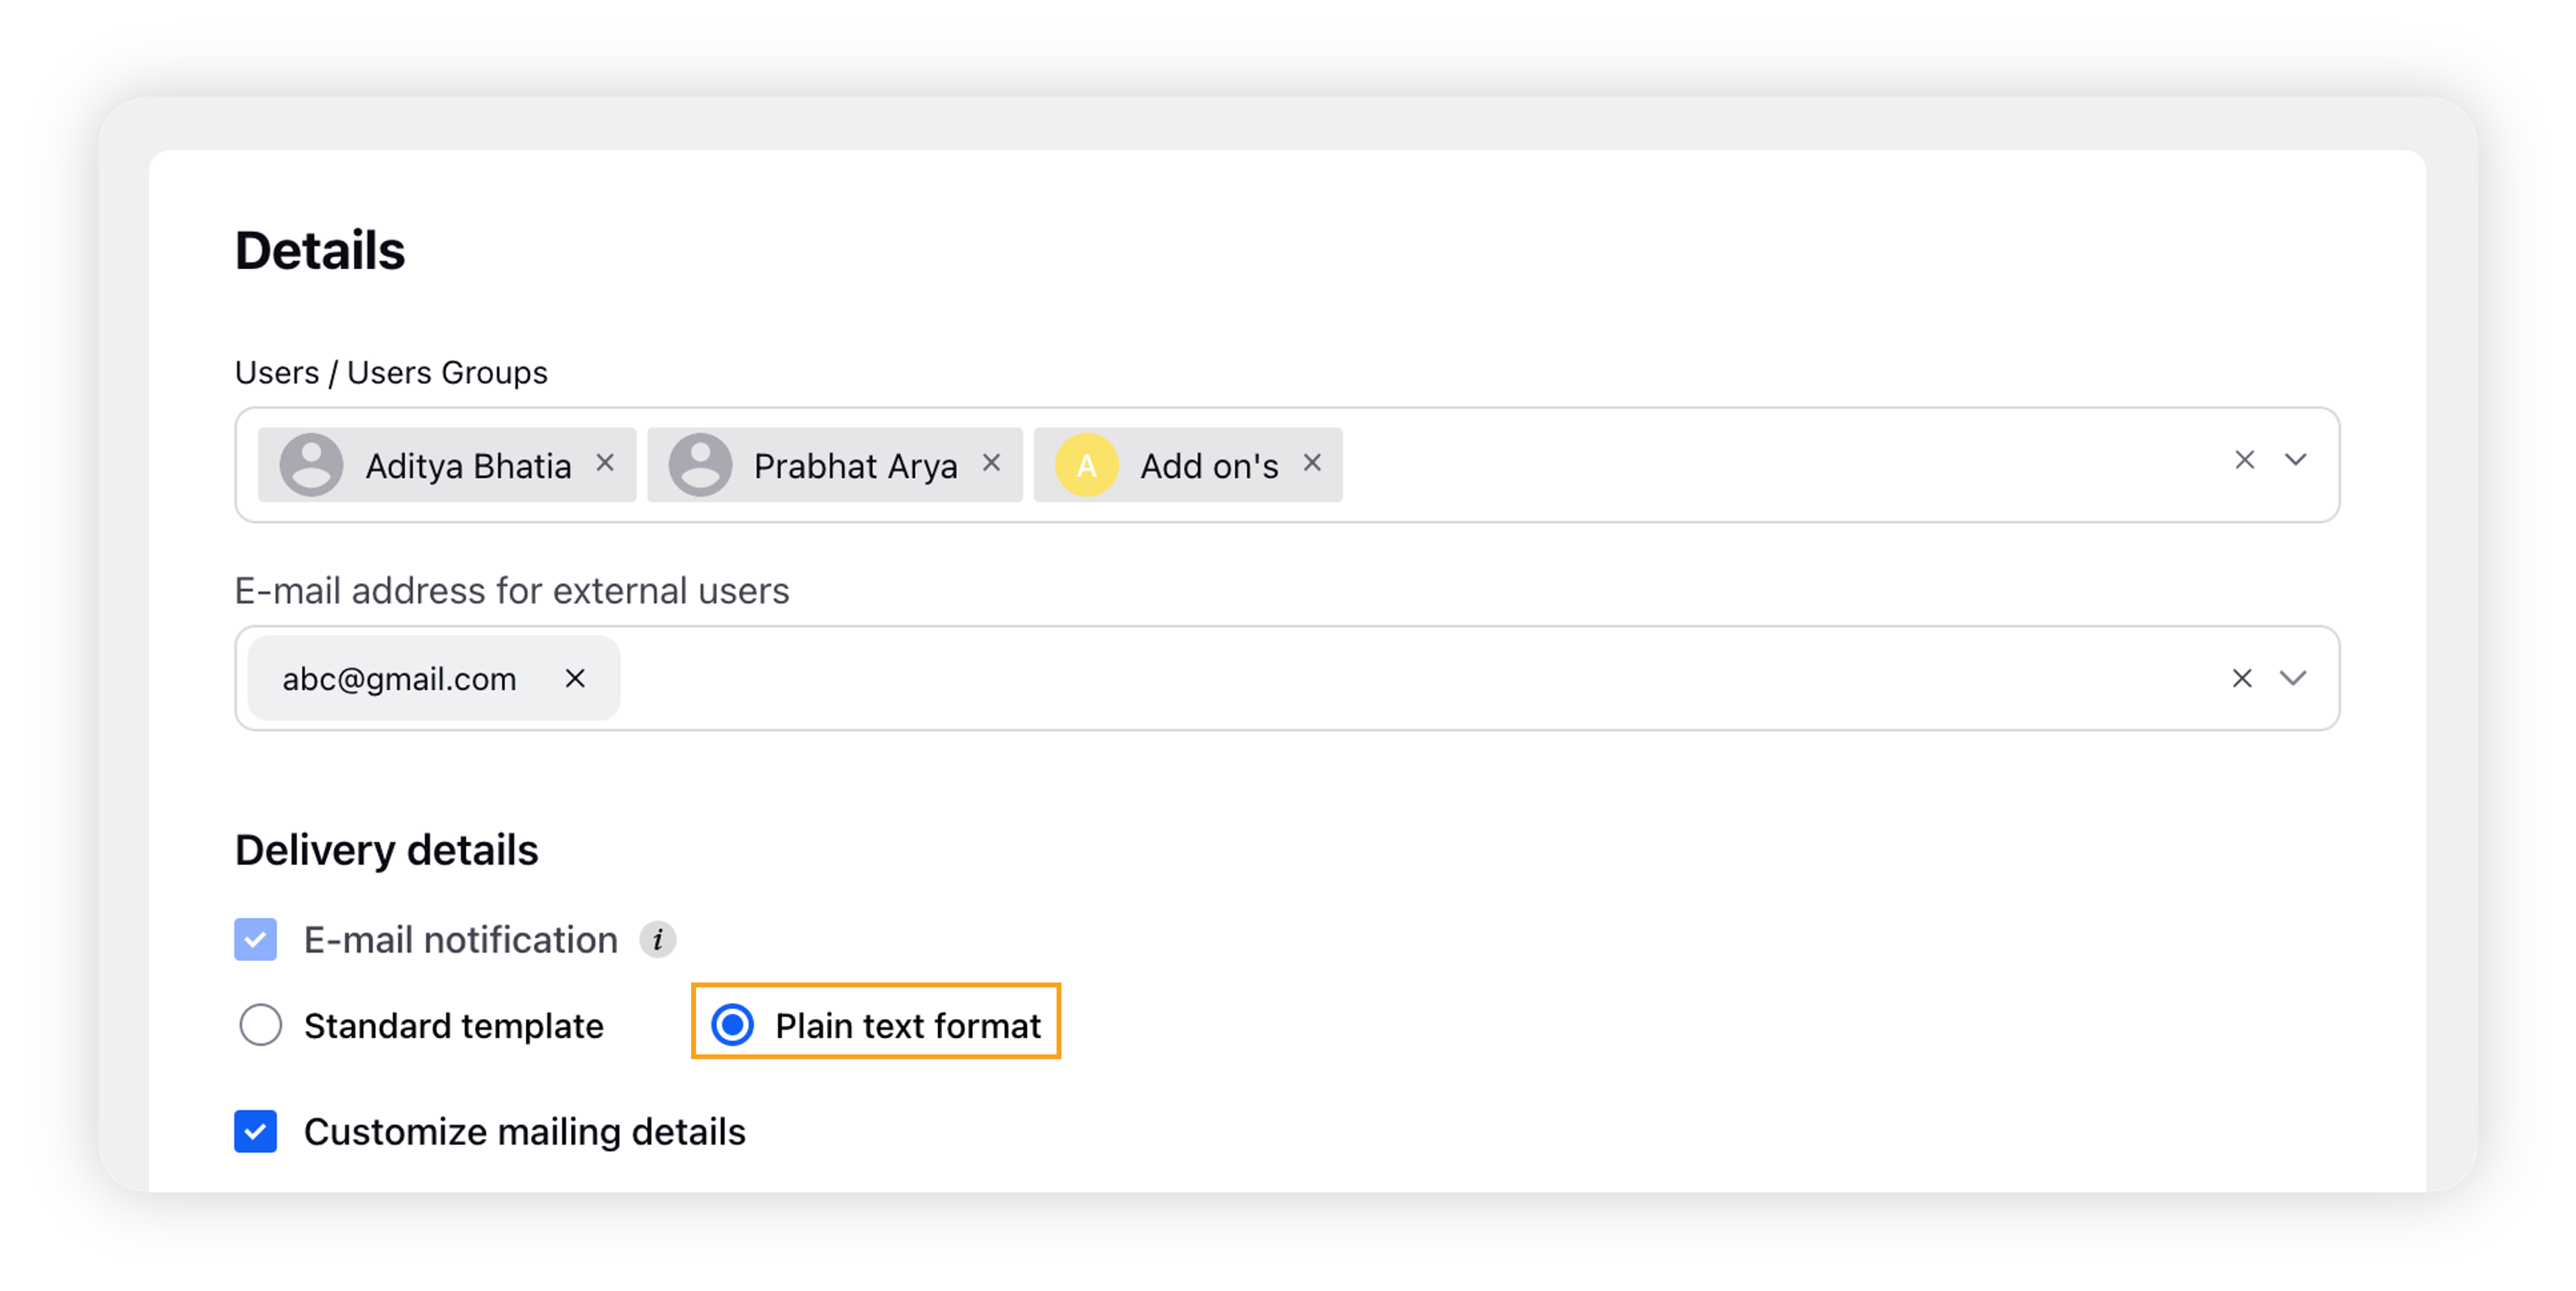
Select Users / User Groups | Select the users and/or user groups to whom you intend to send the report to |
External email address | You can add external users as recipients by entering their email addresses.
|
Email notification | This permits Sprinklr to send emails to the entered addresses. This is selected by default. You can choose from the following options –
|
Sections for export | Select the widgets you want to receive in the email report once triggered. The following options are available:
|
Customize mailing details | This option is selected by default –
|
Send Empty report | An empty report will be sent to your email if there is no volume of mentions at the scheduled time.
|
Time Zone in Scheduled Reports
The Time Zone field will allow you to set the desired Time Zone for your scheduled reports. However, the Scheduled Report's email will be triggered for all users at the same time. For example, the Scheduled Report for 5 PM GMT will be received by all users at the same time. Users in the GMT time zone will receive it at 5 PM while users in the IST time zone will receive it at 10:30 PM.

![]() Note:
Note:
The existing reports will keep triggering based on the time zone they were configured in. For example, if a Report is currently triggering at 5 pm IST, then it will continue doing so.
The Time Zone visible upon editing will be the same as the time zone in which the report was configured.
It will not automatically change to display the editor’s timezone. It will only change manually if the user who is editing the report wants to do so.
Plain Text Report
The Plain Text Report functionality allows you to send white-labeled emails (or in other words plain text snippets of conversation stream) to specific user/ user groups in the partner environment. By enabling the Plain Text Report option while creating a Scheduled Report, a white-label scheduled email report is triggered to the user/ user group upon meeting required alert conditions.
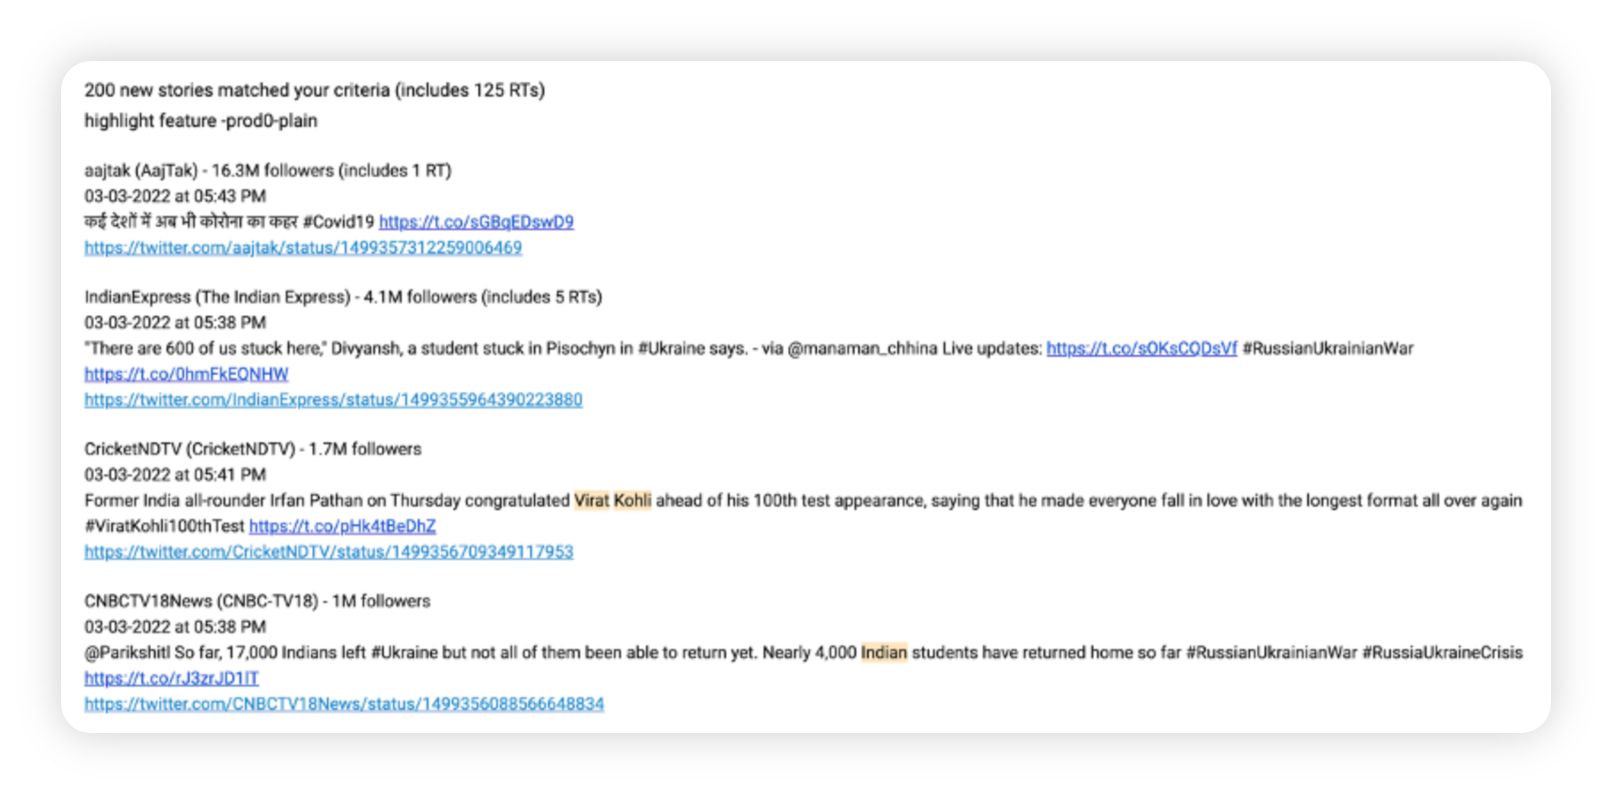
The Plain Text Report will contain –
Plain Text
URL/ permalink in the body of the email
No Images
Query Keyword Highlighting *
* While viewing plain text emails via Scheduled Reports, the matching keywords will be highlighted with the light pink background color. So, you can easily concentrate on the keywords that match the topic. Here, the matching keywords are related to a Topic, Topic Tag, Topic Group, Theme, and Keyword List.
What does Plain Text Report option do?
Only plain text conversations will be sent to the email receiver matching the criteria
Strip all widgets from the templated report
Strip any header summary text present in the templated report
Include only relevant details like
<N> mentions matching the alert criteria
Top posts (sorted by engagement & descending time)
Individual plain-text posts containing details for –
Author
Author Followers (wherever applicable)
Timestamp White Label Content with No rich-text
No Media No upfront engagement stats
No CTA for View Post
Instead a URL/ permalink of the post at the end of content
Character limit of 350 characters
![]() Note: In your Scheduled Report Emails, you will also see a link to access the associated Dashboard with your filters pre-selected.
Note: In your Scheduled Report Emails, you will also see a link to access the associated Dashboard with your filters pre-selected.