Filter out irrelevant data for accurate brand insights in AI Studio
Updated
Sprinklr’s AI Studio can be utilized for brand disambiguation purposes. This will involve distinguishing between messages that mention a particular brand and those that do not.
For instance, if a message contains the word "apple," it may refer either to the fruit or to the brand "Apple." In this scenario, a classification model is necessary to accurately identify the intended meaning of the message.
Using Sprinklr AI Studio, it is possible to train and deploy a classification model to classify such messages on a large scale. By doing so, businesses can more effectively identify and categorize relevant messages that mention their brand, which can provide valuable insights and inform decision-making across different departments. This helps to ensure that businesses can keep a pulse on their brand's online reputation and respond appropriately to customer feedback or inquiries.
By leveraging the Single Select Classifier model, businesses can efficiently filter and prioritize their social media mentions, allowing them to quickly respond to customer inquiries, identify emerging trends, and gain valuable insights into customer sentiment towards their brand.
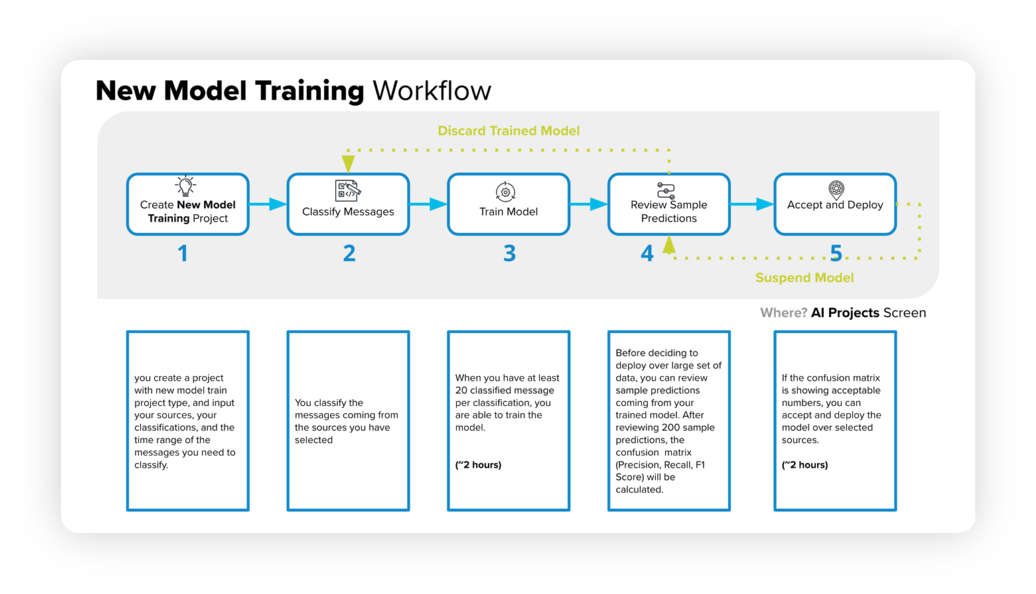
The below diagram will help you understand the New Model Training workflow –
Creating a new project
We start by creating a new Single Select Text Classifier project. This will enable you to filter out irrelevant terms for your brand or industry without the need for manual rule implementation or keyword maintenance.
We start by creating a new Text Classifier (Single-Select). For a comprehensive guide on creating a new model training project, refer to the KB article - Create a New Model Training project for Text Classifier.
The article will walk you through the entire workflow and provide step-by-step instructions.
Classifying text messages
The next step is to classify text messages which will be used for model training. The following KB article – How to classify messages and train model describes how to classify text messages after creating a new text classifier project in AI Studio.
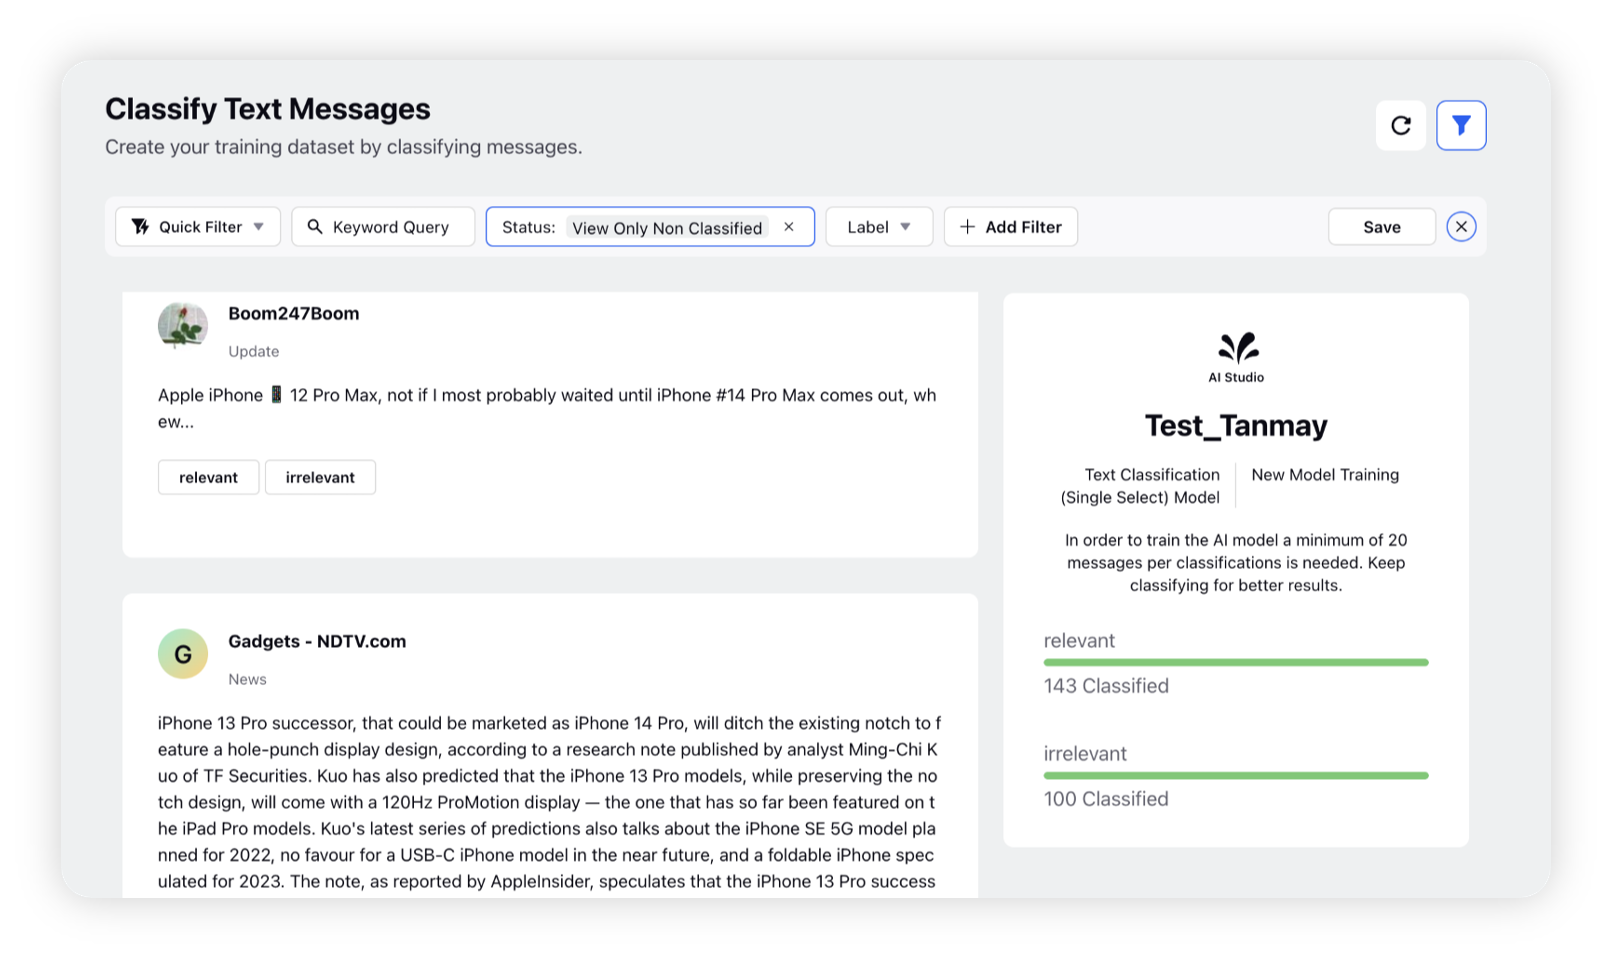
For example, you can classify the messages this way –
Message | Classification |
The @apple account would have many more followers if it posted content | relevant |
Apple and Google are working together on a new effort to help limit the risk of Bluetooth devices like AirTags being used for unwanted tracking. cnn.it/3VvKpJT | relevant |
Reynard the Fox, perfect to read under a blossoming apple tree | irrelevant |
I love the new Apple Watch | relevant |
I brought apple sauce into work and they gave me a helmet | irrelevant |
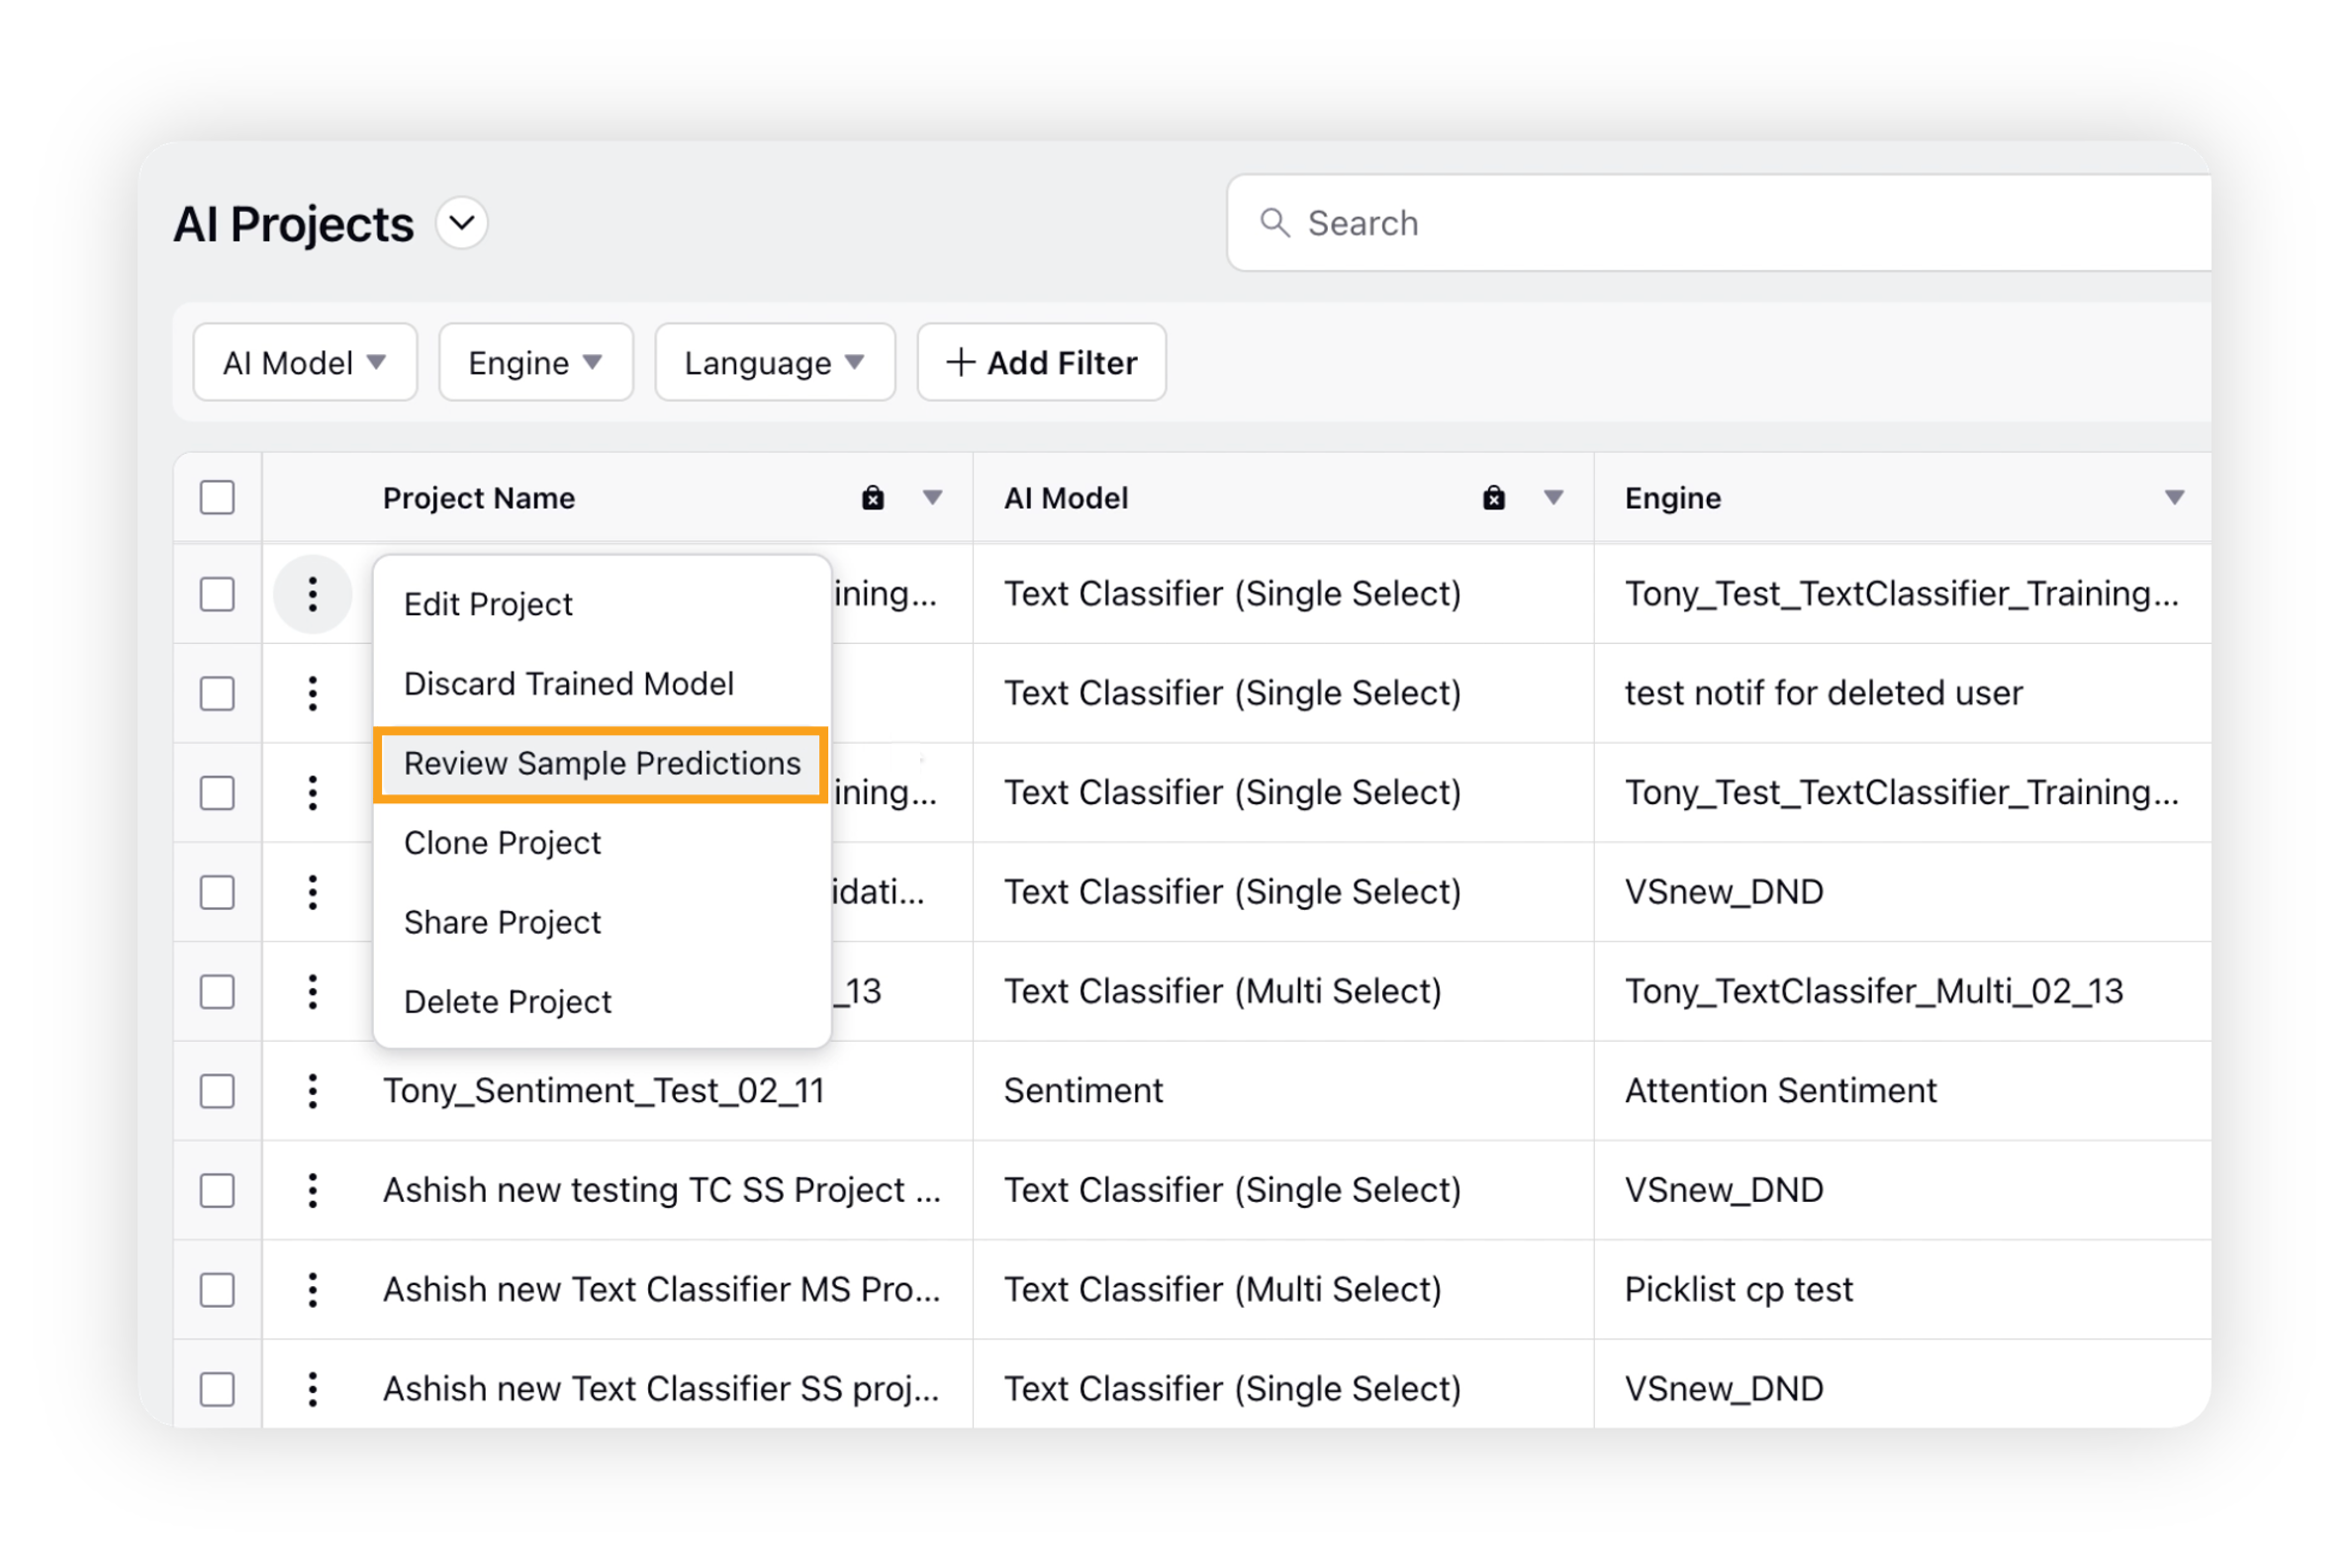
To review and approve sample predictions.
Navigate to the AI Projects window and select the Options icon next to your AI project. From the dropdown menu, choose Review Sample Predictions.
On the Review and Approve Sample Predictions window, you can evaluate the AI Model's predicted results by providing feedback on the accuracy of each message's classification.
If you believe the prediction is correct, click the Approve button. If you think the classification is incorrect, choose the correct label for the message and click Approve.
 Note: To ensure accurate results, you should review and approve at least 200 messages.
 Once you have approved at least 200 messages, the Accept and Deploy button will appear. Click it to deploy the trained model.
To know this process in detail, refer the KB Article – Validate predictions of the new model and deploy and Editing and suspending the model.
After you successfully deploy this model, you can use this custom field in several places across the platform. See below sections for reference.
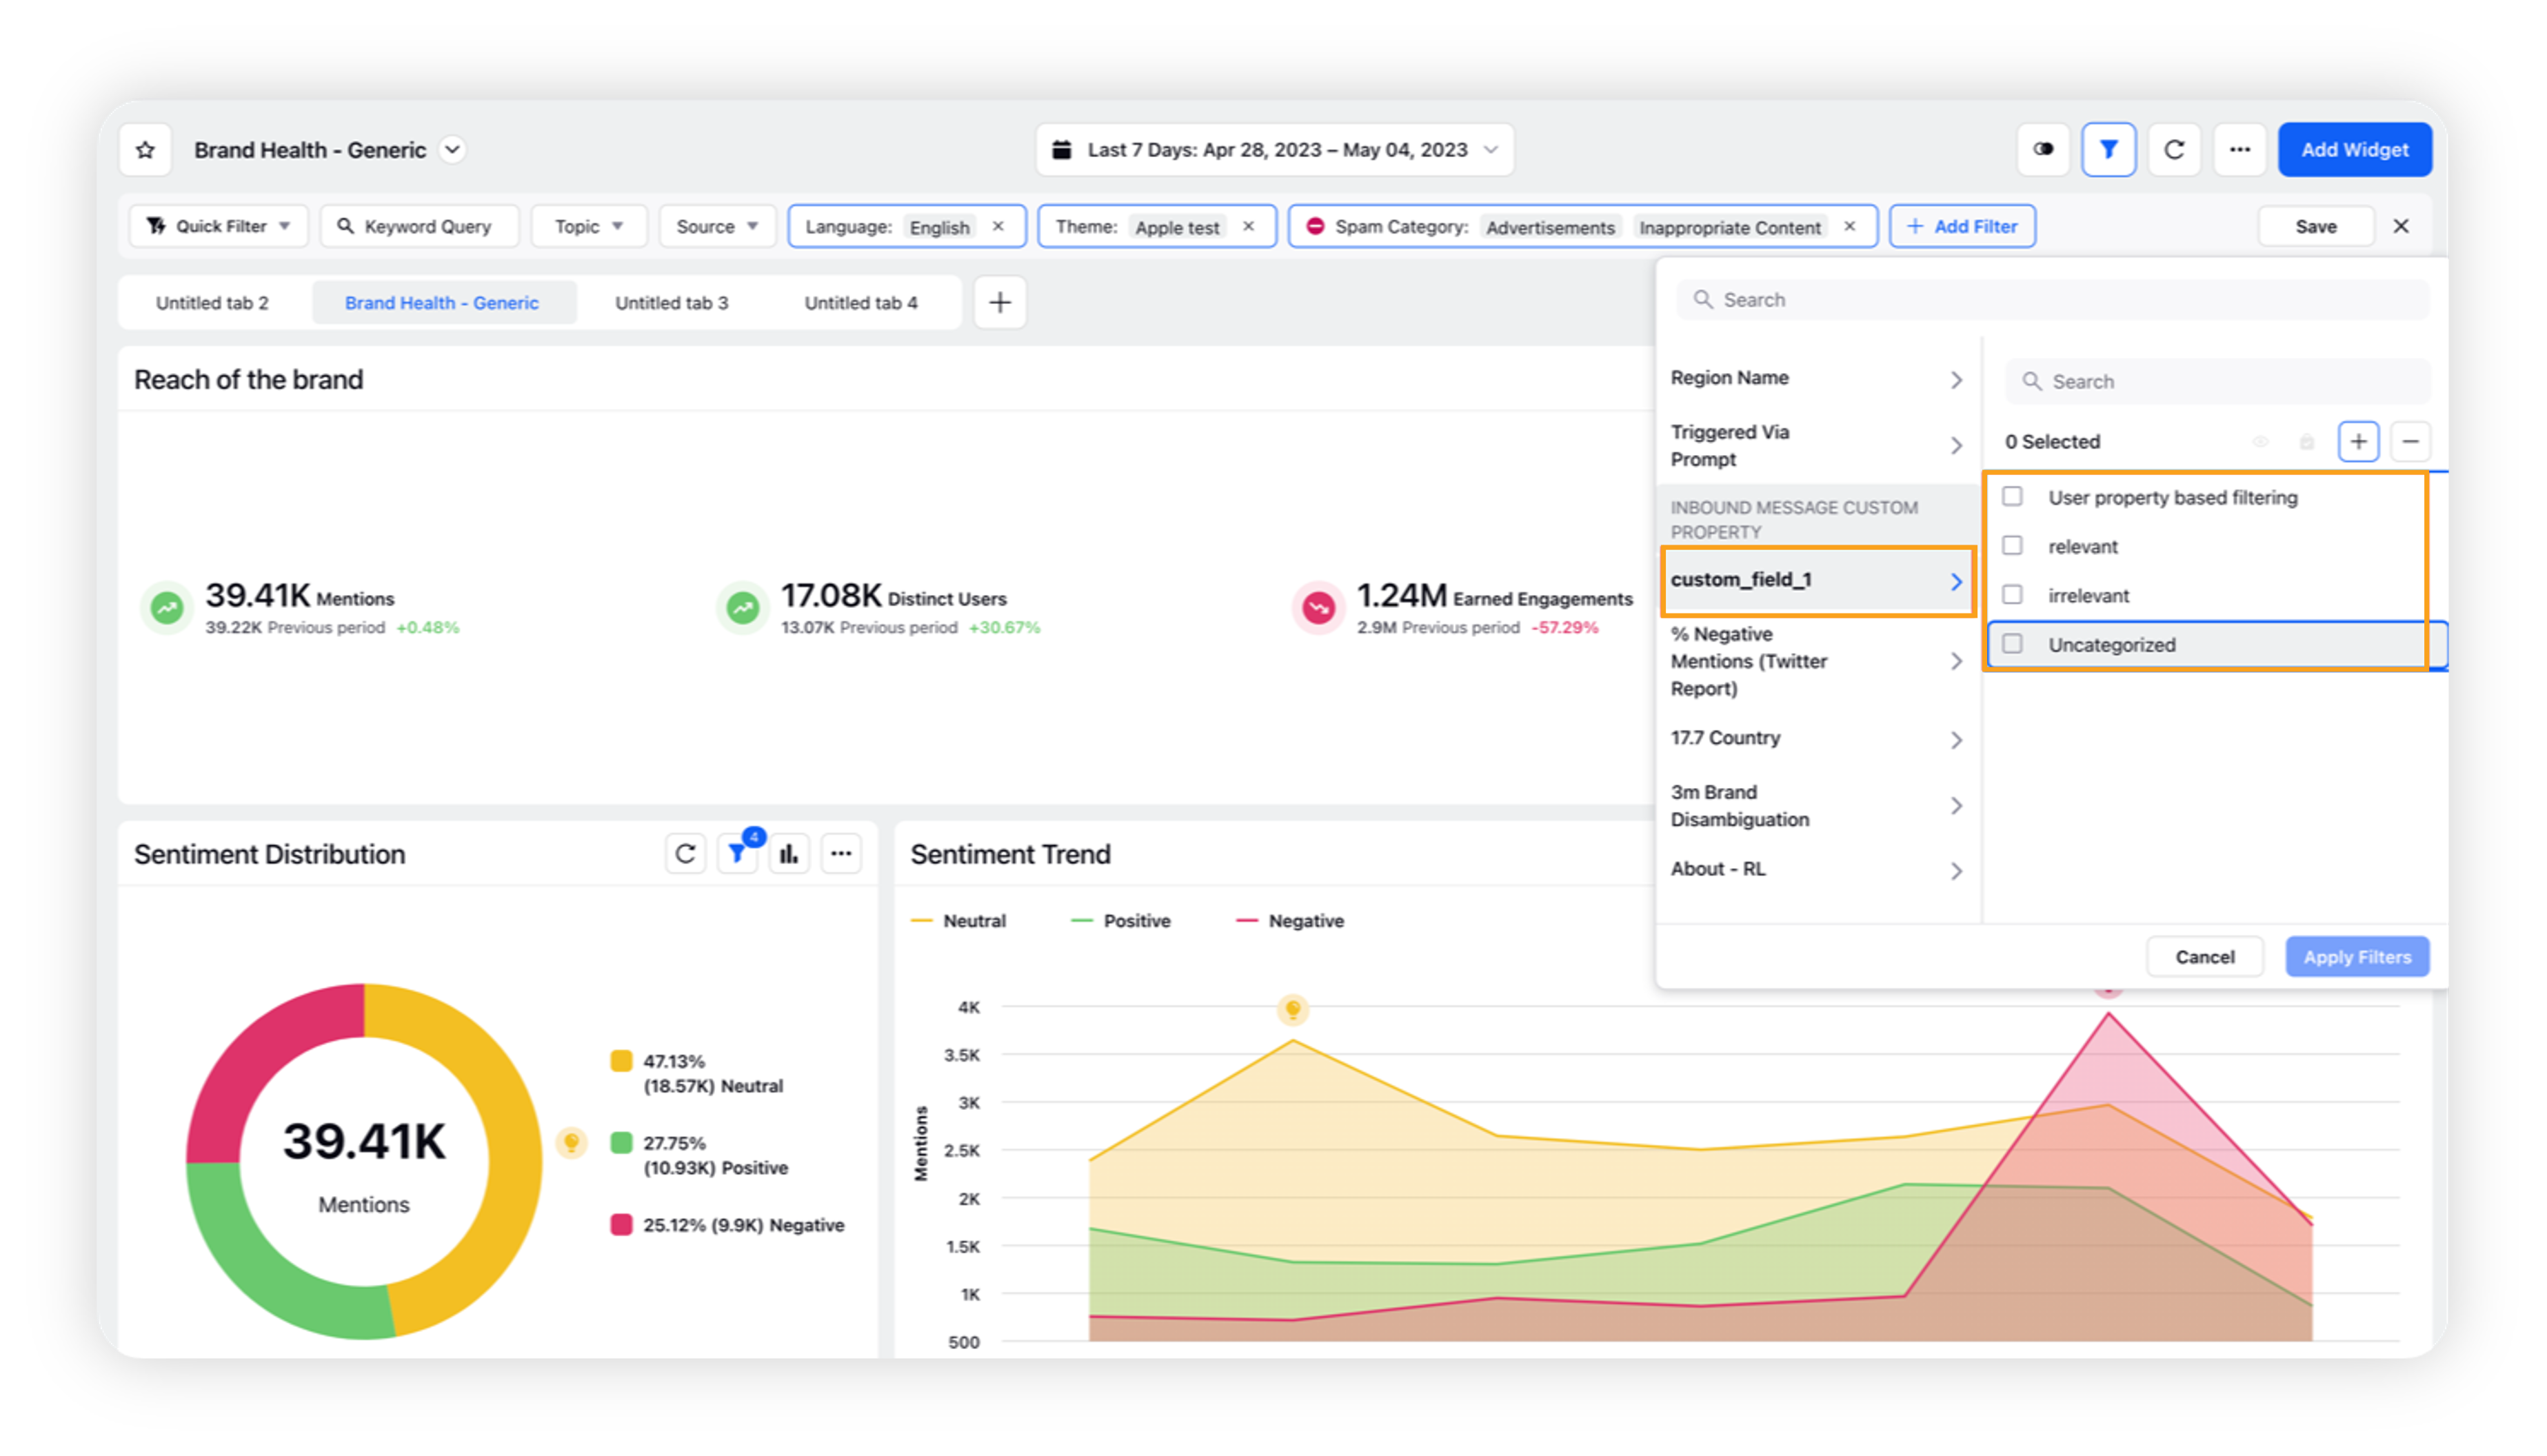
How to use the custom field in a Listening dashboard?
Create a Listening dashboard with the required widgets.
Go to Add Filter and search for your custom field.
Use it to filter the dashboard with the appropriate values.
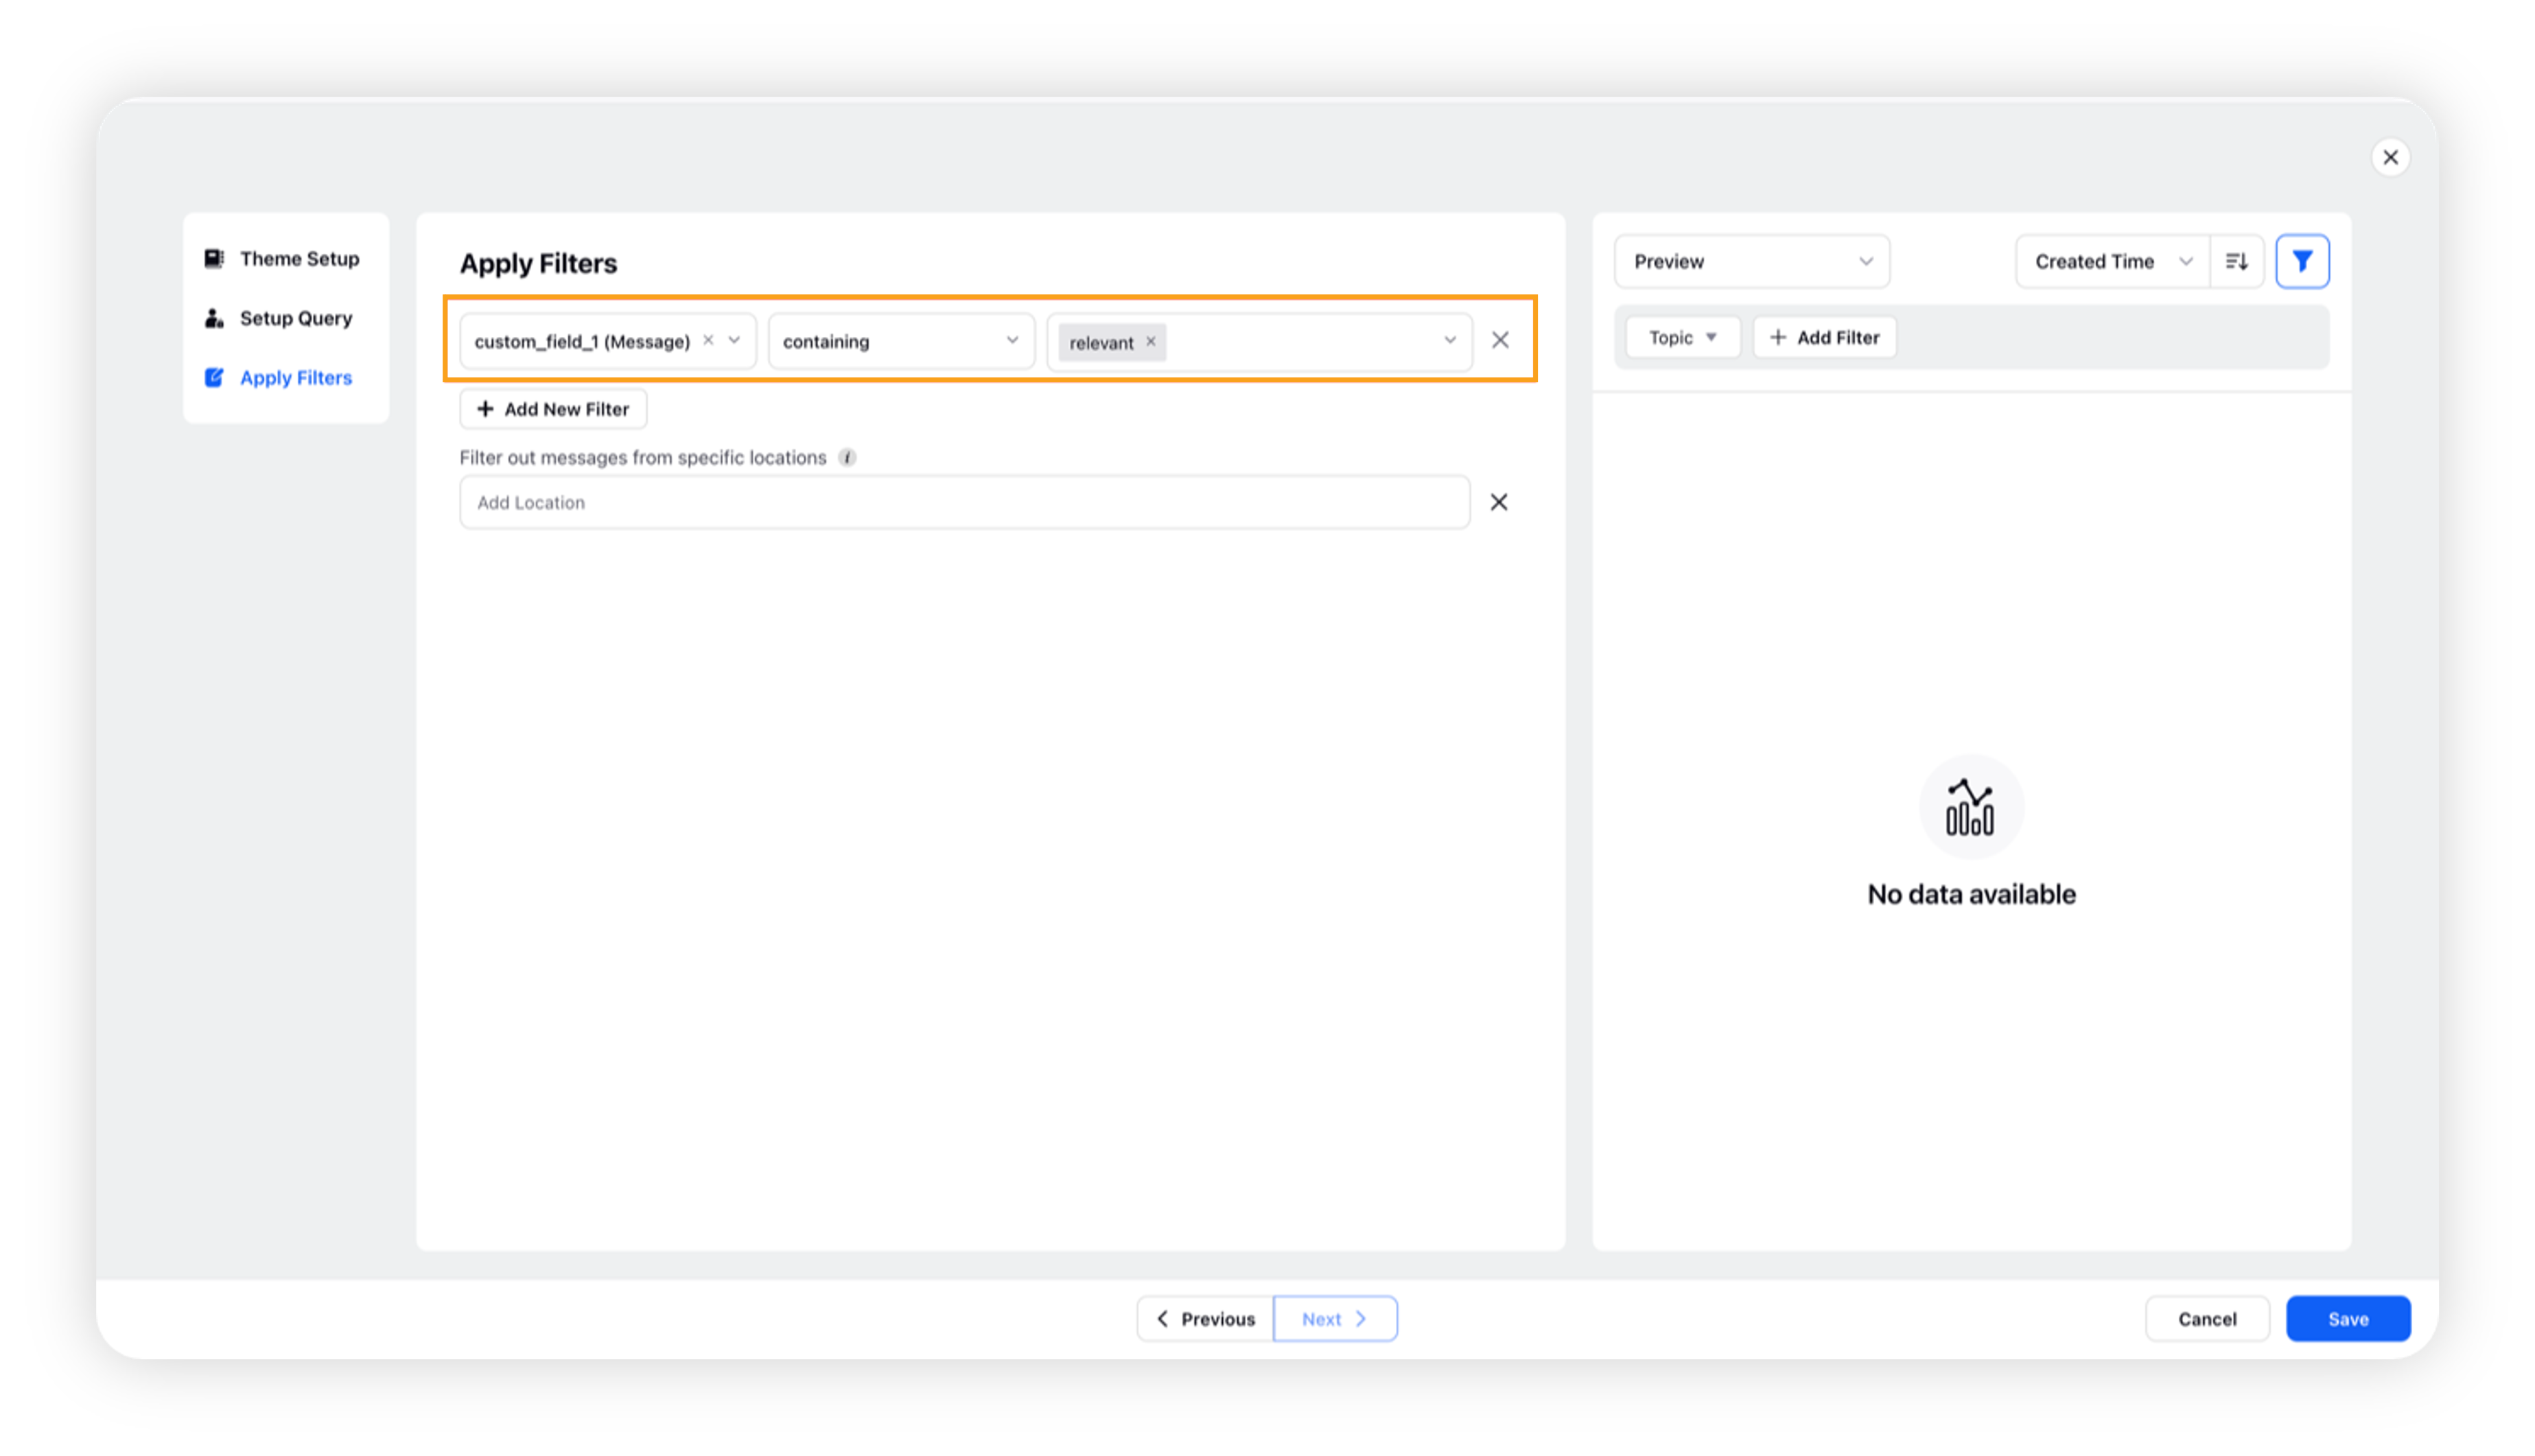
How to use the custom field in Theme creation?
When creating a new theme, it can be helpful to use custom fields as filters to ensure that the topic is relevant and easily searchable.
Simply apply the custom field as a filter while creating the Theme.