Build an AI model to segment and action on potential leads
Updated
To effectively manage potential sales leads, it can be useful to segment incoming messages into different categories. One way to do this is by using Sprinklr AI Studio to build a model that can automatically classify messages into specific categories.
Using Sprinklr’s Multi Text Classifier, the model can be trained to categorize messages based on their content and context. Categories might include inquiries from potential customers, requests for information about your products or services, sales pitches from other companies, or customer complaints.
To build an effective model, you will need to train it on a representative dataset that includes messages from all the different categories. Once the model has been trained, it can be used to automatically classify new incoming messages.
By automatically routing messages to the relevant teams based on their category, you can ensure that leads are followed up on quickly and efficiently. This can help to streamline your sales process, improve customer satisfaction, and ultimately drive more revenue for your business.
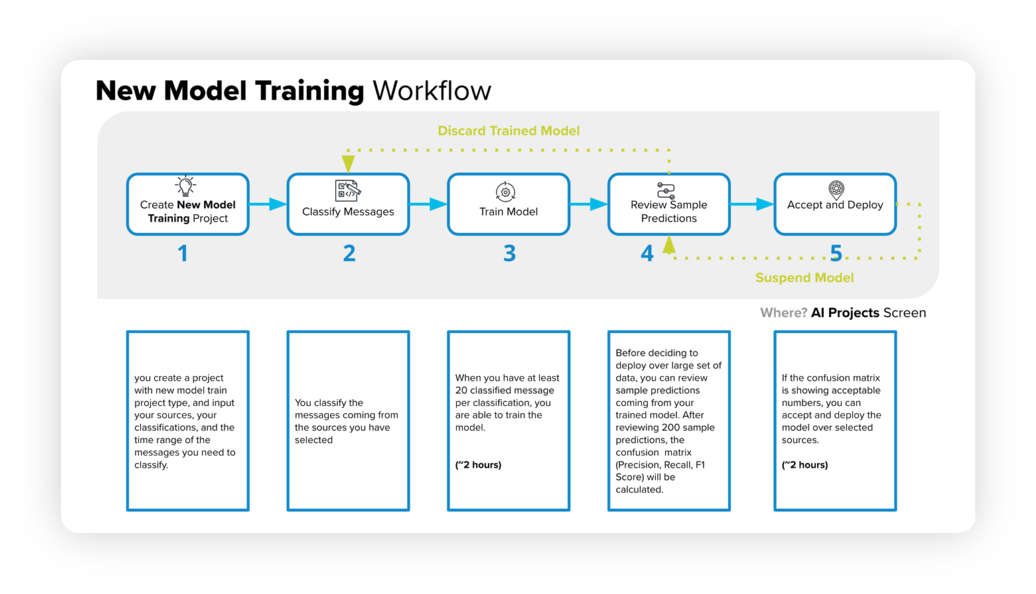
The below diagram will help you understand the New Model Training Workflow –
Creating a new project
We start by creating a new Text Classifier (Multi-Select). For a comprehensive guide on creating a new model training project, refer to the KB article - Create a New Model Training project for Text Classifier. The article will walk you through the entire workflow and provide step-by-step instructions.
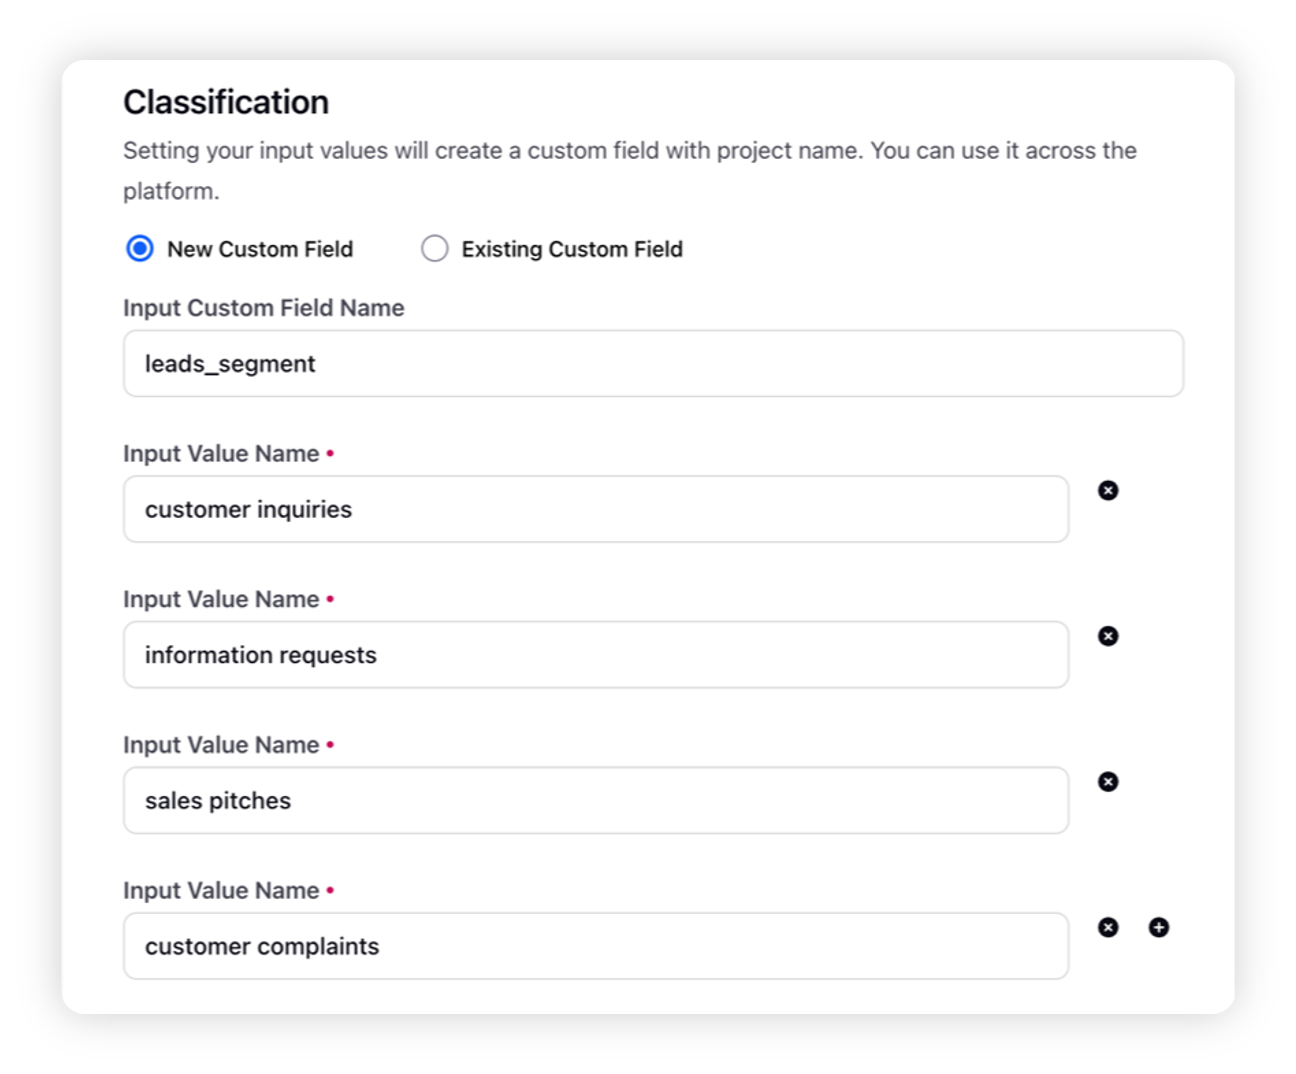
For example, while creating the model you could create Custom field classifications this way – Customer inquiries, information requests, sales pitches, customer complaints.
Classifying text messages
The next step is to classify text messages which will be used for model training. The following article – How to classify messages and train model describes how to classify text messages after creating a new Text Classifier project in AI Studio.
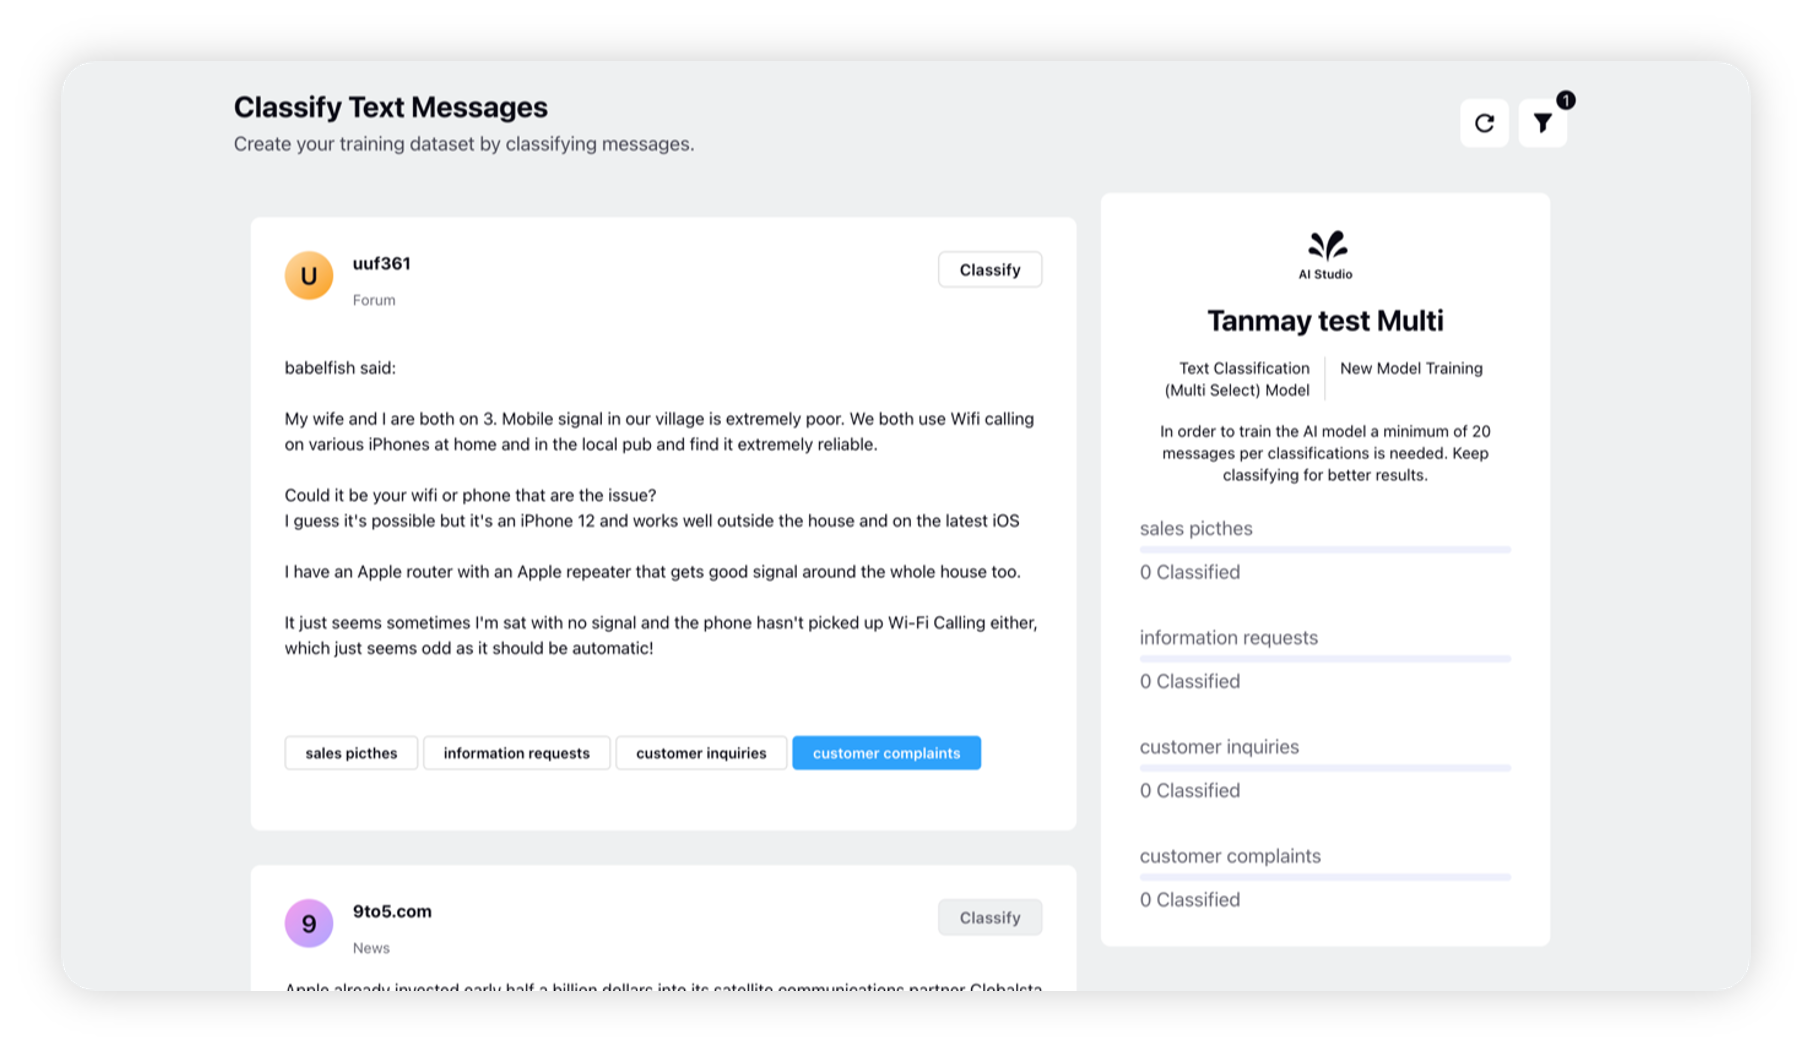
Classify the messages as per your requirements from the model.
For example, you can classify the messages this way –
Message | Classification |
Hey @Tesla, I'm interested in purchasing a Model 3. Can you tell me more about the different customization options? | Customer inquiries, information request |
Not impressed with the customer service at @Tesla. Trying to get a refund for a faulty part has been a nightmare. | Customer complaint |
Hey @Tesla, our company manufactures high-quality brake pads for electric vehicles like your Model 3. Would you be interested in learning more about our products? | Sales pitch, information requests |
Although we have a fondness for Tesla cars, we believe that their interiors could benefit from some enhancements. Our organization specializes in providing customized Tesla interiors that feature top-notch leather upholstery. @Tesla. | Sales pitch, customer complaints |
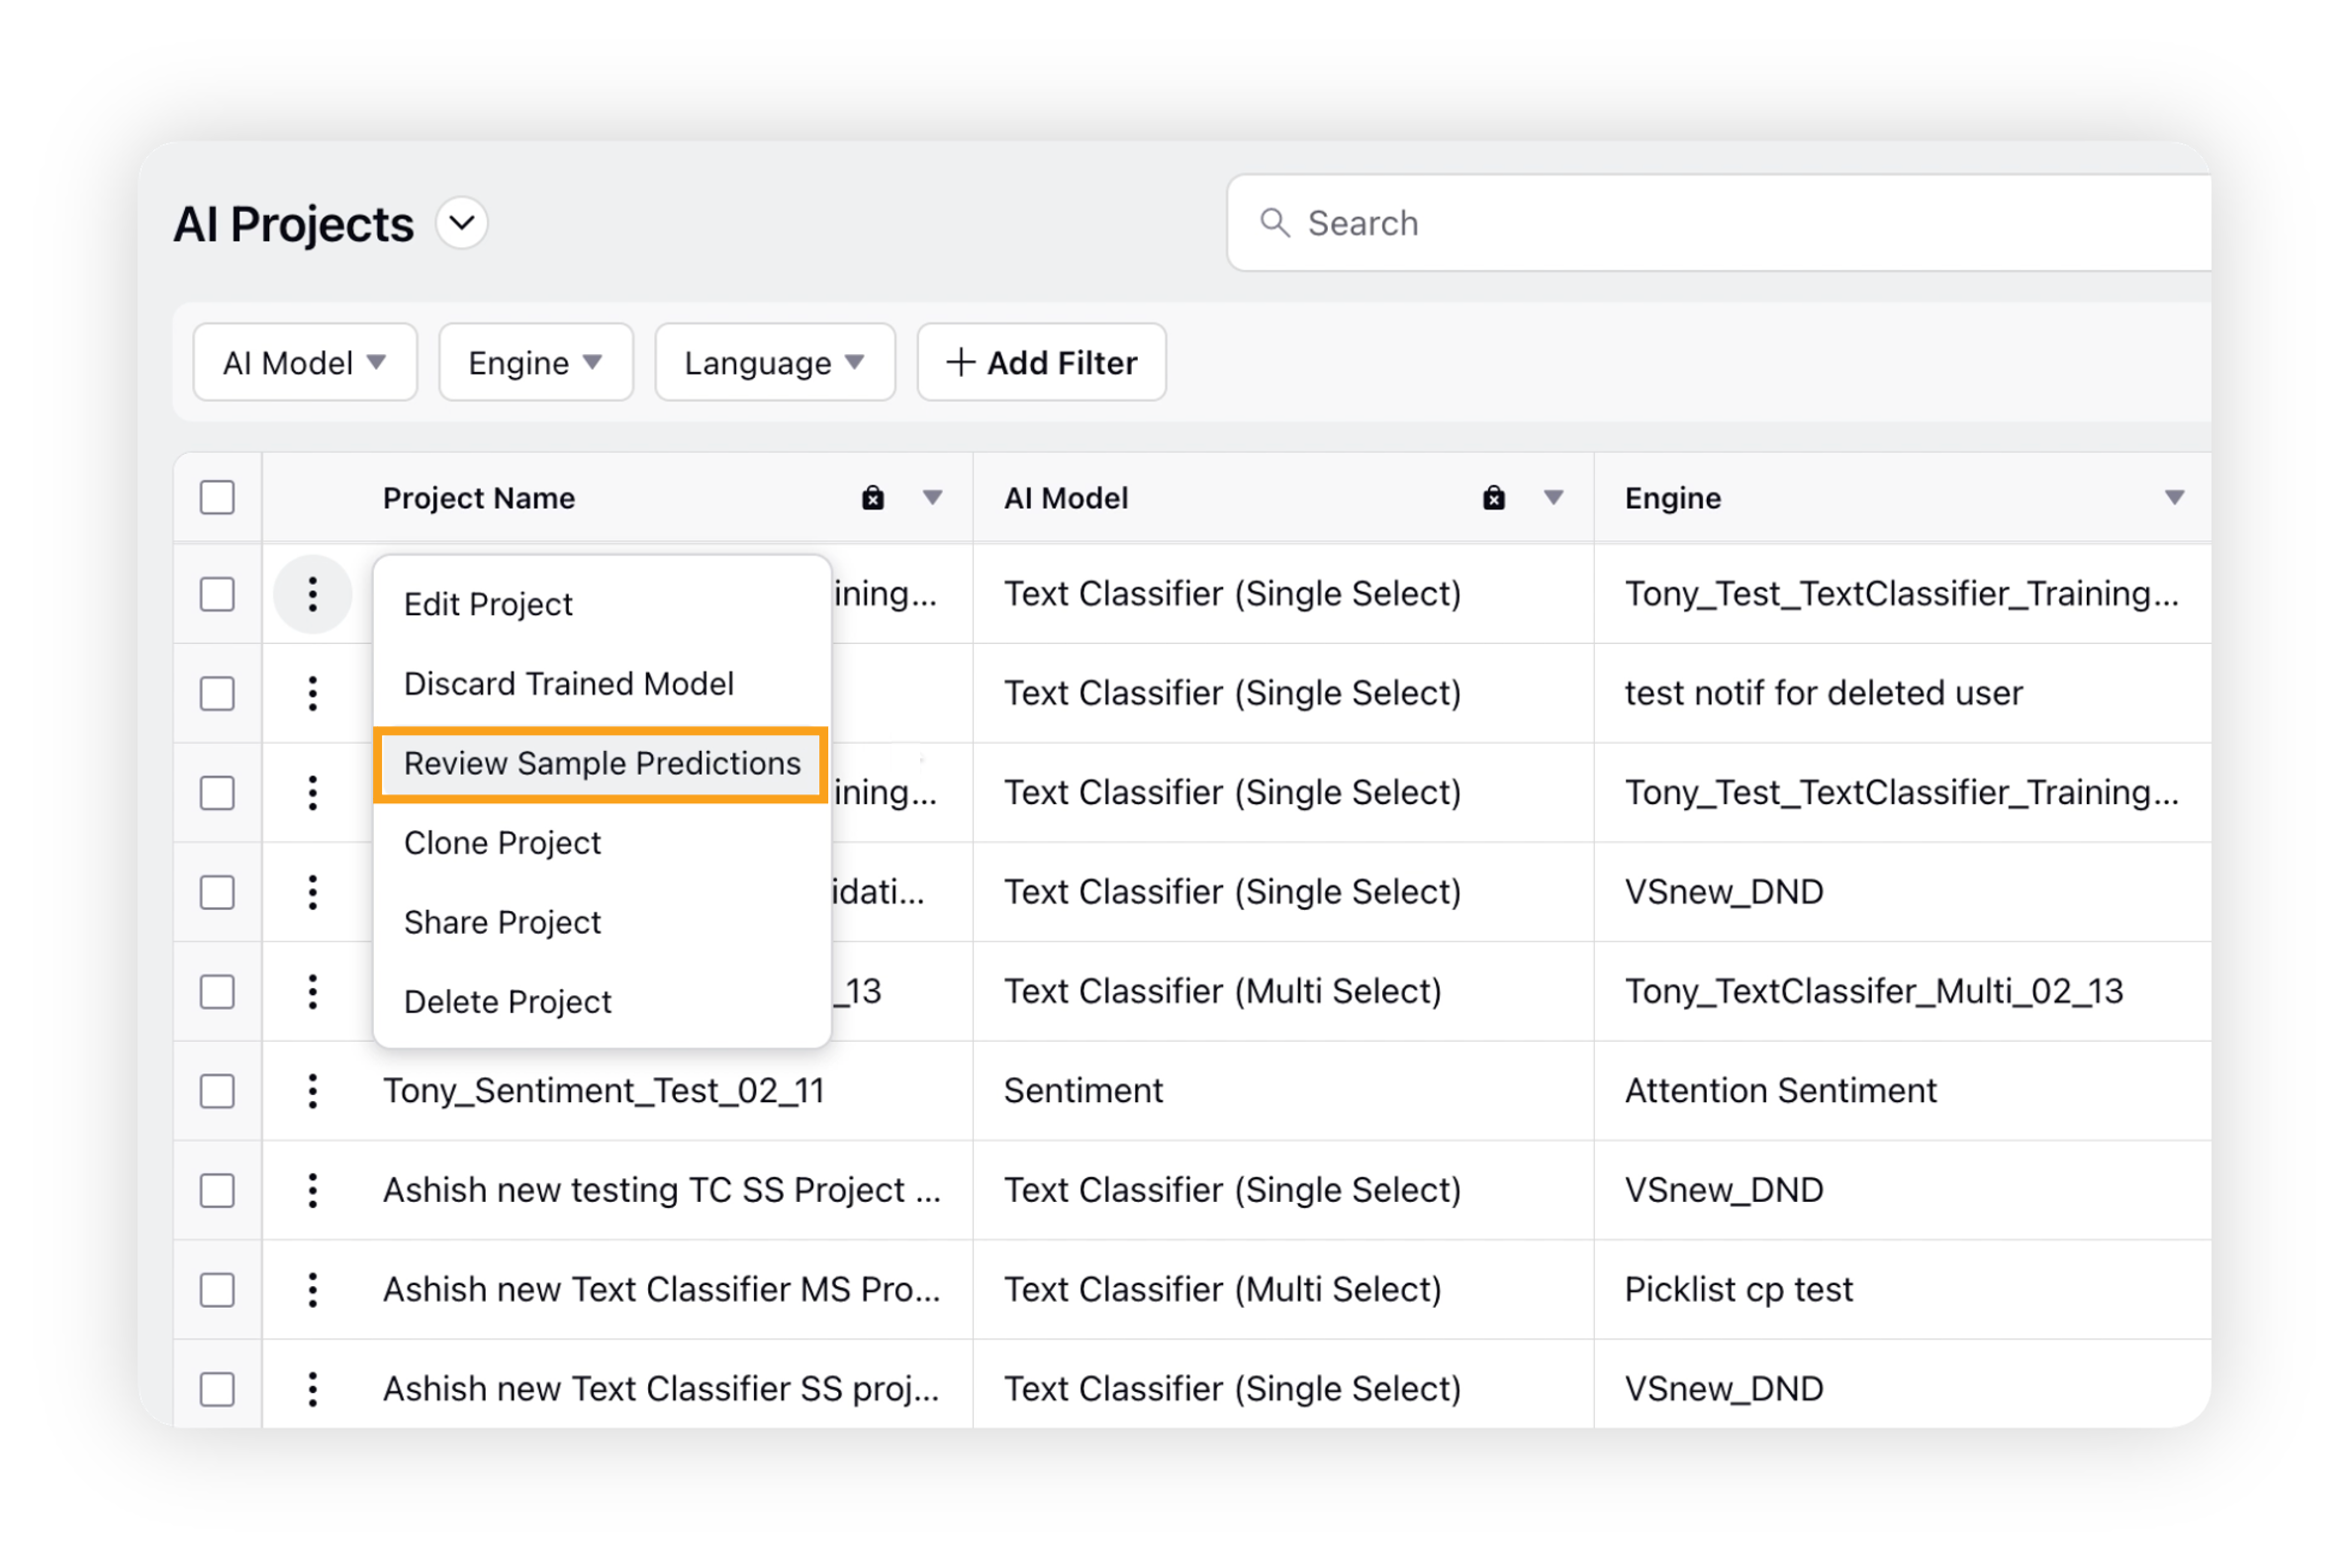
To review and approve sample predictions
Navigate to the AI Projects window and select the Options icon next to your AI project. From the dropdown menu, choose Review Sample Predictions.
On the Review and Approve Sample Predictions window, you can evaluate the AI model's predicted results by providing feedback on the accuracy of each message's classification.
If you believe the prediction is correct, click the Approve button. If you think the classification is incorrect, choose the correct label for the message and click Approve.
 Note: To ensure accurate results, you should review and approve at least 200 messages.
 Once you have approved at least 200 messages, the Accept and Deploy button will appear. Click it to deploy the trained model.
To know this process in detail, refer to these articles – Validate predictions of the new model and deploy and Editing and suspending the model.
After you successfully deploy this model, you can use this custom field in several places across the platform. See below sections for reference.
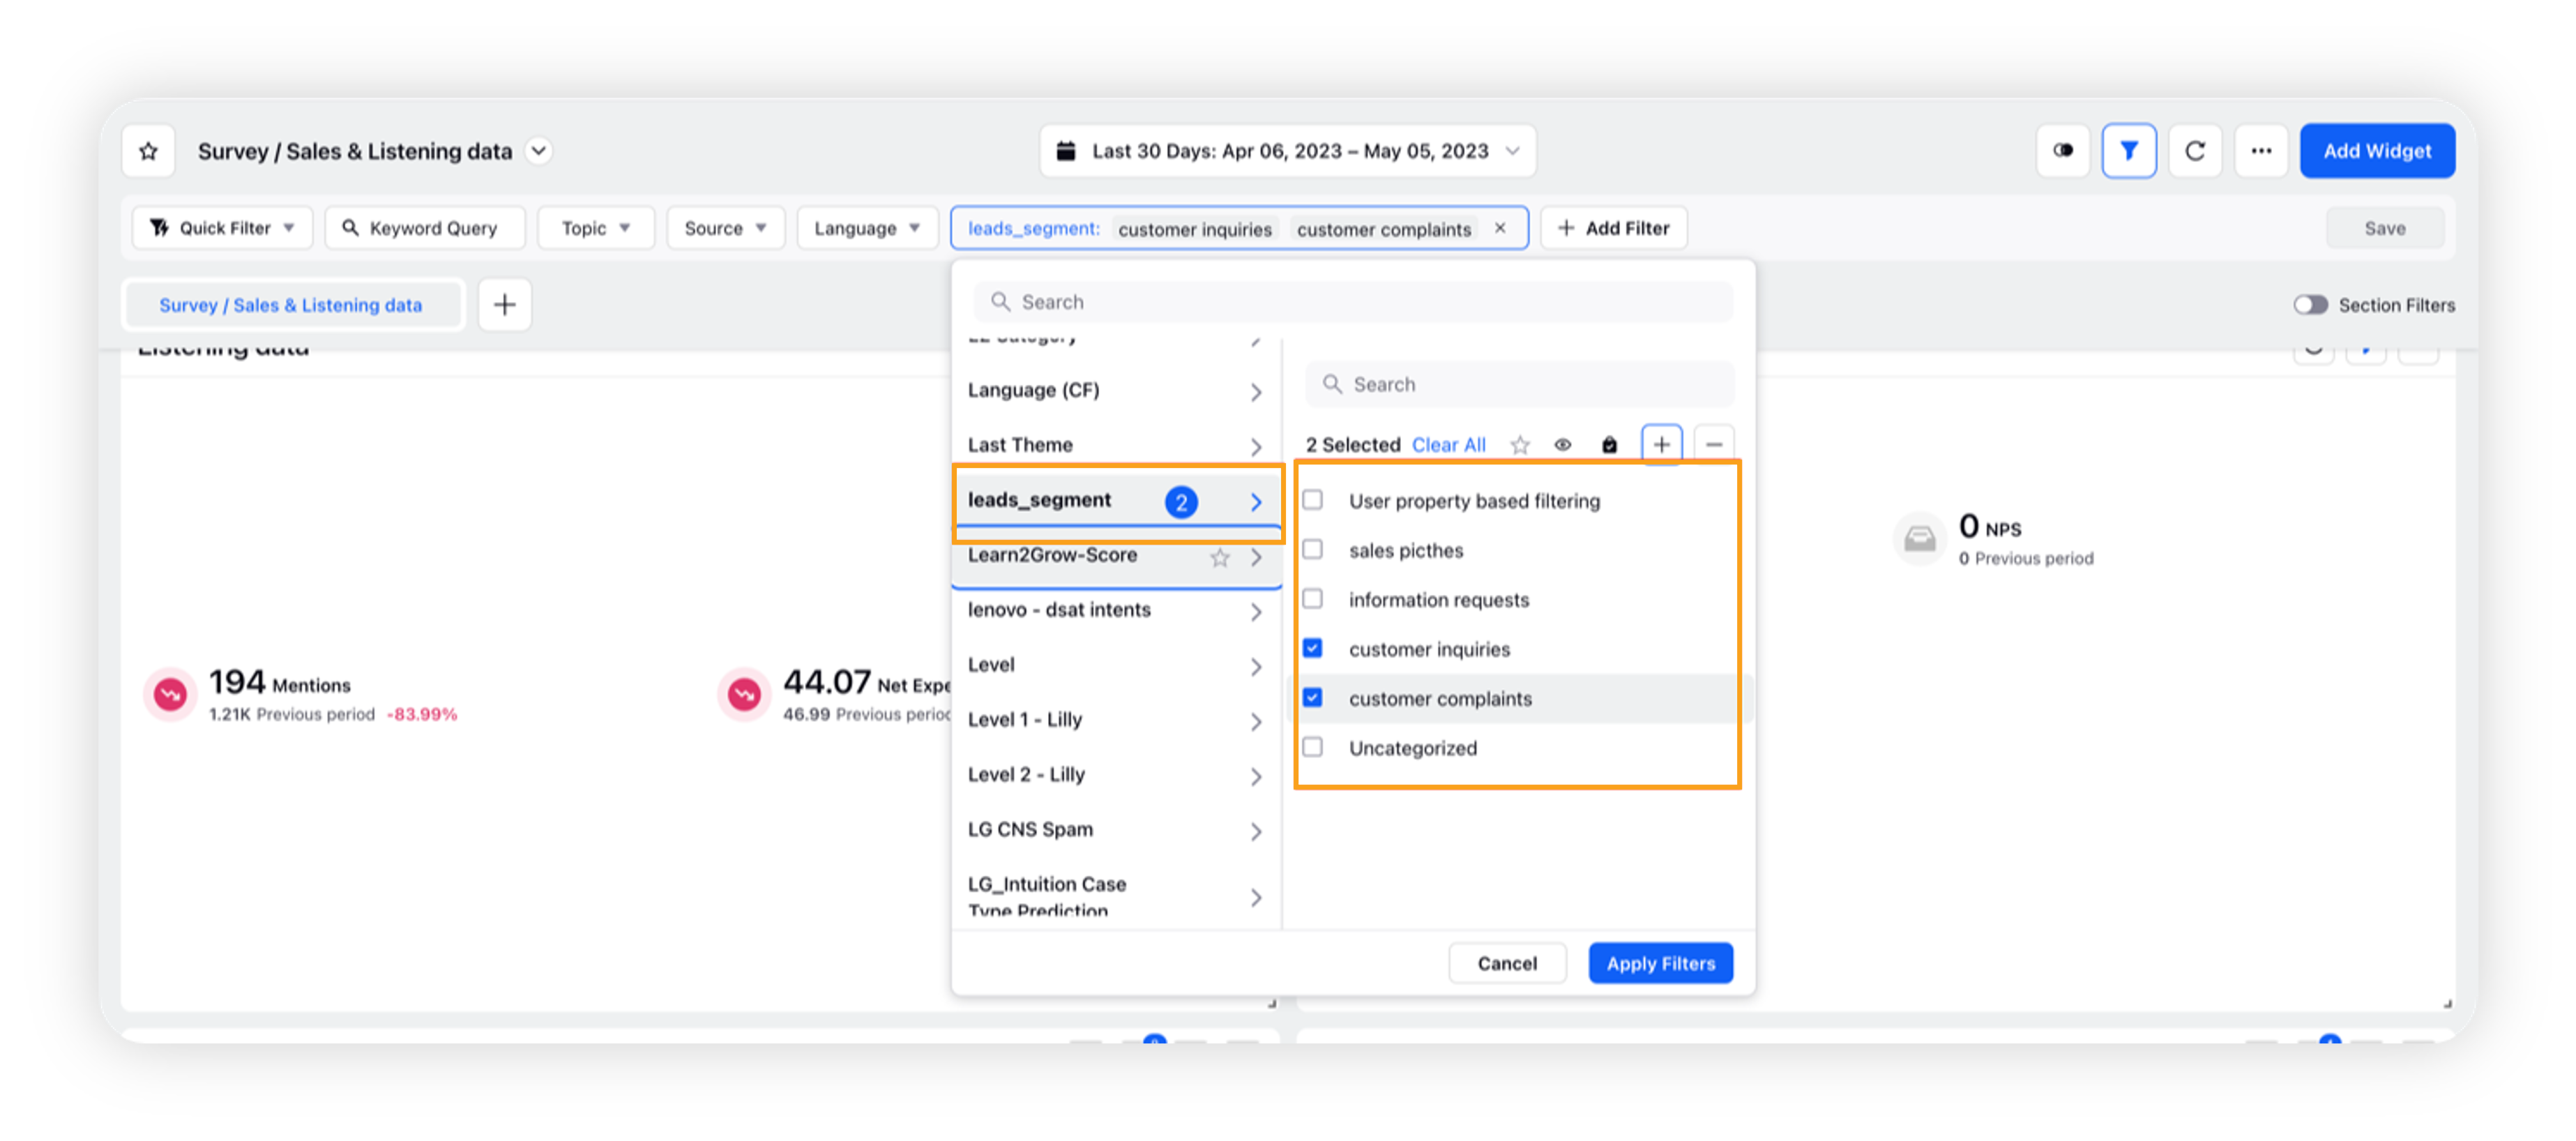
How to use the custom field in Listening dashboards?
Create a Listening Dashboard with the required widgets.
Go to Add Filter and search for your custom field.
Use it to filter the dashboard with the appropriate values.
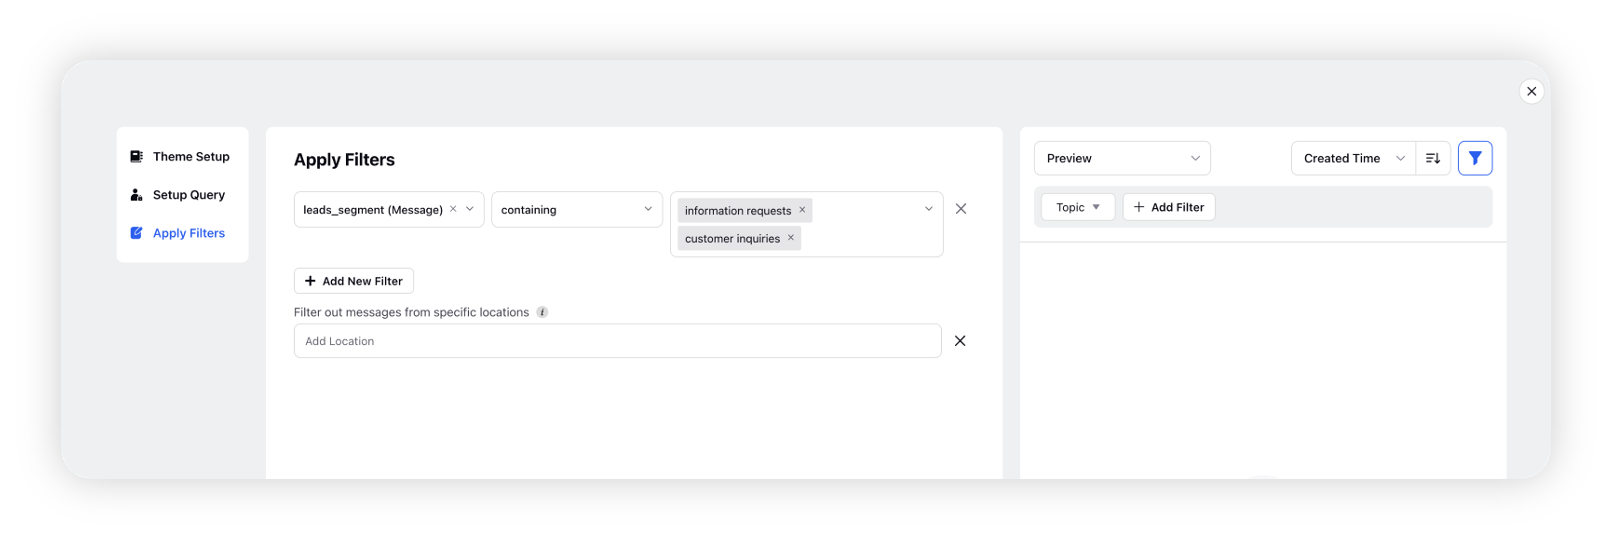
How to use the custom field in the Theme creation?
When creating a new theme, it can be helpful to use custom fields as filters to ensure that the topic is relevant and easily searchable.
Simply apply the custom field as a filter while creating the Theme.