Add a User
Updated
Adding users to Sprinklr allows you to onboard your team, providing them with the access and permissions they need to get started. Once added, the users can accept the email invite and edit their personal details like first name, last name, phone number, and language, if needed. This article covers the user creation steps in detail.
Steps
Click the New Tab icon
. Under Platform Modules, click Users within Collaborate.
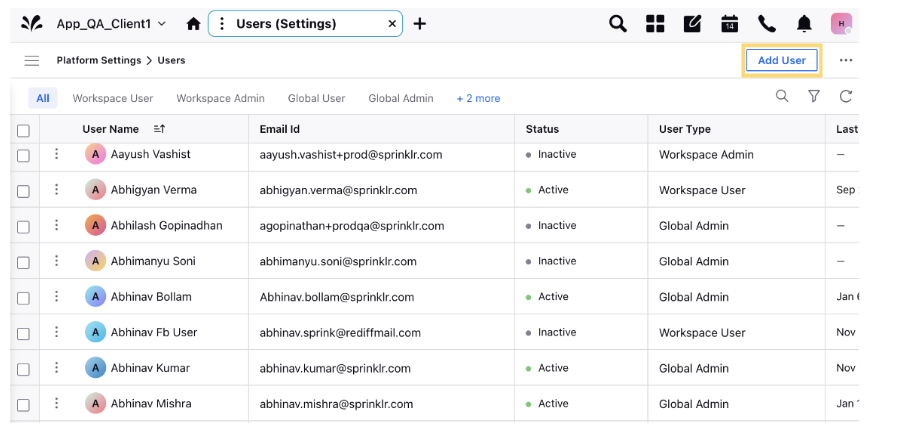
In the User (Settings) window, click Add User in the top right corner.

In the New User window, fill in the required details. You can find details about each section in the next part of this article.

Click Save in the bottom right corner of the New User window.
New User: Field Descriptions
The new user fields are categorized into the following sections -
Primary Details
Upload Image: Upload an image of the user.
First Name: Enter the user's first name.
Last Name: Enter the user's last name.
Email ID: Enter the email address of the user, which will be used when logging into Sprinklr.
Note: It is recommended to first enter the email address before you fill any other field. It ensures that Sprinklr auto populates the remaining fields based on the existing user-related data available in the Sprinklr database.
User Type: Select the level of access for the user.
Product Seat: Select the desired product seat from the drop-down menu.
Define logout timeout in minutes: Either enter or select the logout timeout in minutes from the drop-down list. Note that this setting will override any logout timeout setting defined in the user groups.
Designation: Enter the designation (you may opt to use this field to describe the organizational role of the user).
Department: Enter the department to which the user belongs.
Manager: If the user's manager is available in Sprinklr, he or she can be selected from a drop-down list.
Phone Number: Enter the user's phone number.
Language: Enter the language to be used by the user in Sprinklr. The following languages can be selected for users:
Arabic, English (U.K.), English (U.S.), French, German, Italian, Japanese, Korean, Portuguese, Russian, Simplified Chinese, Spanish Note: The language selected applies to the language a user will see in Sprinklr, not the content of messages which will appear in the language in which they were written unless translated.
Federation ID: Assigning a Federation ID helps for unique identification. You cannot assign the same federation identity to more than one user across the Workspace within the same Customer.
Note: The federation ID is additionally used by Customer Environments for attaching extra SSO Login information which is used as a part of the authentication request.
Secondary User: Designate a secondary or backup user during the user creation process. This user will be responsible for transferring specific assets if the primary user is deactivated.
Assets eligible for transfer include:
- Scheduled Exports
- Dataflows
After the transfer, the secondary user will need to log in again to activate the scheduled exports, run pipelines, and manage other reporting assets.
This feature enables a hierarchical structure where User 2 can serve as the backup for User 1, User 3 as the backup for User 2, and so forth, ensuring a seamless transition and continuity in operations.
Restricted IPs: Enter the restricted IPs, if applicable. Once you have entered the IPs, you will be only able to access Sprinklr from those specified IPs.
Is Active: Select this option to set a user as active or inactive. Inactive users cannot log in to Sprinklr.
Login using only SSO: Check the box if you want the user to be able to log in using only SSO (Single Sign-On).
Revoke Auth Token On Password Expiry: Check the box to revoke authorization access tokens on password expiry.
Is Distributed User: Check the box if you want the user to be in the distributed interface.
Note: When a Distributed User is deleted, all the accounts owned by the user will also get deactivated.
Is Space User: Check the box if you want the user to be able to access Space UI only.
Enable TFA: Check the box if you want to enable TFA for the user.
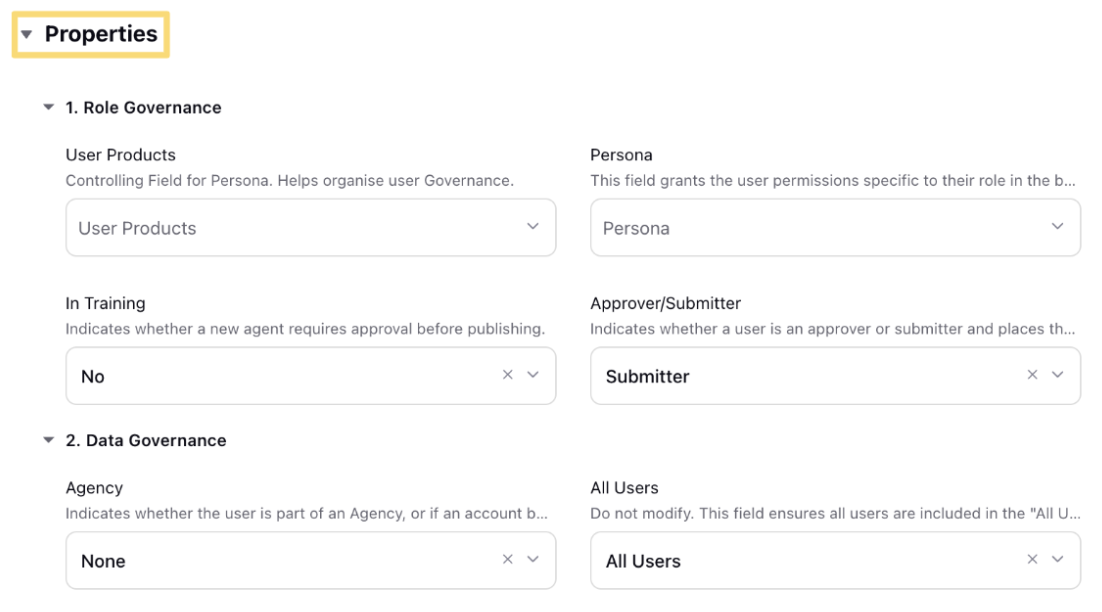
Properties
Custom Properties: Enter the desired custom fields for better filtering & tagging of users. 
User Groups

Select User Groups: Select the user group(s) to include the user in from the drop-down menu.
Primary User Group: Select the primary user group from the drop-down menu.
Default Handles

Select Channel: Select the desired social channel from the drop-down menu.
Select Handles: Select the default handle for the social channel.
Add New Default Handle: Click to add a new default handle for the social channel.
Assignment Capacity

Work Assignment Capacity: Enter the user capacity to handle a number of cases/messages at a time.
User Skills

Add Skill: Click this to add the skills of the user and the respective proficiency score. Hence, when a new message or case comes into the queue, the Assignment Engine will route them to an agent who has the requisite skills and available capacity.
Skill: Select the desired skill from the drop-down menu.
Proficiency Score: Enter the desired proficiency score for the skill.
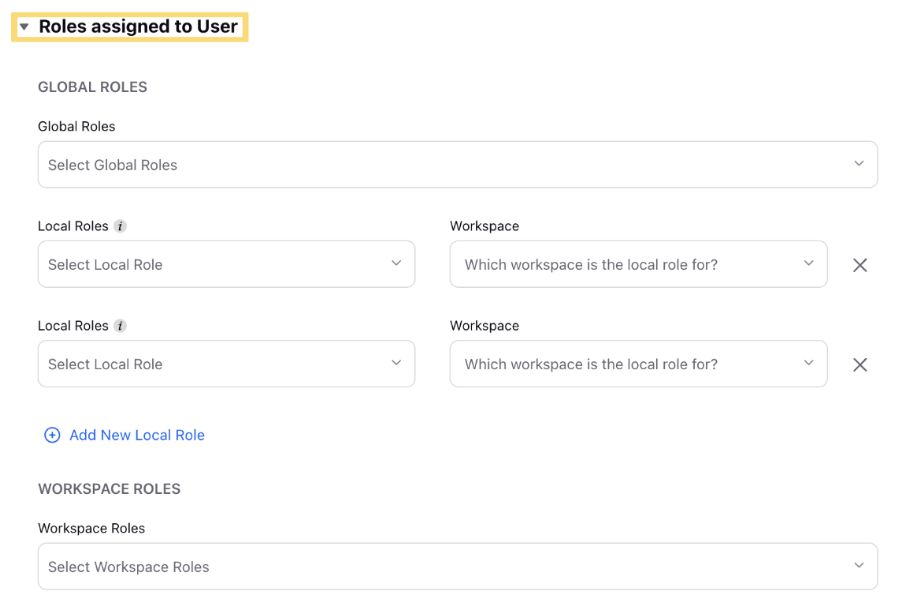
Roles Assigned to User

Global Roles: Select a Customer Global Role if applicable.
Local Roles: Select a Customer Local Role if applicable. Local roles are special global level roles that can be enabled for specific workspaces.
Workspace: Select Workspace.
Add New Local Role: Click this to add a new local role.
Workspace Roles: Select a Workspace Role if applicable.
Approvers

Publishing Approval Mandatory: Check the box if you want the user's posts to go through mandatory approval by another user or users. If a mandatory approval is set for a user who is added to multiple workspaces, the approval must be set in each workspace.
Approvers: Select the approver(s) for this user. Approvers set will only apply if Publishing Approval Mandatory is selected.
Approver User Group: Select the approver user group for the user.
Note:
To add a user, you must either be a Global Admin/User or a Workspace Admin of the customer/workspace environment in which you want to add users. You cannot create a user with a higher user level than yourself. You must also have the appropriate permissions to be able to add users in Sprinklr.
Depending on your spam settings, confirmation emails may sometimes be directed to your spam folder. Please check your spam folder for your confirmation email and white-list Sprinklr to ensure that future Sprinklr emails are routed directly to your inbox.