Create Custom Profile for Users
Updated
You can create custom profiles for Facebook, Twitter, Google Business Messaging, and Sprinklr Live Chat for customer care agents. Enabling a custom profile will allow you to respond to a private message on your Brand's accounts using your user persona instead of the brand's name. Follow the steps mentioned below to create custom profiles for users.
Enablement note: To learn more about getting the desired channels enabled in your environment, please work with your Success Manager. |
Steps to Create Custom Profile for Users
Click the New Tab icon
. Under Platform Modules, click Users within Collaborate.
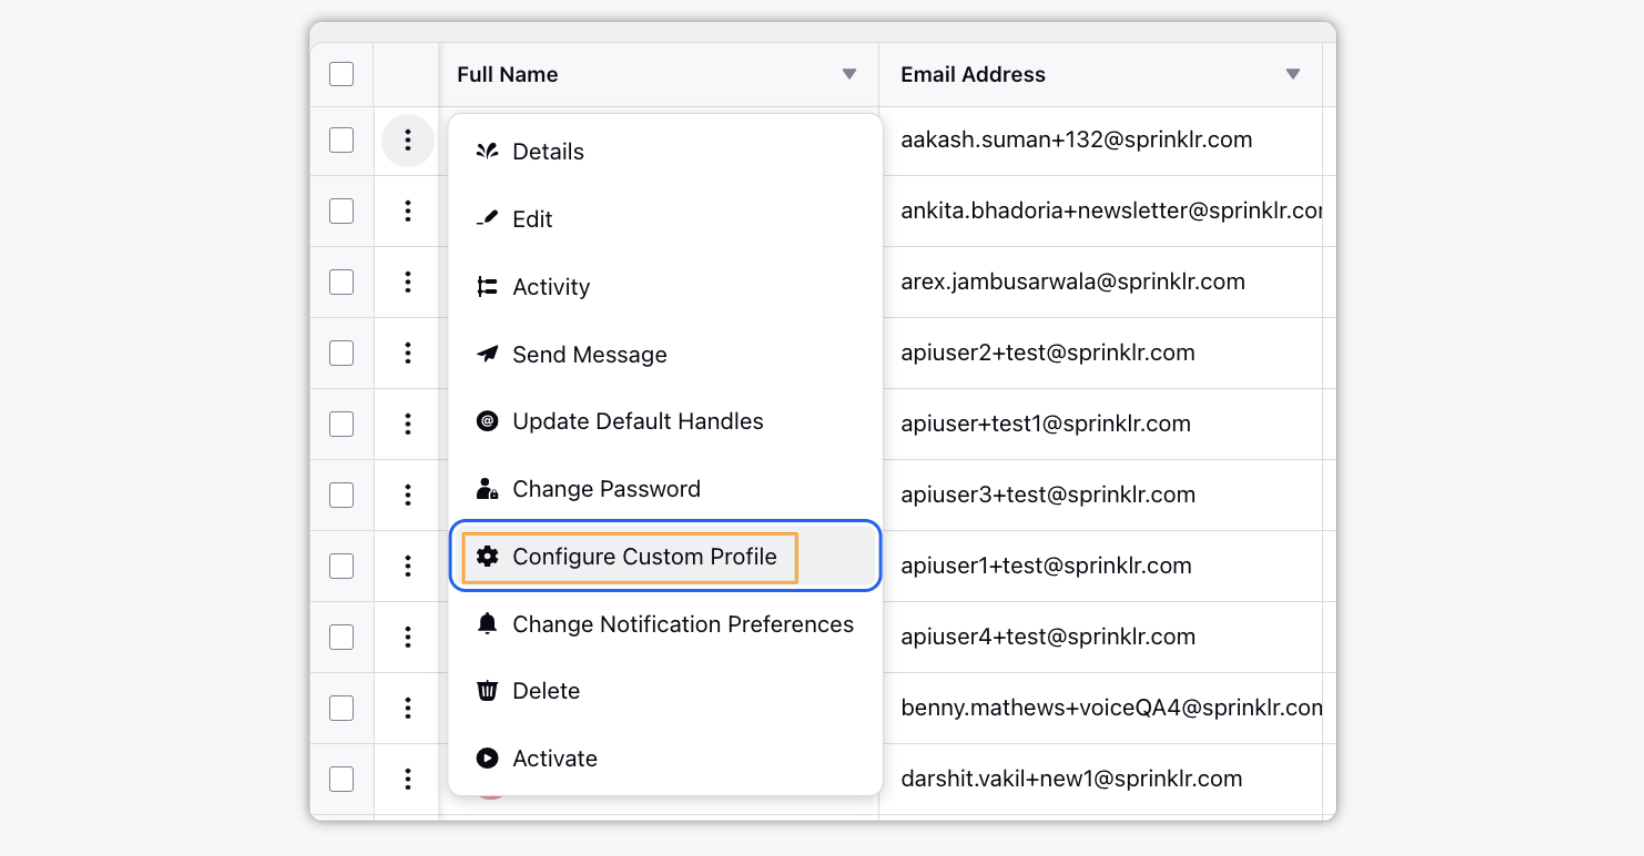
Hover over the Options icon
for the user whose persona you want to create and select Configure Custom Profile.
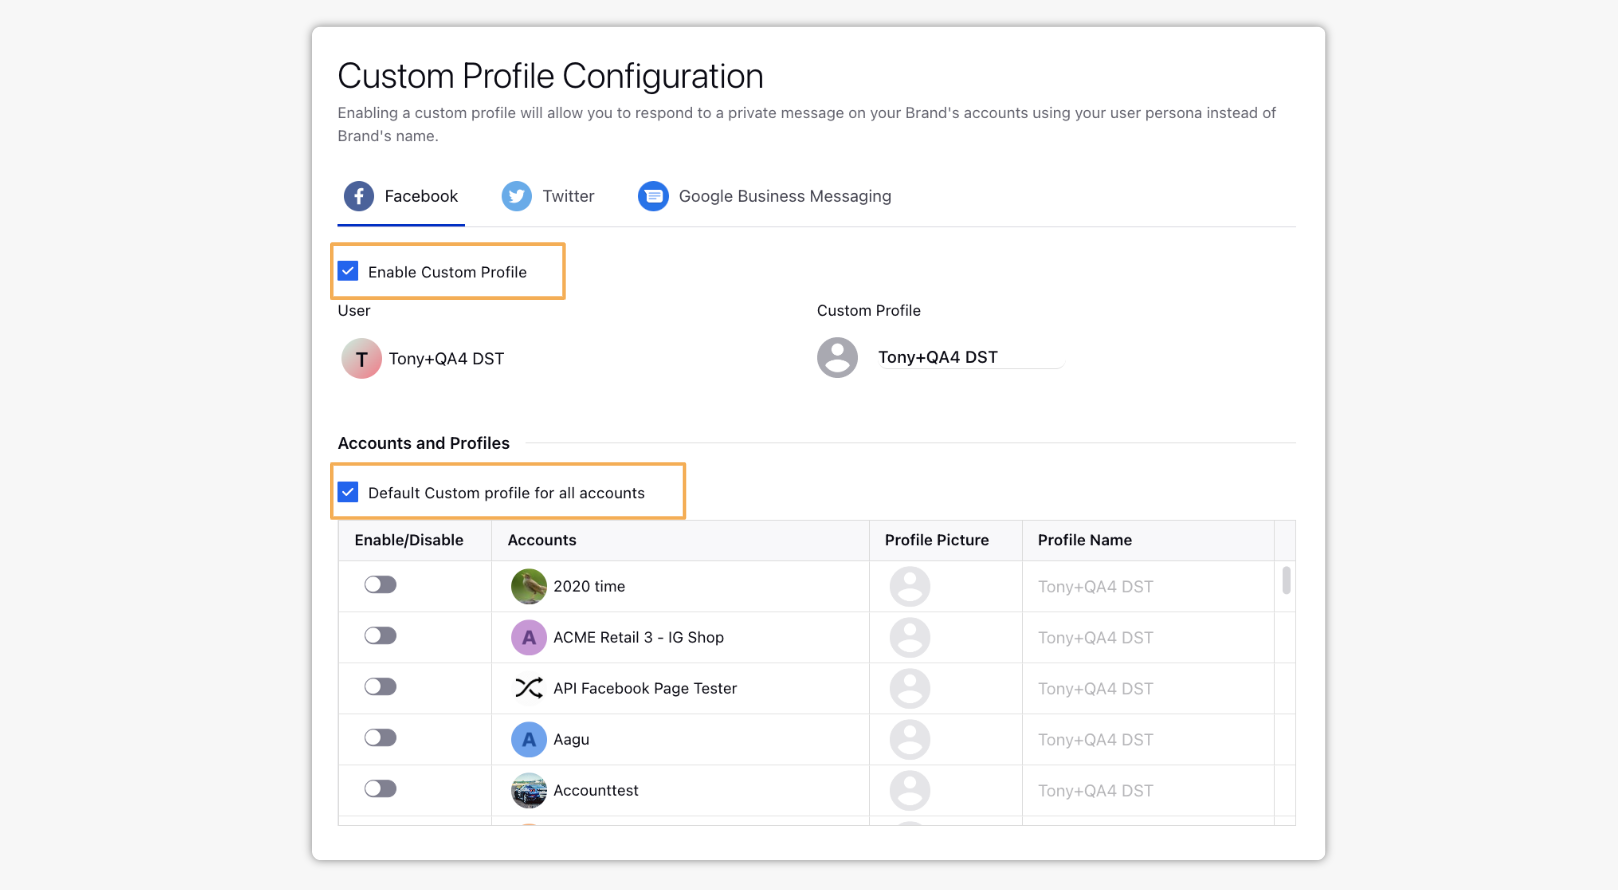
On the Custom Profile Configuration window, select Facebook, Twitter, Google Business Messaging, or Sprinklr Live Chat.
Next, check the box alongside Enable Custom Profile.
In the Custom Profile field, enter a name for your custom profile and set an avatar image for your profile. Note that the maximum size of your Facebook and Twitter profile images should not exceed 8 MB. For Google Business Messaging, it must be 1024x1024 px and have a maximum file size of 50 KB.
Under Accounts and Profiles, select the accounts you want to enable the custom profile for. To enable it for all the accounts, you can check the box alongside the Default Custom profile for all accounts.
Click Save at the bottom.
Note: To create Custom Profiles for users, you must be an Admin of your environment.