Manage Signatures
Updated
Signatures can automatically be inserted while replying to end-users from the desired account depending upon the channel. You can set agents' signatures for social accounts within their Sprinklr Profiles and also update them while bulk updating profiles. Manage signatures for your agents with the help of this article.
Steps to Manage Signatures
Click the New Tab icon
. Under Platform Modules, click Users within Collaborate.
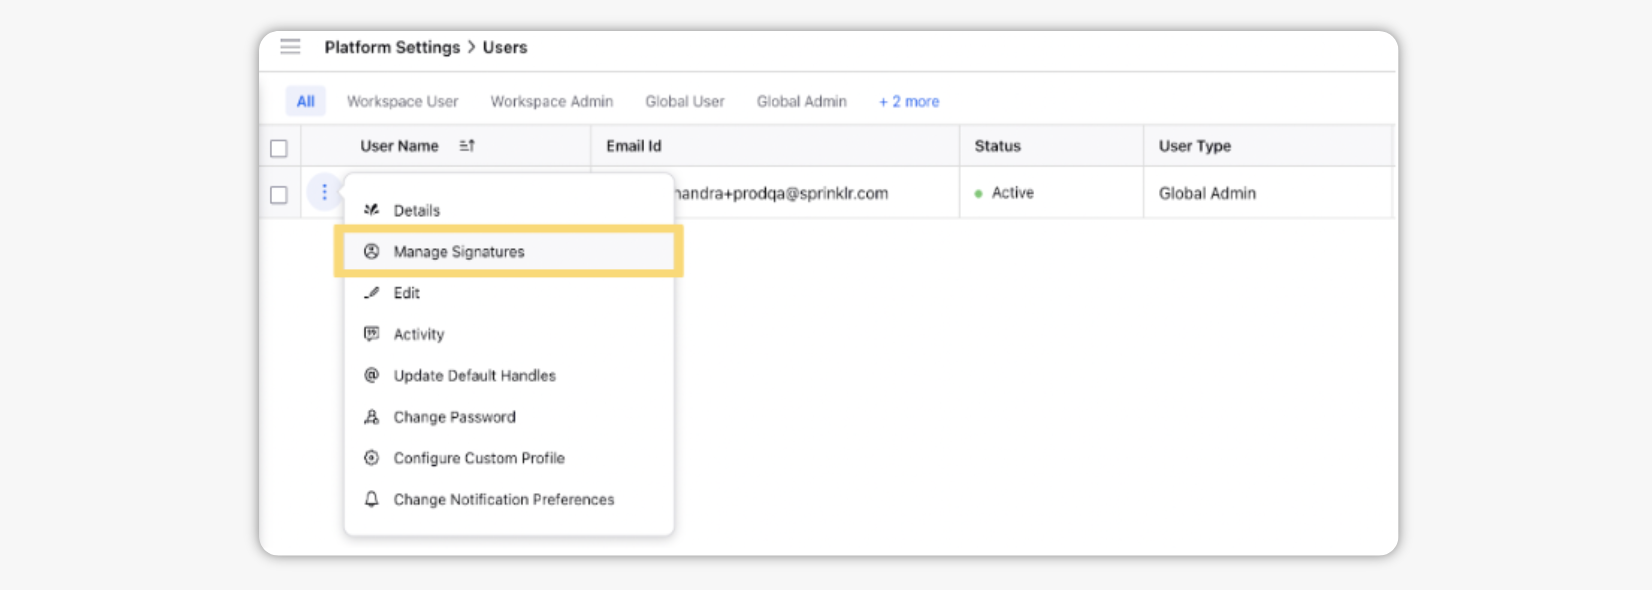
Hover over the user's Options icon
and select the Details option. Once you've opened up the User Details window, click Manage Signatures at the top of the screen.
Alternatively, hover over the user's Options icon
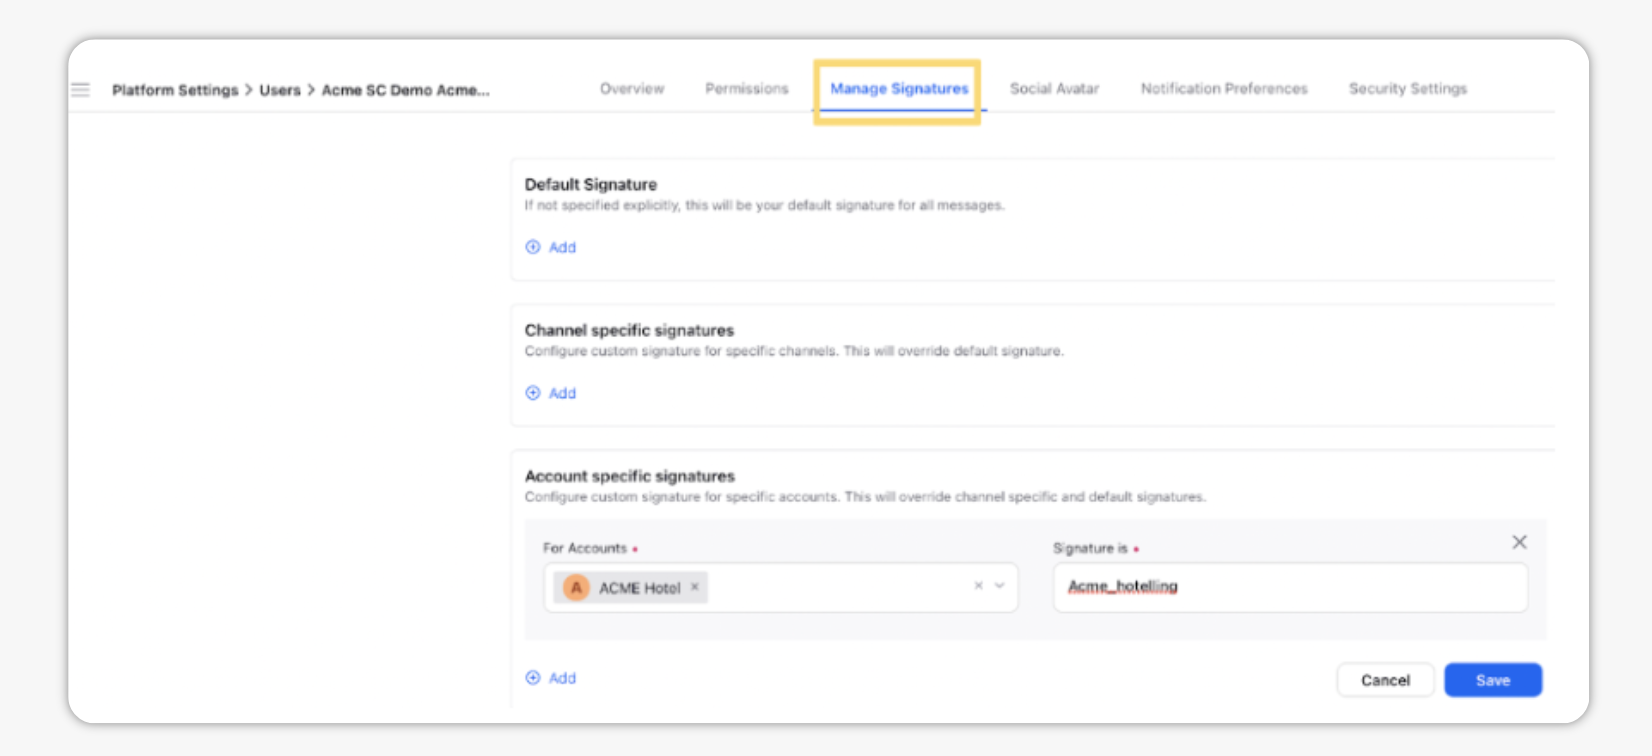
Within this tab, you can set:
Default Signature: If not specified explicitly, this will be your default signature for all messages.
Channel specific signatures: Configure custom signatures for specific channels. This will override the default signature. For the Email channel, you will get the rich text editor to add your signature.
Account specific signatures: Configure custom signatures for specific accounts. This will override the channel-specific and default signatures. For the Email accounts, you will get the rich text editor to add your signature
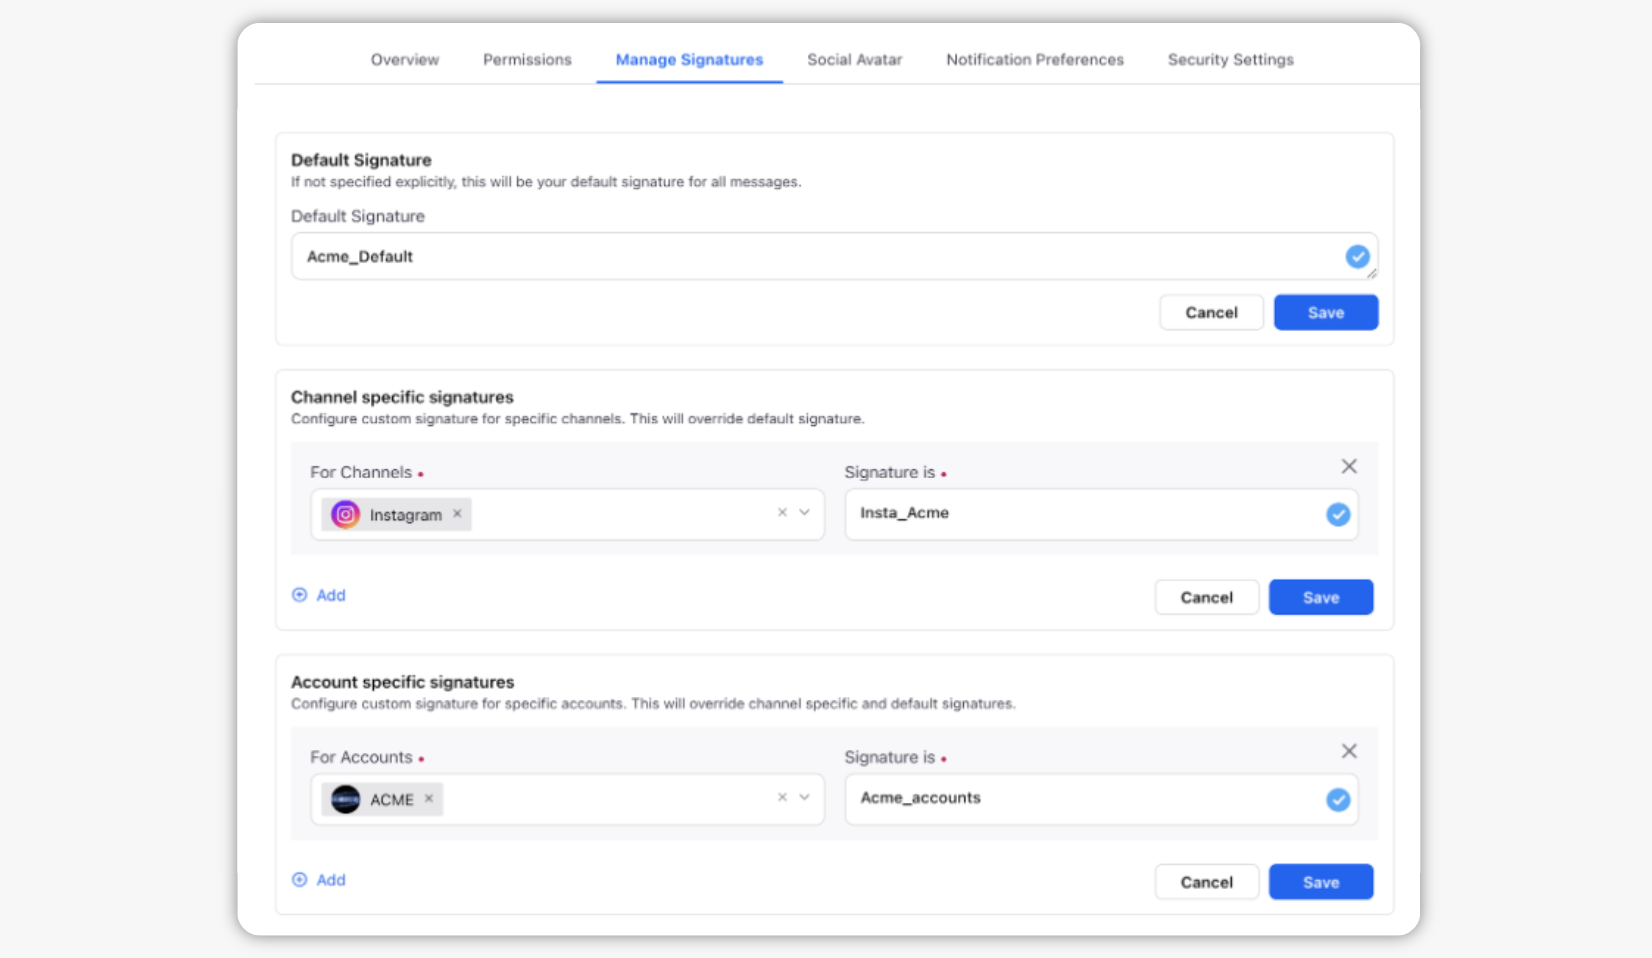
After defining all signatures, click save on each of them.