Secure Access
Updated
For your Social Channels, you can secure and govern native access with the help of Sprinklr Secure Access capability. Login Access permission is given as per end date, and End date is not mandatory and so if access given without any end date means the user can log in till any date. Note that the provisioned user will get logged out natively if the Sprinklr user is logged out from the Sprinklr platform (either by a session-timeout or when the user chooses to log-out from the Sprinklr platform).
Note: To learn more about getting Secure Access capability enabled in your environment, work with your Success Manager. |
Before You Begin
Sprinklr Secure Access is accessible from the Chrome browser, Edge browser and Safari browser for desktop. To begin using this capability, install and activate the updated Secure Access extensions. Note that you may not find the secure access extensions in the Web Store as they are unlisted.
Tip: Extensions from Chrome browser can also be used in Edge browser. You add them from the Chrome Web Store. For more information, see Extensions in Edge. |
If the extensions are not installed in your browser, you can find the permalinks to access them in Sprinklr Web App(For Chrome Browser).
To Manage Permissions for Sprinklr Secure Access
Click the New Tab icon
. Under the Governance Console, click All Settings within Platform Setup.
In the Platform Settings window, select Workspace Roles or Global Roles within Manage Workspace or Manage Customer, respectively.
In the top right corner of the Roles (Settings) window, click Create Role. To learn more about creating a role, see Add a Role.
In the Add Role window, under Select Permissions, search and select 'Sprinklr Secure Access' and click Save in the bottom right corner.
To Govern Secure Access for Workspace
Click the New Tab icon
. Under the Governance Console, click Accounts within Platform Setup.
Click Add Account in the top right corner. Before adding an account, make sure to log out of any account relevant to the account type.
In the Add Account window, select the appropriate Channel you would like to add from the channel options provided.
Depending on the account type, login and perform the authentication or enter the username and password.
Once authorized, you'll be redirected to the Update Account window where you can add/edit the details of your account.
In the Update Account window, enter the details
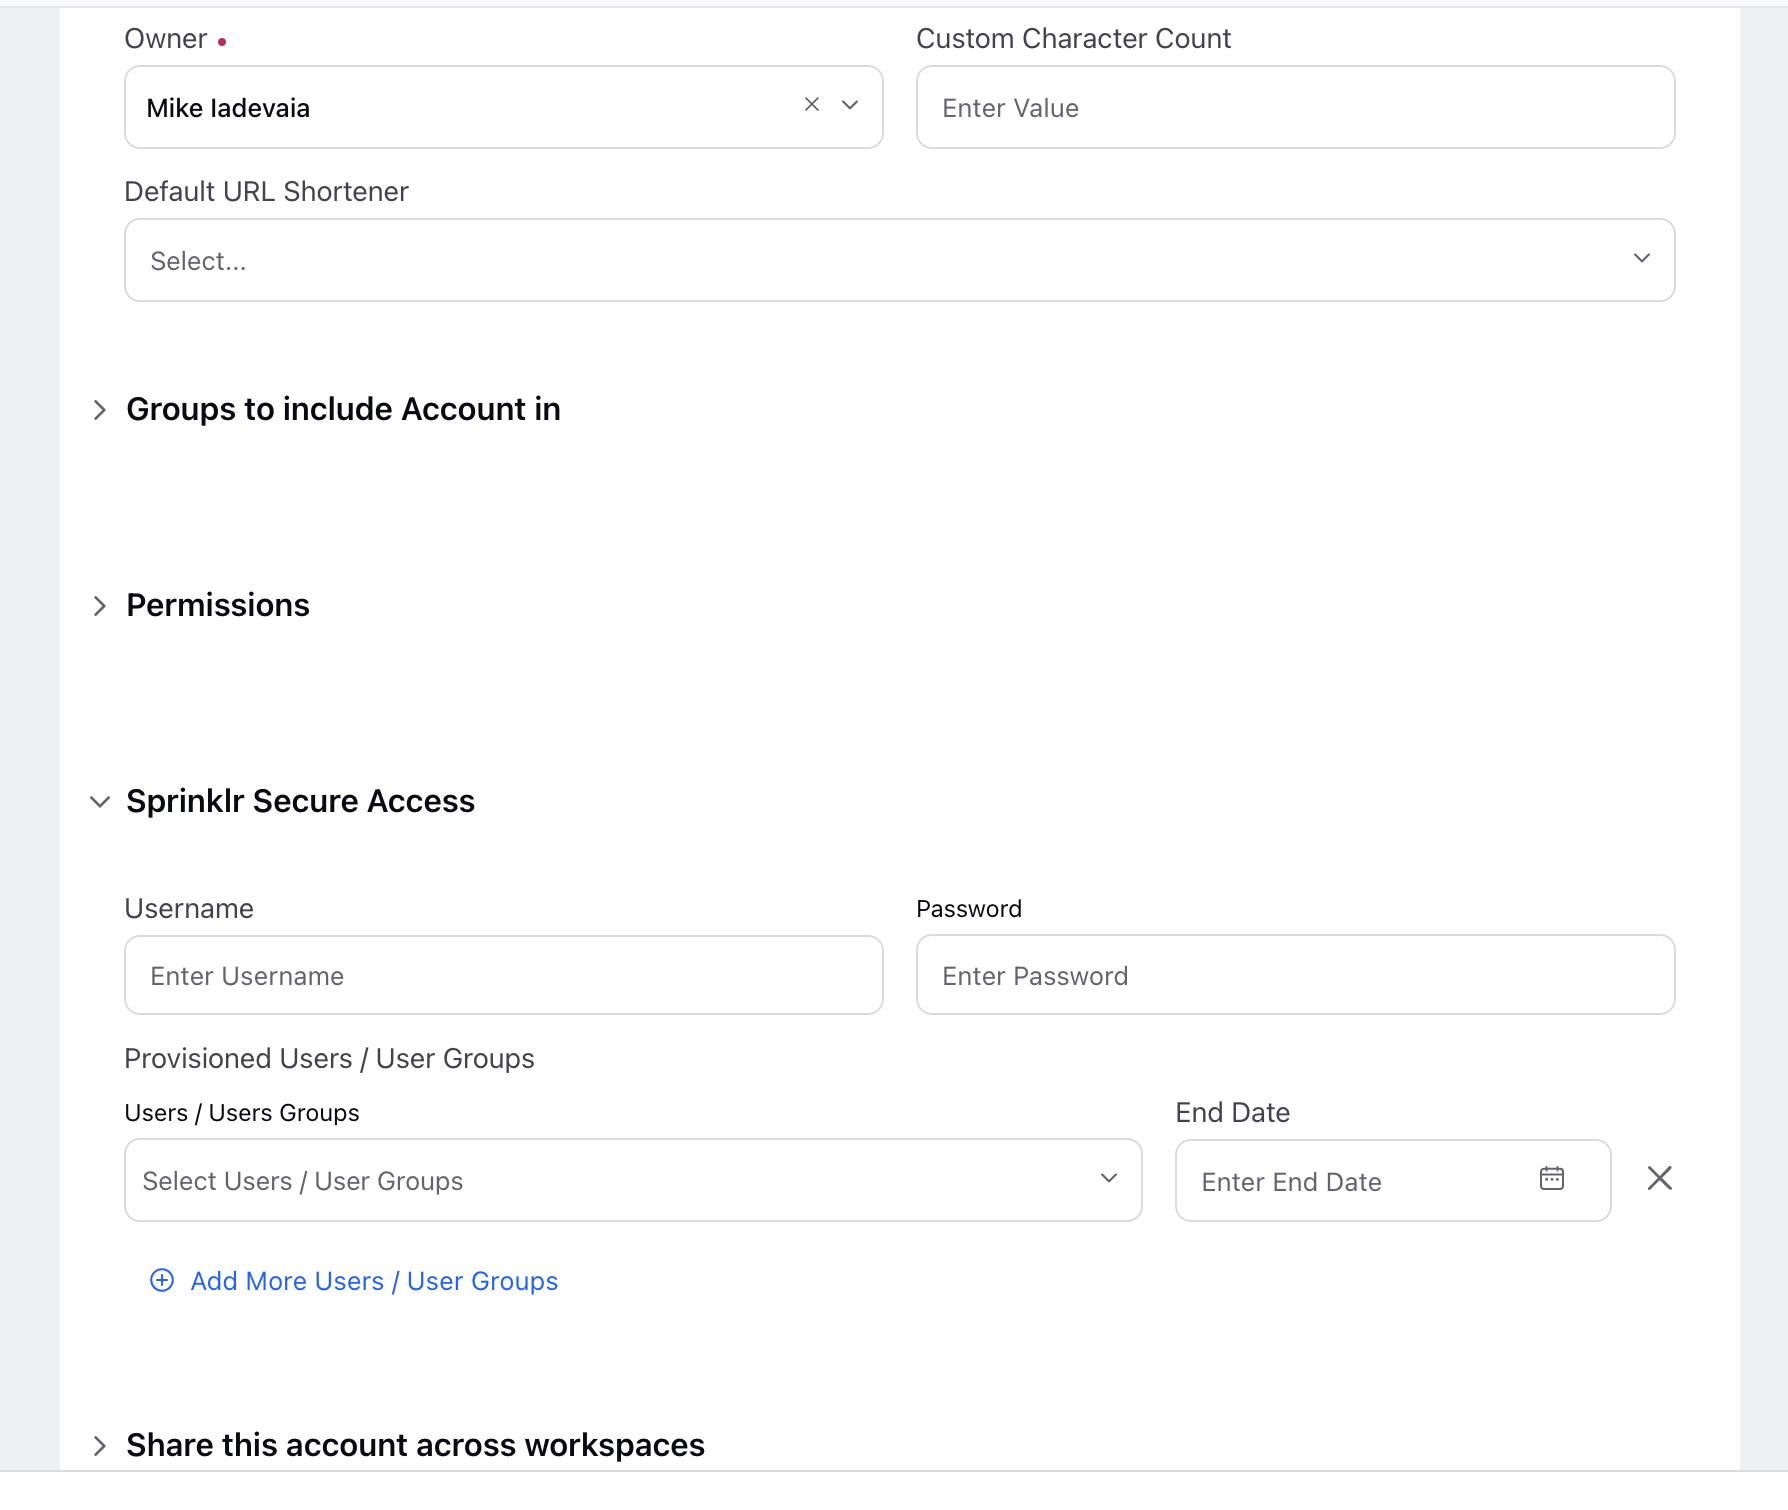
Scroll down to the Sprinklr Secure Access section and enter the Username and Password of your account.
Under Provisioned Users / User Groups, select the User(s) / User Group(s) to be provisioned for native access of the account and enter an End Date to provision until what time the users have access. If the End Date is left blank, the user will have unbound access to the account. Click Save in the bottom right corner.
The user will be logged out natively if:
the permission is revoked from the Sprinklr Secure Access section.
the user is removed from the user group that was given access to the native account login.
the user logs out or user session expires.
To Access the Native Account
Click the New Tab icon
. Under the Governance Console, click Accounts within Platform Setup.
Hover over the account's Options icon
and select Login (only available for provisioned Users / User Groups).
Once you have clicked the Login option within Sprinklr, you will be automatically logged in to the native account in the new tab. And you can take any desired action on the native account.
Note: For certain social media channels like Facebook, you get access to all pages linked to the profile credentials which is as per the construct on Facebook. Hence, Sprinklr can't provide selective access to individual pages.
To Govern Secure Access for Customer
For your Social Channels, you can govern native access, track activity logs and manage Sprinklr and non-Sprinklr accounts.
Click the New Tab icon
. Under the Governance Console, click All Settings within Platform Setup.
On the Platform Settings window, click Manage Customer in the left pane and select Secure Access in the right pane.
On the Account Credentials window, click Add Account Credential in the top right corner.
On the Add Credentials for Account window, fill in the details.
Click Save in the bottom right corner of the Add Credentials for Account window.
Add Credentials for Account — Field Descriptions
Terms | Description |
Basic Information | |
Select Channel | Select the channel from the drop-down menu. |
Account Name | Select the account from the drop-down menu. |
Credentials | |
Username | Enter the username of your account. |
Passwords | Enter the password of your account. |
Users / Users Groups | Select the user(s) / user group(s) to be provisioned for native access to the account. |
End Date | Enter an end date to provision until what time the users have access. If the end date is left blank, the user will have unbound access to the account |
Add More Users / User Groups | Click to add more user(s) / user group(s). |
To Manage Secure Access for Customer
Click the New Tab icon
. Under the Governance Console, click All Settings within Platform Setup.
On the Platform Settings window, click Manage Customer in the left pane and select Secure Access in the right pane.
On the Account Credentials window, Hover over the Role's Options icon
and you can take the following options.
Details
Edit
Remove
Select Login (only available for provisioned Users / User Groups). Once you have clicked the Login option within Sprinklr, you will be automatically logged in to the native account in the new tab. And you can take any desired action on the native account.
On the Activity window, you can track the login activities.
To Plot Reporting on Secure Access
Reporting on Secure Access enhance security, enabling user to add encrypted credentials, giving user convenience to perform native action without sharing their password. You can now plot a reporting widget giving you visibility to track usage of secure access with details of user id, login counts, etc. With Reporting on secure access, you can get reports on secure access for enabled accounts and track their usage.
Click the New Tab icon

Go to the dashboard where you want to create the reporting widget. Or click Create Dashboard in the top right corner to create a new reporting dashboard.
Click Add Widget in the top right corner.

Add a Widget Name.
Under Data Source, select Social Analytics.

Under Select Metric/Dimension, select User and/or User Group as the Dimension.
Select Secure Access related Metric based on your preference.

Click Add to Dashboard in the bottom right corner.
Limitations
Channels supported for Sprinklr Secure Access (on Safari, Chrome and Edge) are Facebook, Twitter, LinkedIn, Instagram, Pinterest, TikTok, Reddit and YouTube.
Once login option is exercised/clicked by default the user will stay logged in for 7 days.
For accounts with two-factor authentication (TFA), the users will have to add the unique one time password manually. If you set up two-factor authentication, you'll be asked to enter a special login code or confirm your login attempt each time someone tries accessing social media account from a computer or mobile device. If you don't wish to enter login code or confirm your login attempt each time you log in, you can use Save the Browser option.