File Upload
Updated
The file upload question type enables you to gather files directly within surveys. You can seamlessly collect multimedia or document-based responses along with other question types by incorporating file upload capabilities into a survey.
Business Use Cases
Post-Claim Submission/Resolution Surveys: This functionality permits you to upload relevant documents, including denied claim letters, images of damaged properties, or records of correspondence. This facilitates the analysis of particular claim issues, the identification of process bottlenecks, and the enhancement of customer satisfaction.
Gathering and Analyzing User Feedback to Improve Experience: To gather feedback on a product, service, or process, create a survey with satisfaction questions and options for comments or images. Share it with users who have interacted with the subject. Analyze their responses to identify trends, common issues, and improvement opportunities, which will help enhance quality, performance, and user satisfaction.
You can use the File Upload question type to allow your users to submit visual evidence, such as screenshots, photos, or other multimedia, that clearly show the issues they’re facing. This helps your team identify problems more quickly and take faster, more effective action to resolve them.
Prerequisites
You will need View, Edit and Delete permissions at the Program Level to access Survey Logics.
View: Helps to view the feature.
Edit: Helps to edit the feature.
Delete: Helps to delete the feature.

Setting Up File Upload
Go to Builder and in the Question Library select File Upload.
Question Layout

It helps to modify the File Upload Survey Question Type.
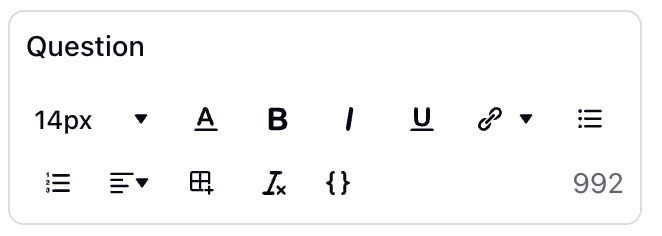
Question Title: You can add the question title by clicking on the Question Title Option.
Font Size: Click Font Size to change the size of the title text.
Text Color: Click Text Colour to change the colour of the text.
Bold: Click Bold to bold the text.
Italic: Click Italic to make it italics.
Underline: Click Underline to underline the text.
Insert Link: Click to insert URL.
Add Bulleted List: Click to add bullets.
Add Numbered List: Click to create a numbered list.
Align: Assistance in aligning the text (to the left, right, or center) is needed.
Insert Table: Click to insert table.
Clear Formatting: Select to remove the formatting.
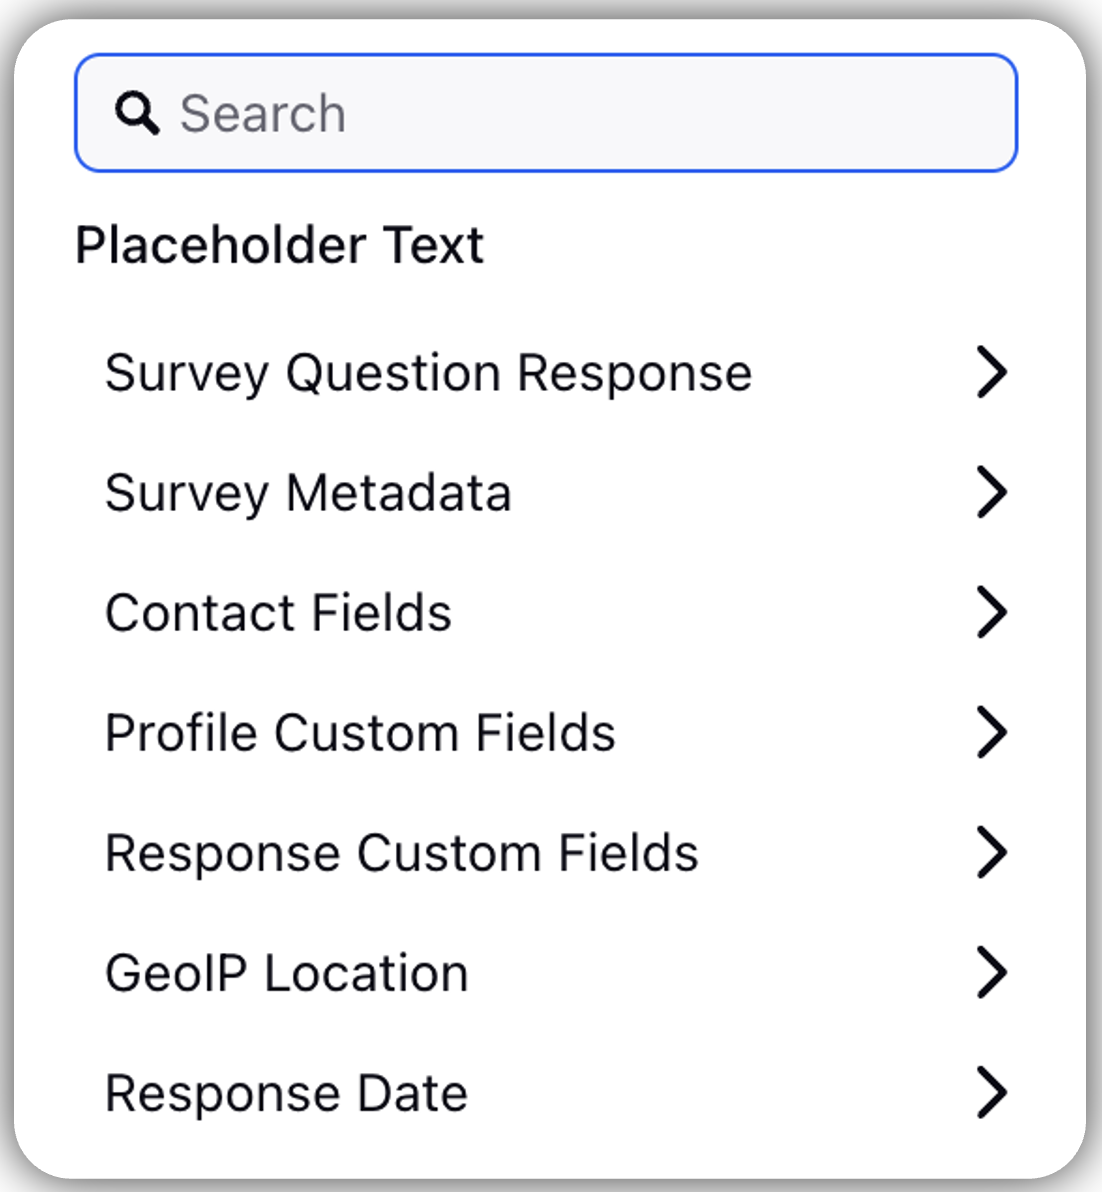
Placeholder: Click to incorporate placeholder text into the information piping of a question title externally, making it dynamic in nature.

Survey Question Response: Response to one question can be added as a placeholder question title for another.
Example: Capture name in first question and use them for other questions.
Survey Metadata: Essentially, it assists in gathering details regarding the particular browser and operating system that the respondent is utilizing.
Contact Fields: Assists in gathering customer contact details such as their address, email address, and both first and last names.
Profile Custom Fields: Helps to tag user profiles.
Example: user type -advocate, influencer, detractor, etc.
Response Custom Fields: It is located in the anonymous section and chooses from the response custom field. When the respondent provides an answer, the particular custom field associated with it will be linked to that response.
Example: If we receive a location response custom field from a particular site for a retail chain, it will be labeled here.
Response Date: It records the exact moment when the response is obtained (in various formats). These are utilized in transactional surveys.
Transaction Fields: Gathers details pertaining to any additional custom field.Instruction:
Instructions

Allows you to add additional instruction for the question.
Instruction Title: You can add the question title by clicking on the Question Title Option.
Font Size: Click Font Size to change the size of the title text.
Text Color: Click Text Colour to change the colour of the text.
Bold: Click Bold to highlight the text.
Italic: Click Italic to make it italics.
Underline: Click Underline to underline the text.
Insert Link: Click Insert Link to add URL.
Add Bulleted List: Click to add bullets.
Add Numbered: Click to create a numbered list.
Align: Click to align the text ( left, right or center).
Insert Table: Click to Insert Table to add table.
Clear Formatting: Click to clear format.
Upload Details

Upload Messages: You can add a upload message for the upload message.
File Limit: You set a limit for maximum number of files that respondents can upload for a question.
Support File Format: You can add the upload format, you can select the format from the complete list of file formats. Example: PDF, JPEG, JPG, etc. A file size limit of 25 MB has been established. The default limit is 20 MB for each file. This limit can be adjusted manually or modified using the up and down arrows.
You can choose from various formats, including Textual Documents, Images, Audio, Video, Spreadsheet and data files, as well as Presentation Files.
File Size Limit(in MB): You can add a file size limit in MB and also define it in total or per file.
Question Media

Question Media files helps to attach media files to provide more context to the question. You can click Upload Asset to upload assets using Upload Media or Select from Asset Library. You have the option to adjust the media size by clicking on the slider.
You can align the Question Media by selecting the options from the Alignment drop-down.
Media Attachment


You can attach media files for additional information by clicking Add Media option. You have the ability to switch on the Preview option and download the media files.
Manage Respondents Screen

Clone: You have the ability to clone a question without having to create that again.
Edit Logic: Edit logic option helps to edit the logic of question.
Delete: You have the option to delete a question.
Manage Settings

Toggle Mark as required option to make the question mandatory. It is denoted by a small red dot on the respondent screen. When activated, the File Upload will become a mandatory question for participants.
Preview

Select Preview Survey (located in the top-right corner) to test and view how it will appear to respondents.
To ensure your survey supports a variety of user inputs, start by adding a File Upload question to your draft survey. Then, test the feature by uploading different file types and sizes to verify compatibility and ensure that the system accepts expected formats. Additionally, check how the survey handles errors by attempting to upload unsupported formats or files that exceed size limits, making sure that clear messages are displayed and the user experience remains smooth.
Key points to note
While the feature is robust, keep these constraints in mind:
Maximum of 20 files can be uploaded per question.
File size is limited to 25 MB per file.
Unsupported file types are “.exe”, “.html”, “.svg”, “.zip”, “.rar”
Best Practices
Provide clear, concise instructions for respondents.
Evaluate the survey on various devices to ensure the user experience is satisfactory.
FAQs