Create a Rule
Updated
The Sprinklr Rule Engine is a powerful tool that can execute complex actions automatically, creating efficiency in your workflow and saving time by eliminating the need for manual actions to be taken, seamlessly automating processes at scale.
The Rule Engine's wide array of conditions and actions makes Rules infinitely customizable. So many options at your fingertips may seem a little daunting - simply put: the Rule Engine is an If-Then statement. If a message (or another entity) meets a specific scenario, then a specified action should be executed.
The conditions and actions can be configured to best suit your workflow needs, but the basic set-up for Rules follows the below steps.
Admin Set-up Creating rules is limited to admins. Additionally, users must be assigned to a role with the set-up permissions to view and create rules. |
Tip Rules do not run retroactively and will not affect messages that were brought into Sprinklr prior to a Rule's creation. Rule Triggers can be used to alter the standard execution of rules and apply rules to content already in Sprinklr. Learn more in Rule Triggers. |
To create a rule
Click the New Tab icon. Under the Platform Modules, click Rule Engine within Collaborate.
In the top right corner of the Rule Engine window, click Create New Rule.
On the New Rule window, provide a name and an optional description for your new rule.
Set the Rule Scope to Workspace or Customer.
Select the rule Context. The rule type selected will determine which type of asset the rule will be executed upon, and in the case of some rules, like Queue rules, when the rule is run.
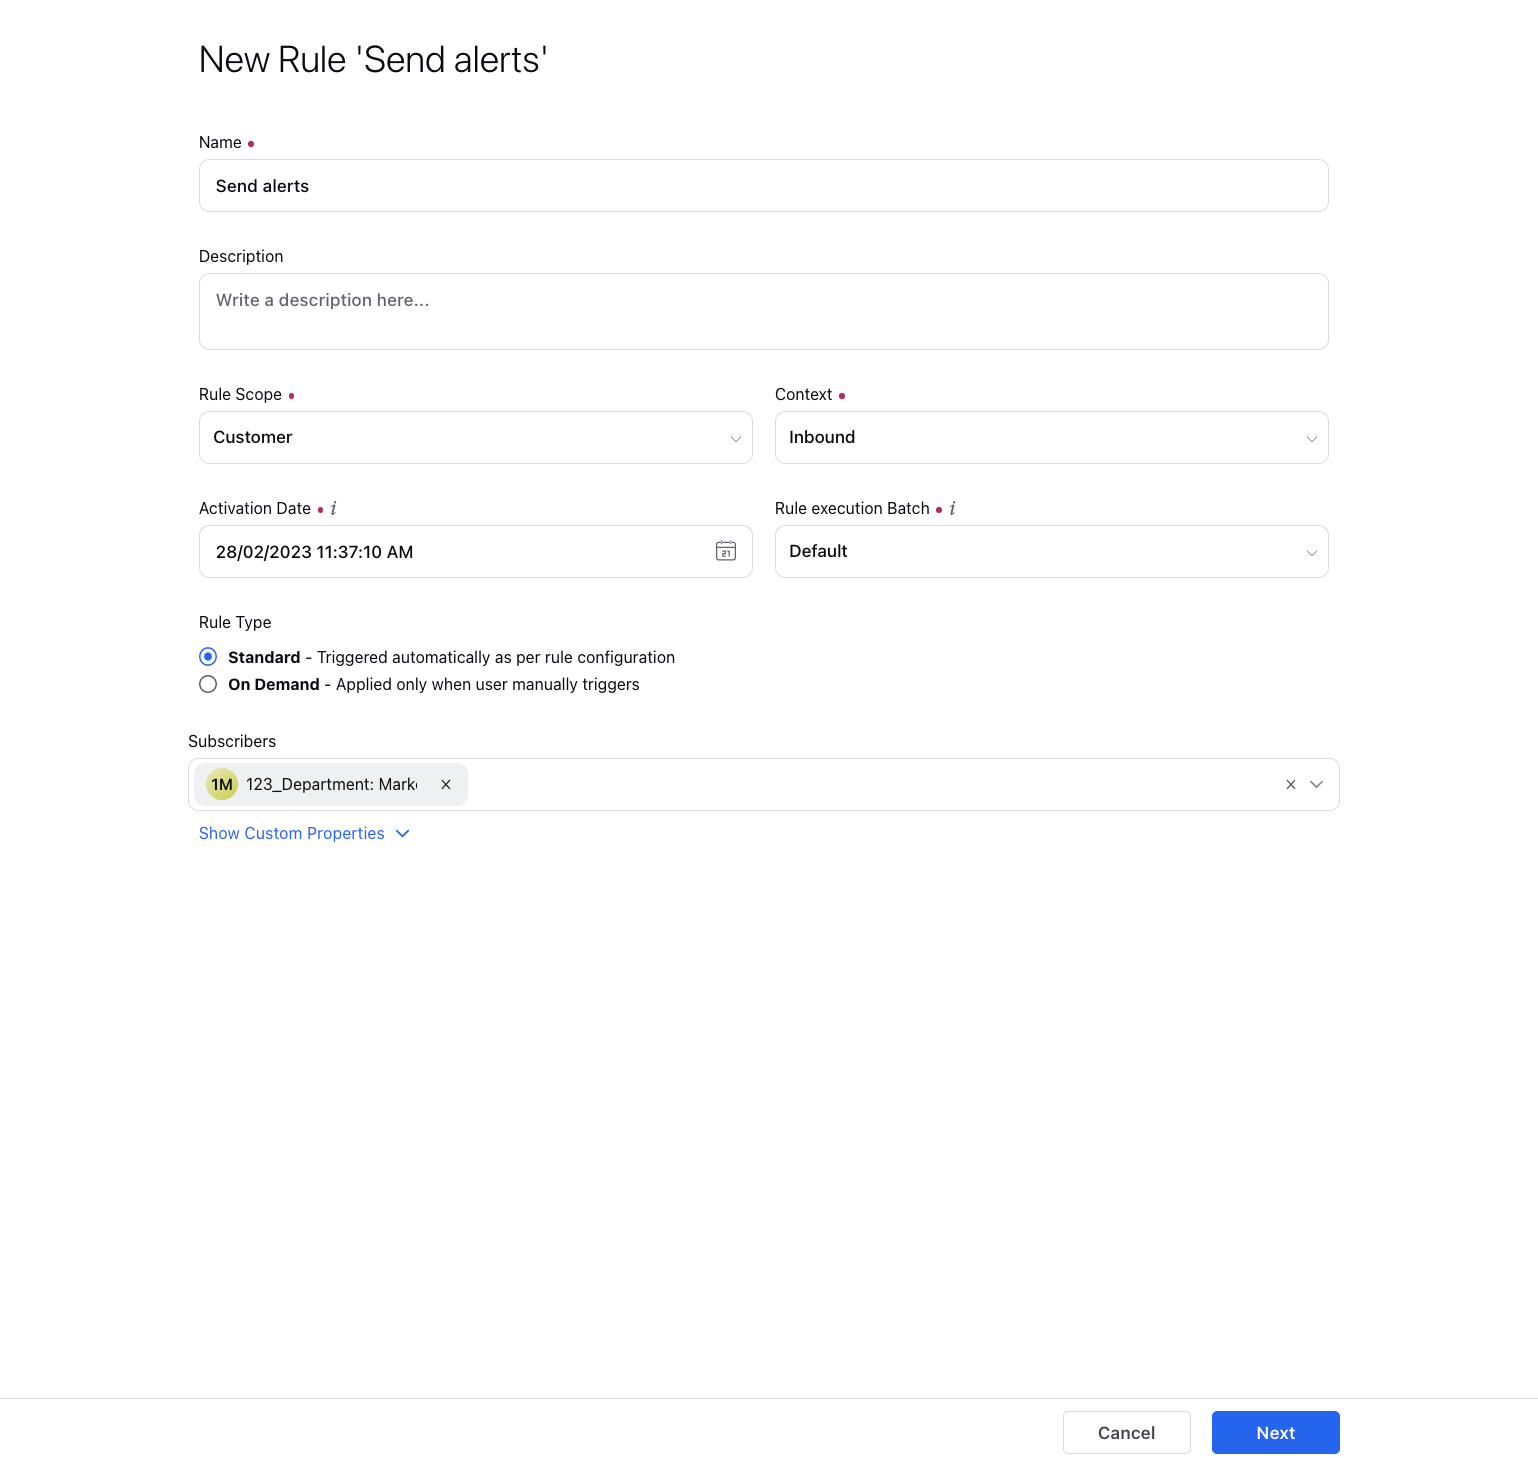
Select the Activation Date which refers to the date when rule is created.
Rule execution Batch contains the rules for specific entities and shows the flow how the rules get executed (Rules execution in columns will be from top to bottom and column will execute in left to right order).
Add Subscribers to receive the real-time alerts on changes to the rule to ensure proper protocol and configuration are followed.
Click Next.
In the Rule Engine Builder, add Rule Conditions to set up specific scenarios that must be met for subsequent actions to execute. You can chain multiple conditions together to refine the scenarios that must be met before an action executes in a Rule.
Configure Rule Actions that will execute on Rules when the conditions are or are not met by selecting Action on a Yes or No branch of Conditions.
You can copy the conditions and actions from a rule and paste it either into the same rule or to another one. Click the icon
and select Copy Sub-Tree. Next, click the Addition icon
of the branch where you want to paste the copied sub-tree and select Paste copied Sub-Tree.
Click Save to finalize the creation of your new Rule, or Save as Draft to create a draft version of your Rule.
Configure Rule Triggers
The type of Rule you configure will determine when the Rule executes on an asset in Sprinklr. Inbound Rules, for example, are implemented on a message when the message is brought into Sprinklr. Queue Rules are applied when a message moves into a Queue. Using Rule Triggers, you can customize the execution of Rules to apply to messages outside of the standard Rule run times.
Rule Triggers can be useful when you want a Rule to apply outside of its standard runtime. To create a Rule Trigger, open a Rule, select the icon and select Manage Triggers to add or edit Rule Triggers. Learn more in Rule Triggers.
Enable a Rule
Enabling a Rule will activate the Rule in Sprinklr, allowing it to run on messages as configured. You can enable a Rule from the Rule's configuration window. When a Rule is open, click the icon and select Enable this Rule.
You can enable Rules from the main Rule Engine window by clicking the Enable icon alongside the Rule.
Working with the Rule Engine Canvas
When creating Rules, there are a number of actions you can take to edit the appearance of Rules, change Conditions and Actions in the details pane, and alter the flow of your Rule by editing the connections between actions and conditions. Below, we'll explore how to make changes in the Rule Engine Canvas.
Open the Details Pane
To open the detailed view of a condition or action, double click any condition or action in the Rule Engine to open the details pane, where you can make edits.
Delete Conditions and Actions
Conditions and actions can be deleted without affecting other conditions or actions in a branch by hovering over a condition or action and clicking the remove icon.
Drag and Drop
Drag and drop conditions and actions to arrange them on the canvas.
Break Connections
Hover over a connector and select Break Connection to break the connection between conditions and actions.