Sending a WhatsApp Flow and Receiving Response via Bot Application
Updated
Before You Begin
Before you begin, ensure the following prerequisites are met:
A WhatsApp Flow asset has been created.
Your business is verified.
High message quality is maintained.
Sending a Flow
This process outlines the steps for sending a flow through WhatsApp using a dialogue tree. By selecting the appropriate flow asset, you can ensure effective communication with users on the WhatsApp platform.
![]() Note: A WhatsApp Flow Asset cannot be used for initiating a new conversation. However, it can be used within an ongoing conversation and sent within 24 hours of the last message sent by the user.
Note: A WhatsApp Flow Asset cannot be used for initiating a new conversation. However, it can be used within an ongoing conversation and sent within 24 hours of the last message sent by the user.
Start by creating a dialogue tree that includes a bot reply node.
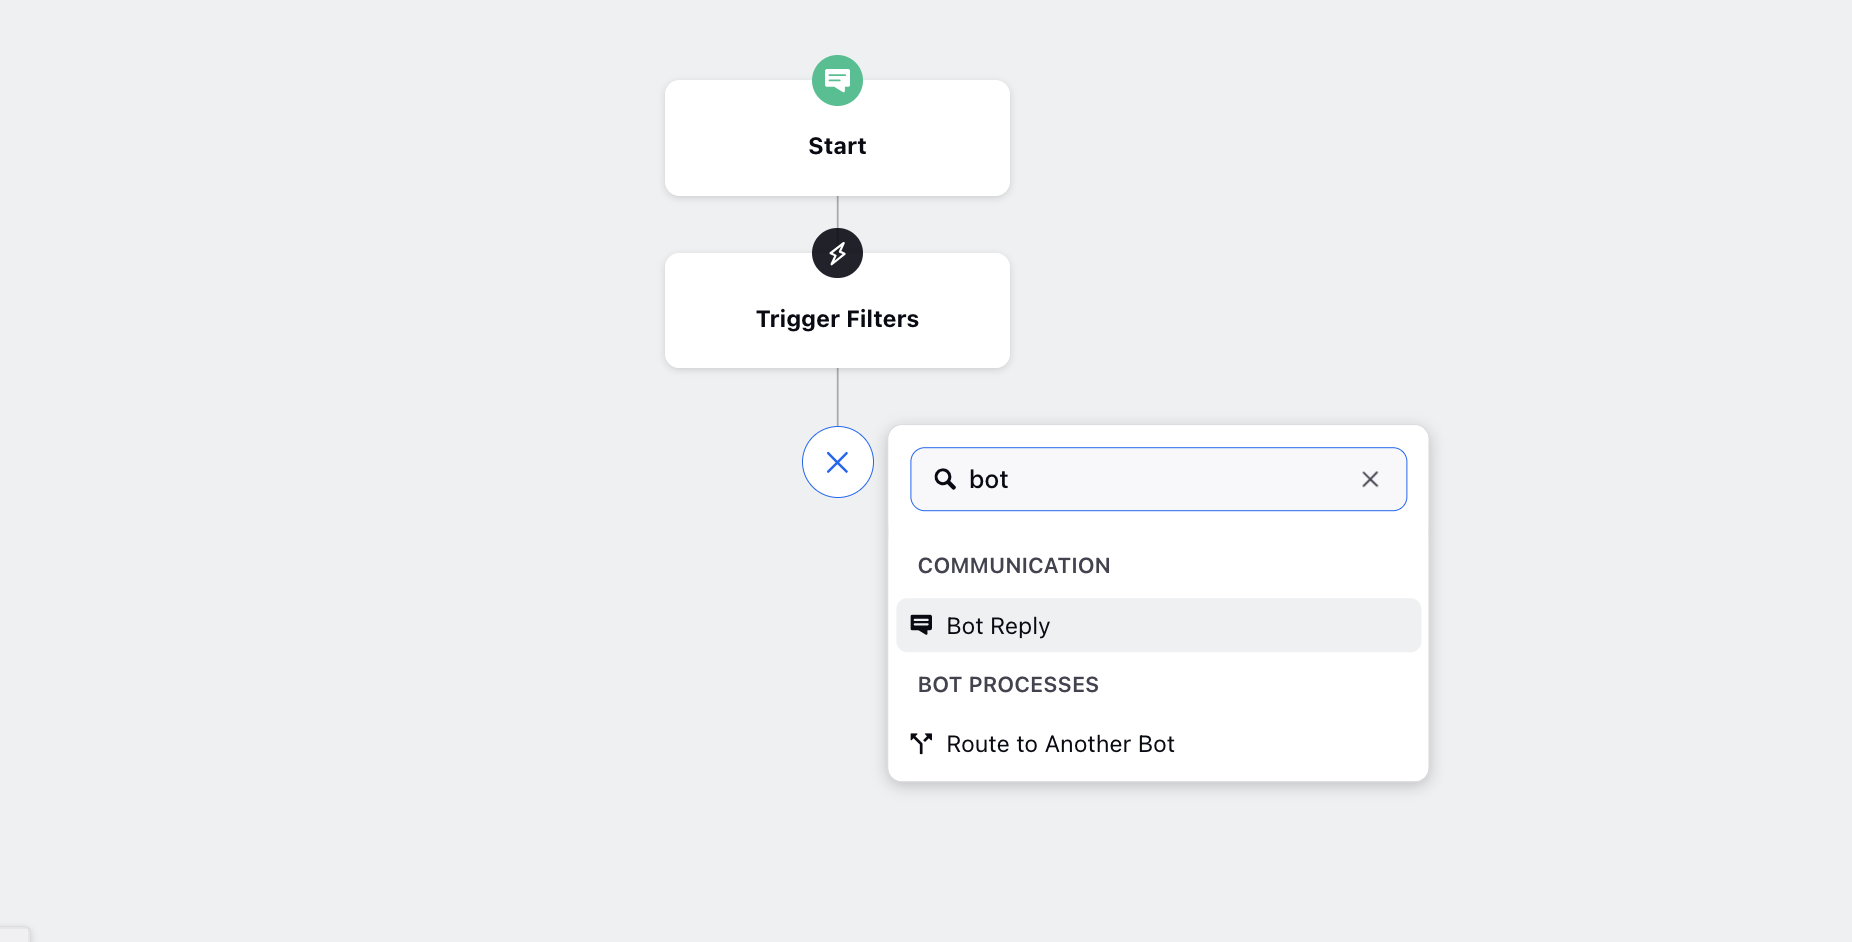
Change the reply to the Chat Templates.
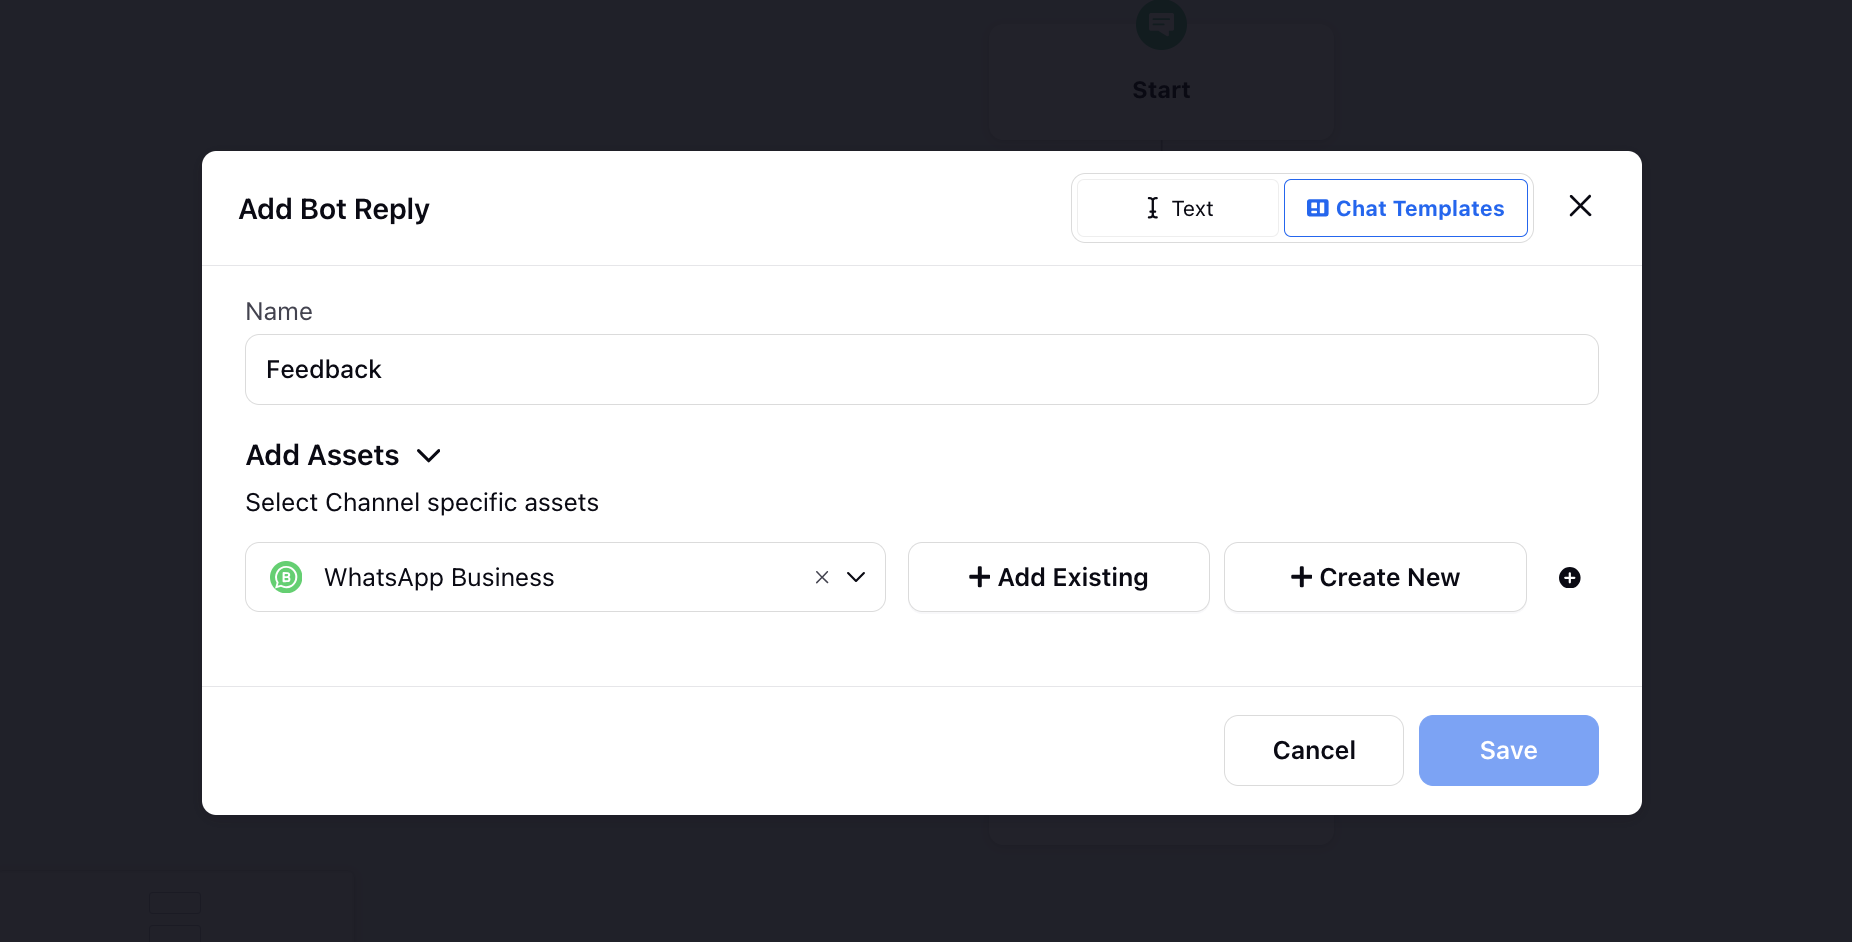
Select the Channel as WhatsApp Business.
Choose a flow asset from the Digital Asset Manager (DAM). All flows created within Conversational AI will be available in the DAM.
Once you’ve selected the appropriate flow asset, click Save to finalize the setup for sending the flow.
Triggering Bot with Flow Asset via Rule
Create an Customer Level(Queue) rule first
Condition Setup: Under "Condition Applies To The source of the Message" section, select the Account as WhatsApp Business account. Ensure that the WhatsApp account (number) used is associated with the same WABA (WhatsApp Business Account) using which the Flow Asset was created.
Action Selection: Under "Actions To Auto respond to a message using bot" section, select
Trigger Bot Application: Select Receiver Account Type. Defines the trigger condition for the bot.
Bot Application: Specifies which bot application the trigger condition will be applied to.
Choose Account to Reply From: Select Receiver Account.
Choose Campaign: Choose a specific campaign if required.
Choose Preferred Reply Type: Select Auto Select from Message to have the bot automatically choose the reply based on the incoming message content.

This setup ensures that the bot triggers correctly based on the inbound rule conditions and replies using the designated flow asset from the associated WhatsApp account.
![]() Note: Only sample rule config meant for quick configuration. For end-to-end rule configuration setups, work with your success manager
Note: Only sample rule config meant for quick configuration. For end-to-end rule configuration setups, work with your success manager
Receiving the Flow Response
Once the users fill in the details in the configured flow, you can receive their responses seamlessly.
Upon flow completion, a response message will be sent to the WhatsApp chat. You will receive it in the same way as you receive all other messages from the user—via a message webhook. The message will be in a JavaScript Object Notation (json) format with the following contain flow-specific data formatted as follows:
JSON is a format for encoding data in human readable format for storing and sending over a network. JSON stores data as:
key/value pairs
Data is separated using commas
Text data is enclosed in double quotes
Numerical data has no quotes
Arrays are enclosed in square brackets []
Objects are enclosed in curly brackets {}
The output is a text string
{
“flow_token” : “value”,
“UNIQUE_KEY_1:COMPONENT_REFERENCE_NAME” : “value1”,
“UNIQUE_KEY_2:COMPONENT_REFERENCE_NAME : “value2”,
“UNIQUE_KEY_3:COMPONENT_REFERENCE_NAME” : “value3”
}
In the above code snippet , the values provided by the customer are recieved in Key-Value pairs.
The current Format Set for Each Key-Value Pair: "UNIQUE_IDENTIFIER:COMPONENT_REFERENCE_NAME : “VALUE_RECEIVED”
The key-value pair include :
UNIQUE_IDENTIFIER
COMPONENT_REFERENCE_NAME
VALUE_RECEIVED : This corresponds of the values provided by the customer in the whatsapp flow.
 Note: This is just a generic format, the number of key-value pairs mentioned will change according to number of components we have captured in WhatsApp Flow
This structure allows you to capture and utilize the information provided by users in response to the flow, enabling you to enhance the user experience and process the data accordingly.
Add a User Reply Node after the Bot Reply Node . This node is responsible for capturing any input provided by the user . You can also place special filters to determine what part of the input needs to be captured using Capture Entity.

Next, use the Update Properties node to retrieve the user response which is is an array format(as stored in user Reply) and store it in a single variable for later use. You can also create your own custom groovy code , in case it is not already rpesent. Use the below configuration in your Update Properties node :


Use the below custom code in your node-
return grabEntity.get(0);Next, you will use a decision box to check whether Responses submitted by customer and stored in the single variable (in step 2) is consistent with the WhatsApp Flow Format (specified under Receiving flow response) or any other text/reply .
Specify the correct variable, operator & value checks under the path to ensure valid responses are processed further along the decision path.
You can also add multiple conditions and multiple condition paths based on the interaction you would like to define.
Based on the decision box , there can be two scenarios -
First Path , when the input provided is consistent with the defined WhatsApp Flow format , and the flow response path would take over
The second path would be to capture any other response path , which is not consistent with the defined whatsapp flow format

Use the below string for your Regex value in your custom node-
"(\\.|[^"\\])*"
For the first scenario (capturing flow response), use the update Properties Node, to store the received response in a map containing all the the values entered by the user in the Whatsapp Flow for manipulation or individual component value retrieval.


Use the below custom code in your node-
return JSON_UTILS.parseJson(nextResp);
Finally , now that you have mapped the customer responses in a map variable, you will use another Update Properties node to extract the indivudual input components as shown below :

Within each of the variables (response_1, response_2,response_3) , lies a groovy code that captures and stores the customer response provided. In case, there is no reponse , the script returns an empty string.
- Note:
Within the groovy code, "TEXT_445" refers to the unique Reference Name for each Input Component within the WhatsApp Flow. You must replace it within the custom code corresponding to each variable(response1,response2, response3) you define to retrieve the value
Reference Name is defined during the creation of the Flow within the Builder.
To find the Reference Name for each component

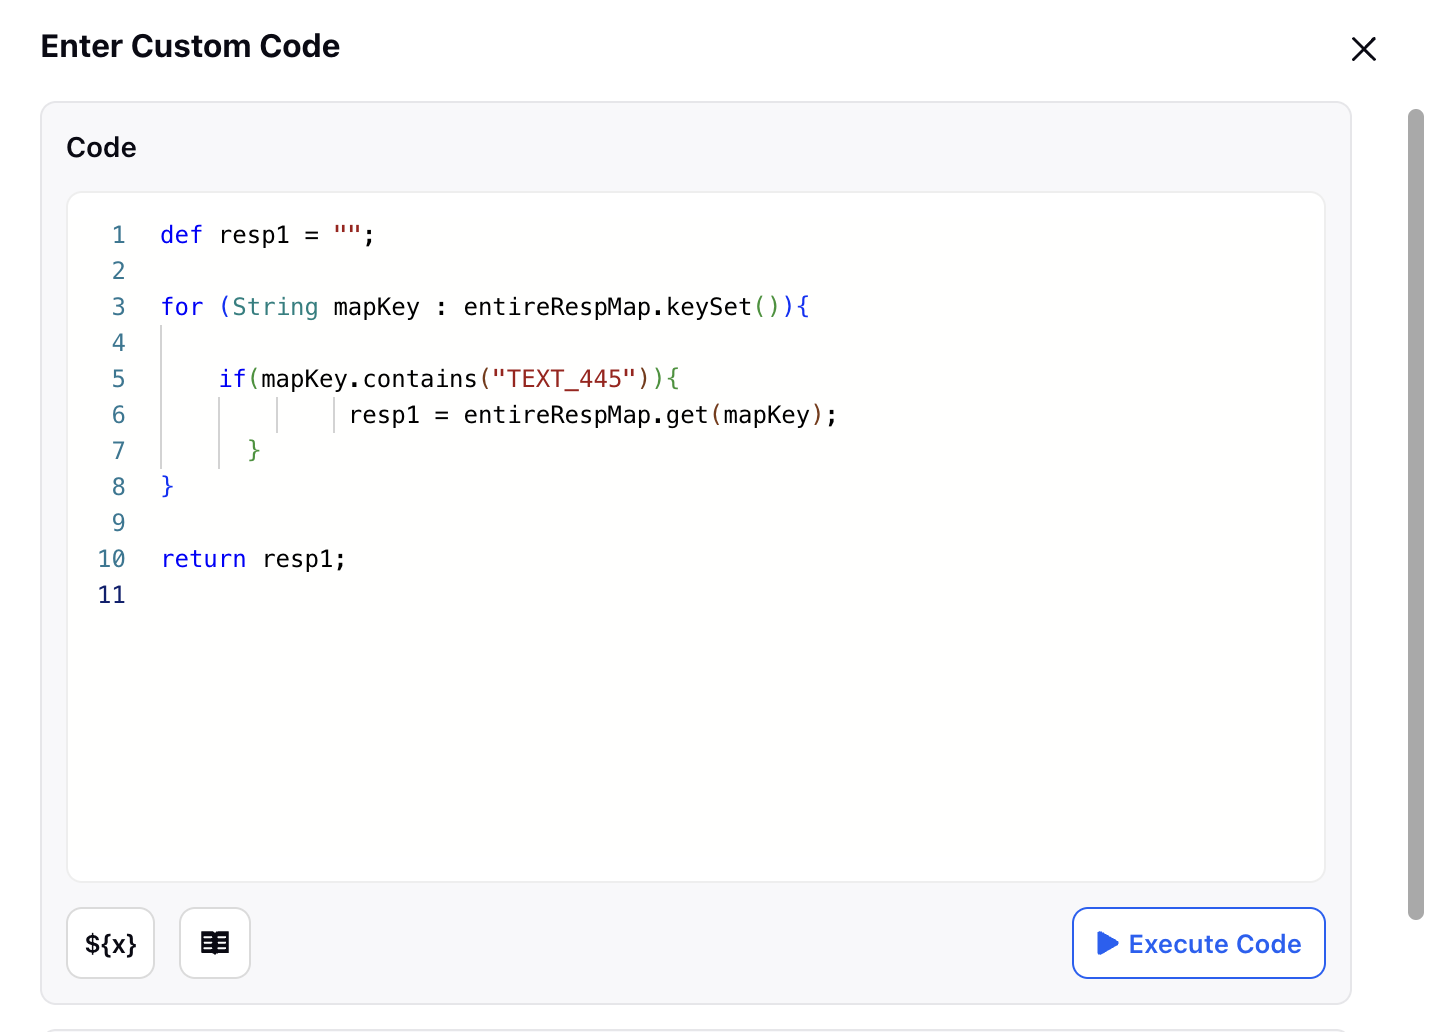
Use the following Groovy code in your custom node-
def resp1 = "";
for (String mapKey : entireRespMap.keySet()){
if(mapKey.contains("TEXT_445")){resp1 = entireRespMap.get(mapKey);}}
return resp1;
Groovy Code Explanation
Referring to the component by it’s component reference name within the variable - entireRespMap -> Defined in Step 4
Checking whether the component value was entered by the end customer
And finally returning that value in a string format
![]() Note: DatePicker Component doesn't support scenarios where the business and the end user are in different time zones
Note: DatePicker Component doesn't support scenarios where the business and the end user are in different time zones