Whatsapp Business Account Addition
Updated
This article describes how you can add a WhatsApp Business Account to the Sprinklr Platform.
In most cases, you can use a self-service flow to add a WhatsApp channel to Sprinklr. With the self-service flow, you can maintain ownership of your WhatsApp number rather than having Sprinklr control it. To use this flow, you need to have access to your company’s Facebook Business Manager. If you are unable to get access to the existing Facebook Business Manager, you will need to create one, which can be done as part of the flow.
Before you begin
Checklist for adding your Business Account in Sprinklr:
Admin-level access to the Facebook Business Manager ID.
Valid Phone Number.
Able to receive OTP, either through SMS or Voice on the above number from a US-based number
To make sure you have a valid phone number:
Check if the number is currently active on WhatsApp Mobile Application. You have to deactivate this number before adding it to Sprinklr.
If the number is currently active on Whatsapp with another vendor. In this case, we you to migrate this number to Sprinklr. Raise a support ticket at tickets@sprinklr.com.
![]() Note:
Note:
Use this link to check for Facebook Business Manager access. If you don't have Facebook Business Manager access, you can create one. After its created, you have to submit a document for verification.
To add a WhatsApp Business account
Click the New Tab icon. Under Governance Console, click Social Accounts within Listen.
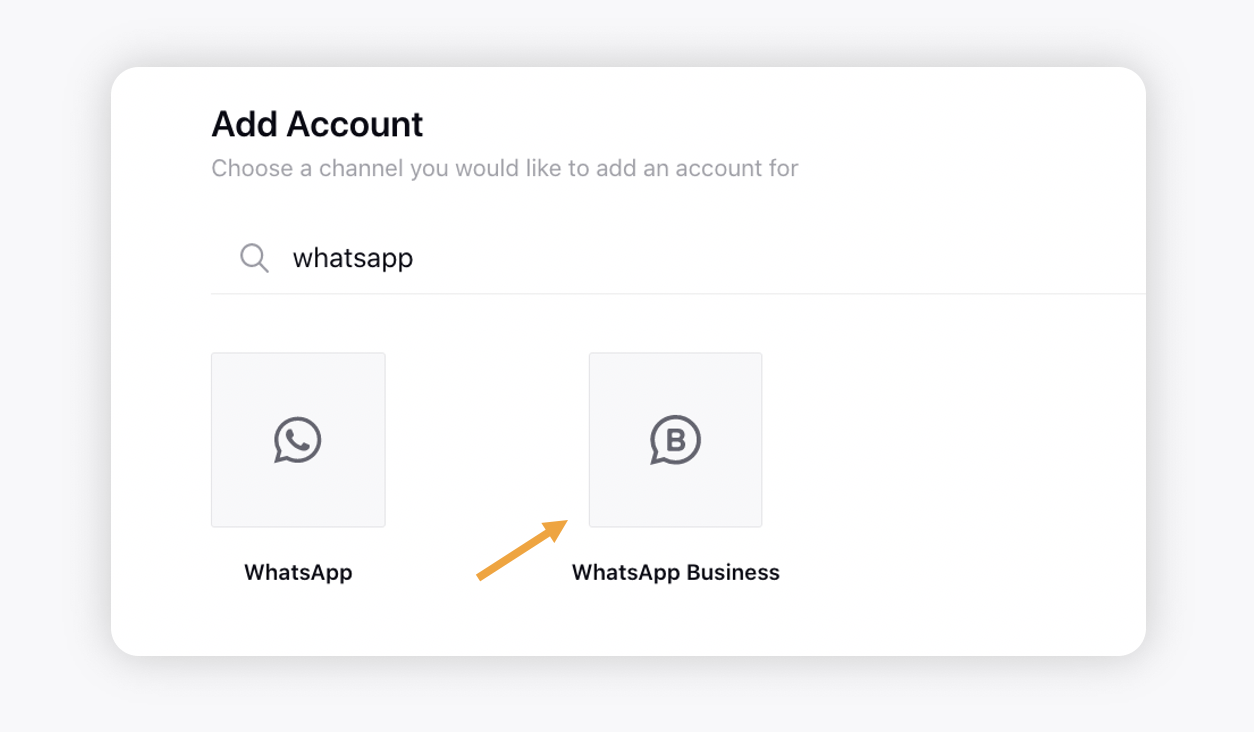
In the top right corner of the Accounts window, click Add Account.
On the Add Accounts window, search and select WhatsApp Business from the available channels. Reach out to support at tickets@sprinklr.com if you cannot see the WhatsApp Buisness channel option.
On the Add WhatsApp Business account window, ensure the toggle is enabled for Embedded Signup flow.
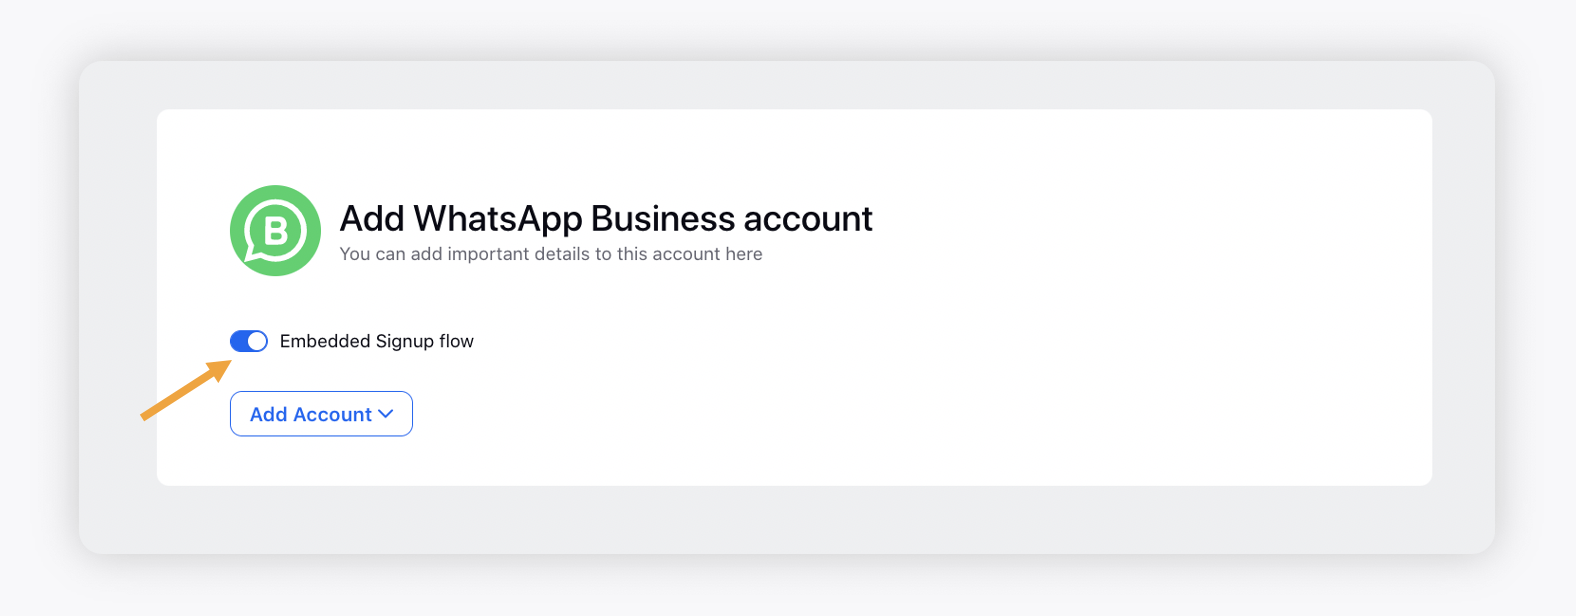
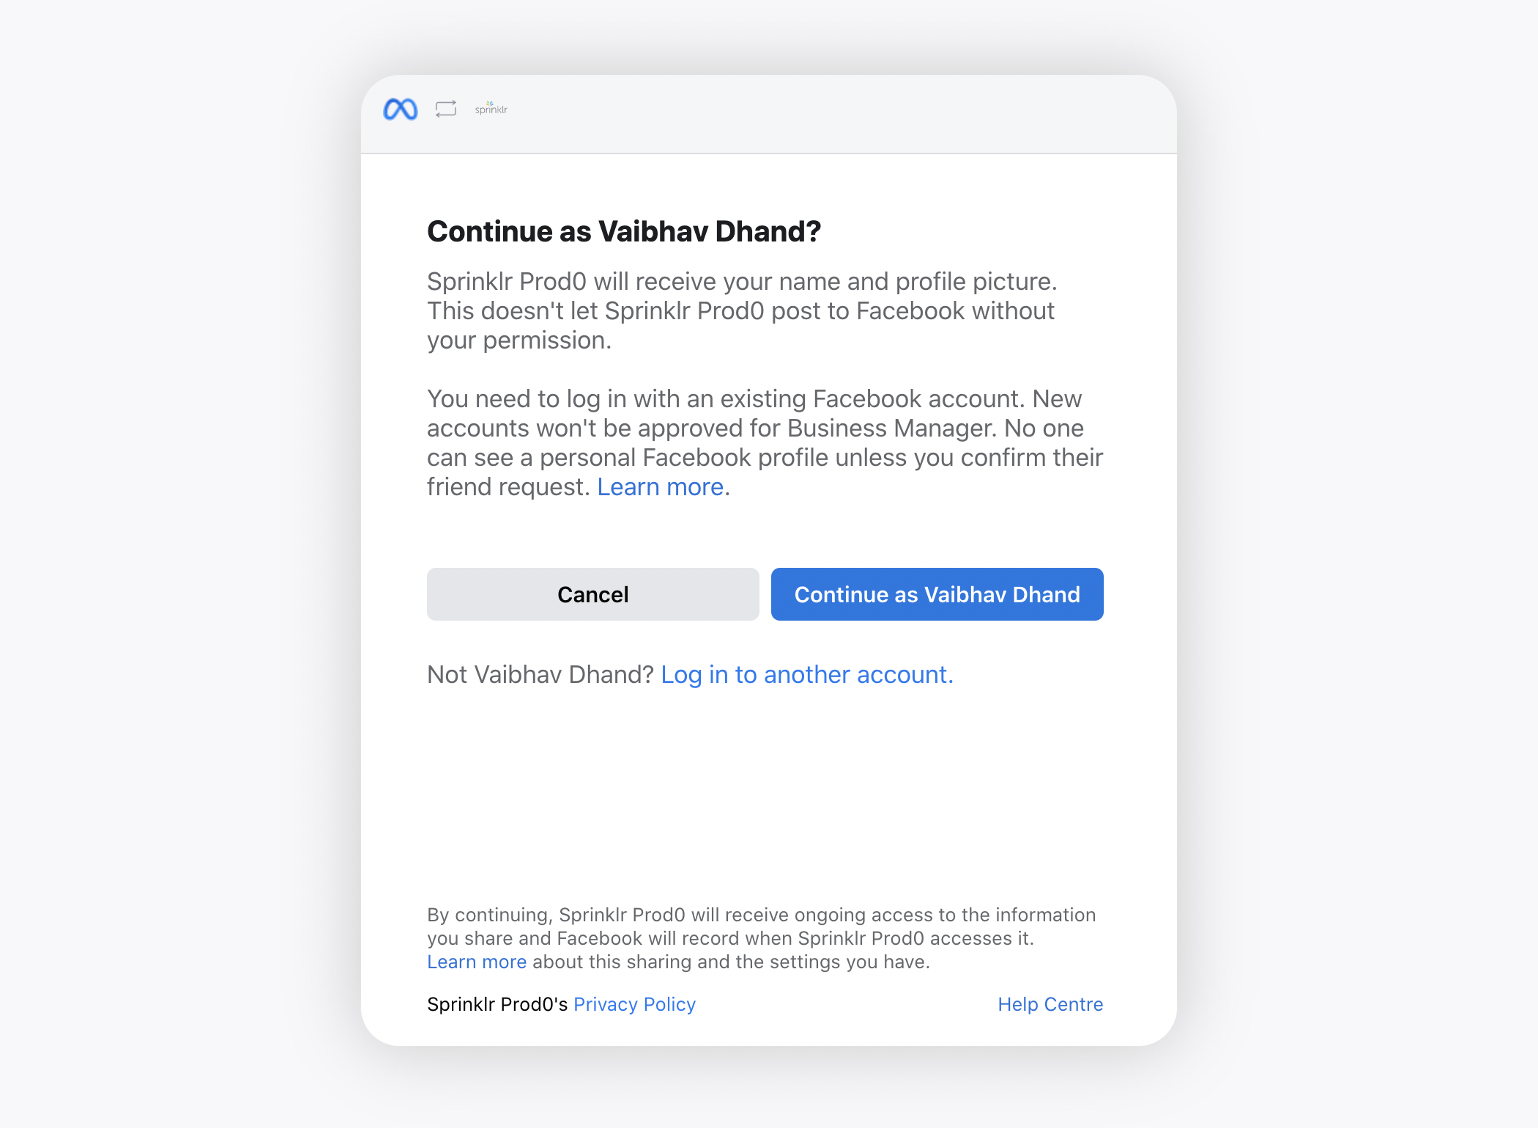
Click Add Account and log into your Facebook account. The individual signing up must log in with their personal Facebook account to create or link a Business Manager account. They must use an existing Facebook account as newly created accounts will not be able to create Business Manager accounts.
The next screen is an overview of the embedded signup flow:
- Creating Facebook and WhatsApp Business Accounts.
- Creating the WhatsApp Business profile.
- Connecting and verifying the WhatsApp Business number.
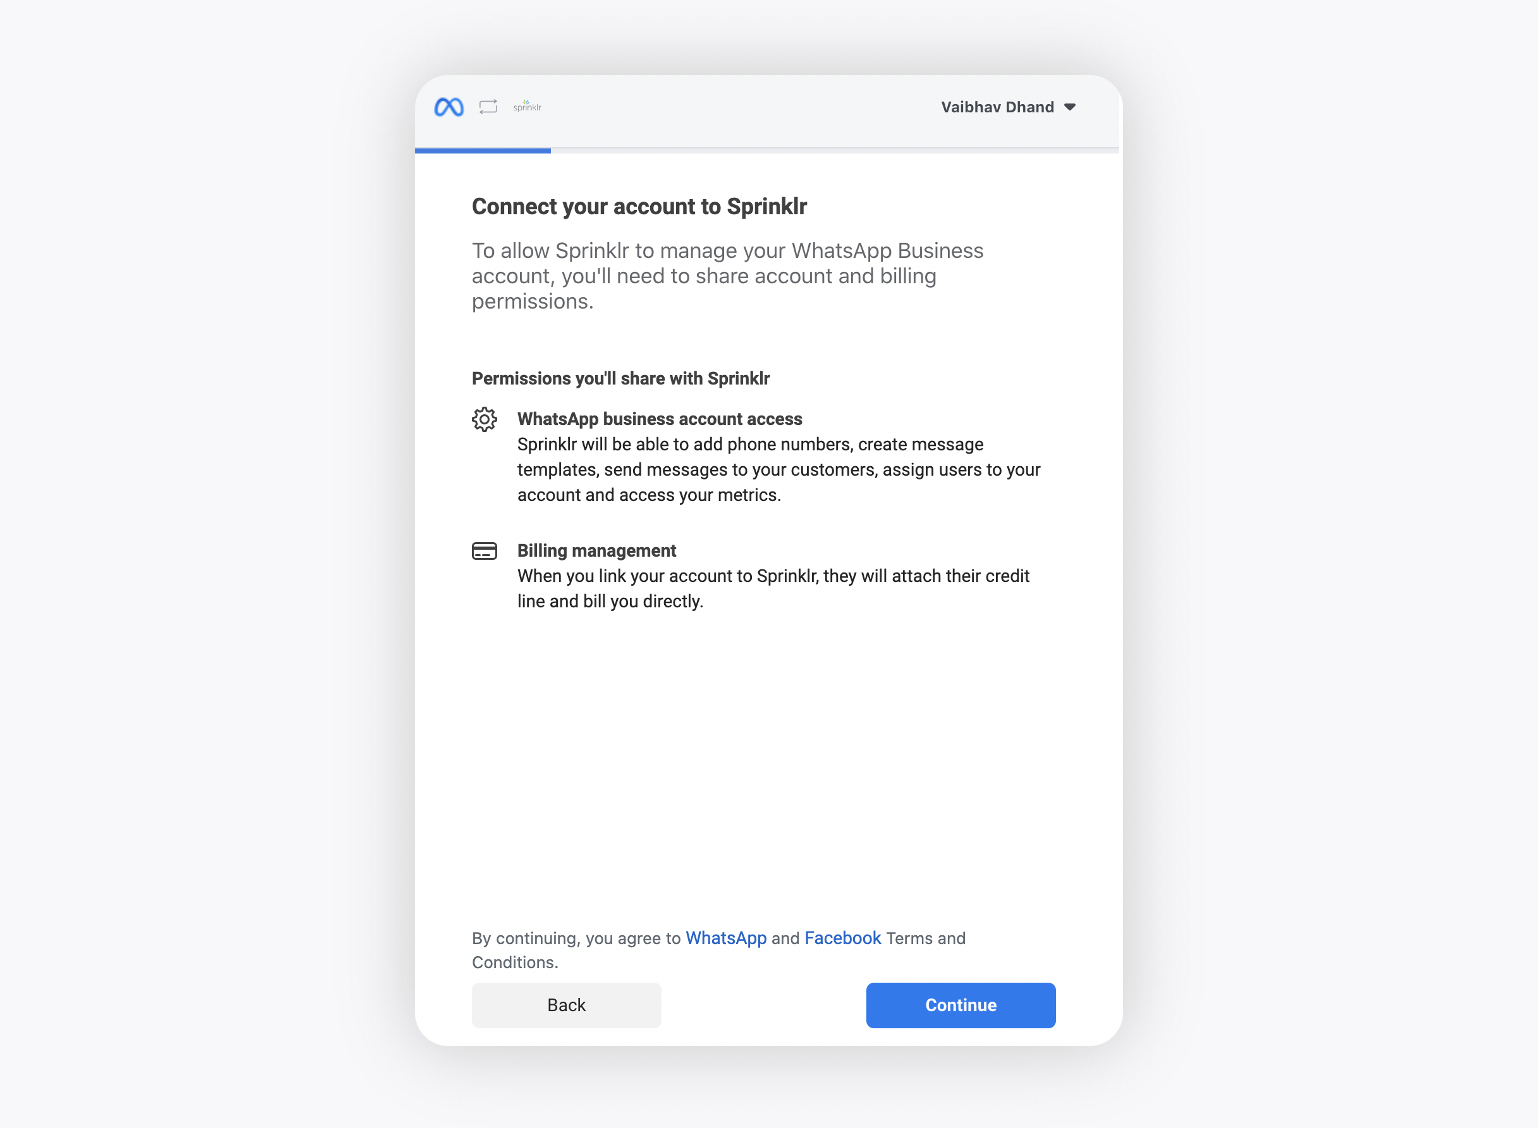
On the next screen, as the business owns the WhatsApp Business Account within their company’s Business Manager, they must share permissions with Sprinklr to allow Sprinklr to manage their account.
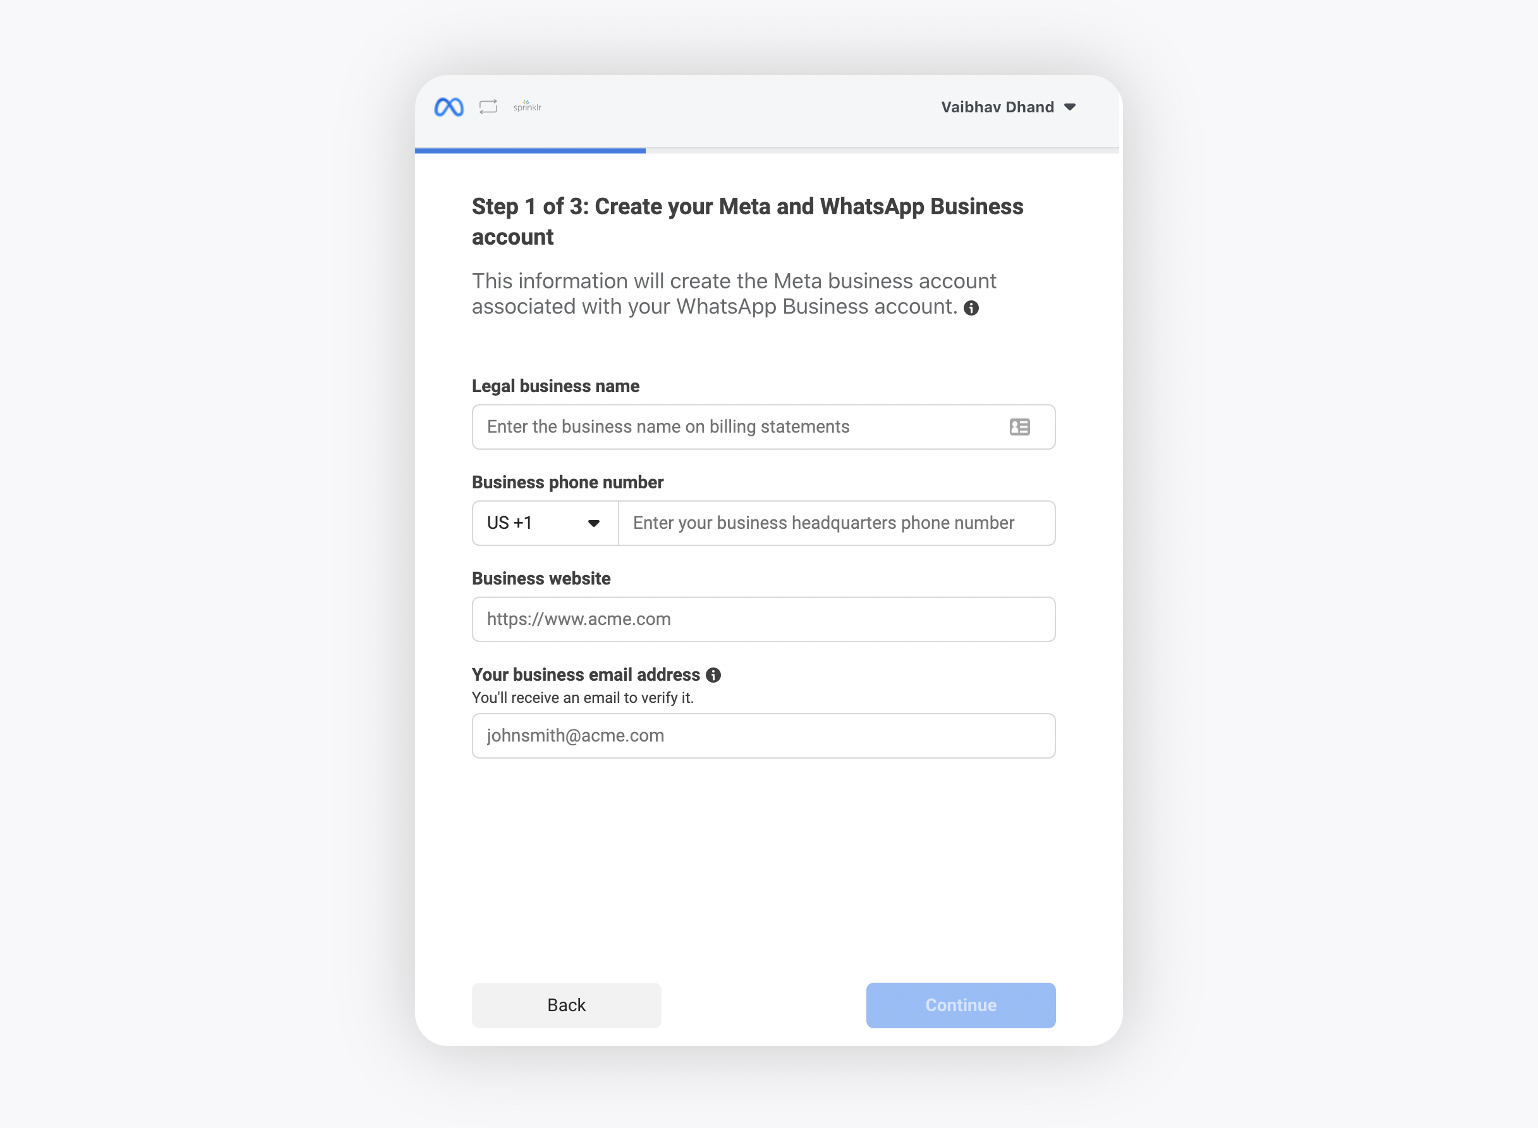
Next, link your existing company’s Business Manager account or create a new Business Manager account. Note that the person whose personal Facebook account is attached to the signup flow must be an admin of the Business Manager account in order to set up WhatsApp Business Accounts.
To create a new Business Manager account, enter legal business name, business phone number/website and work email address.
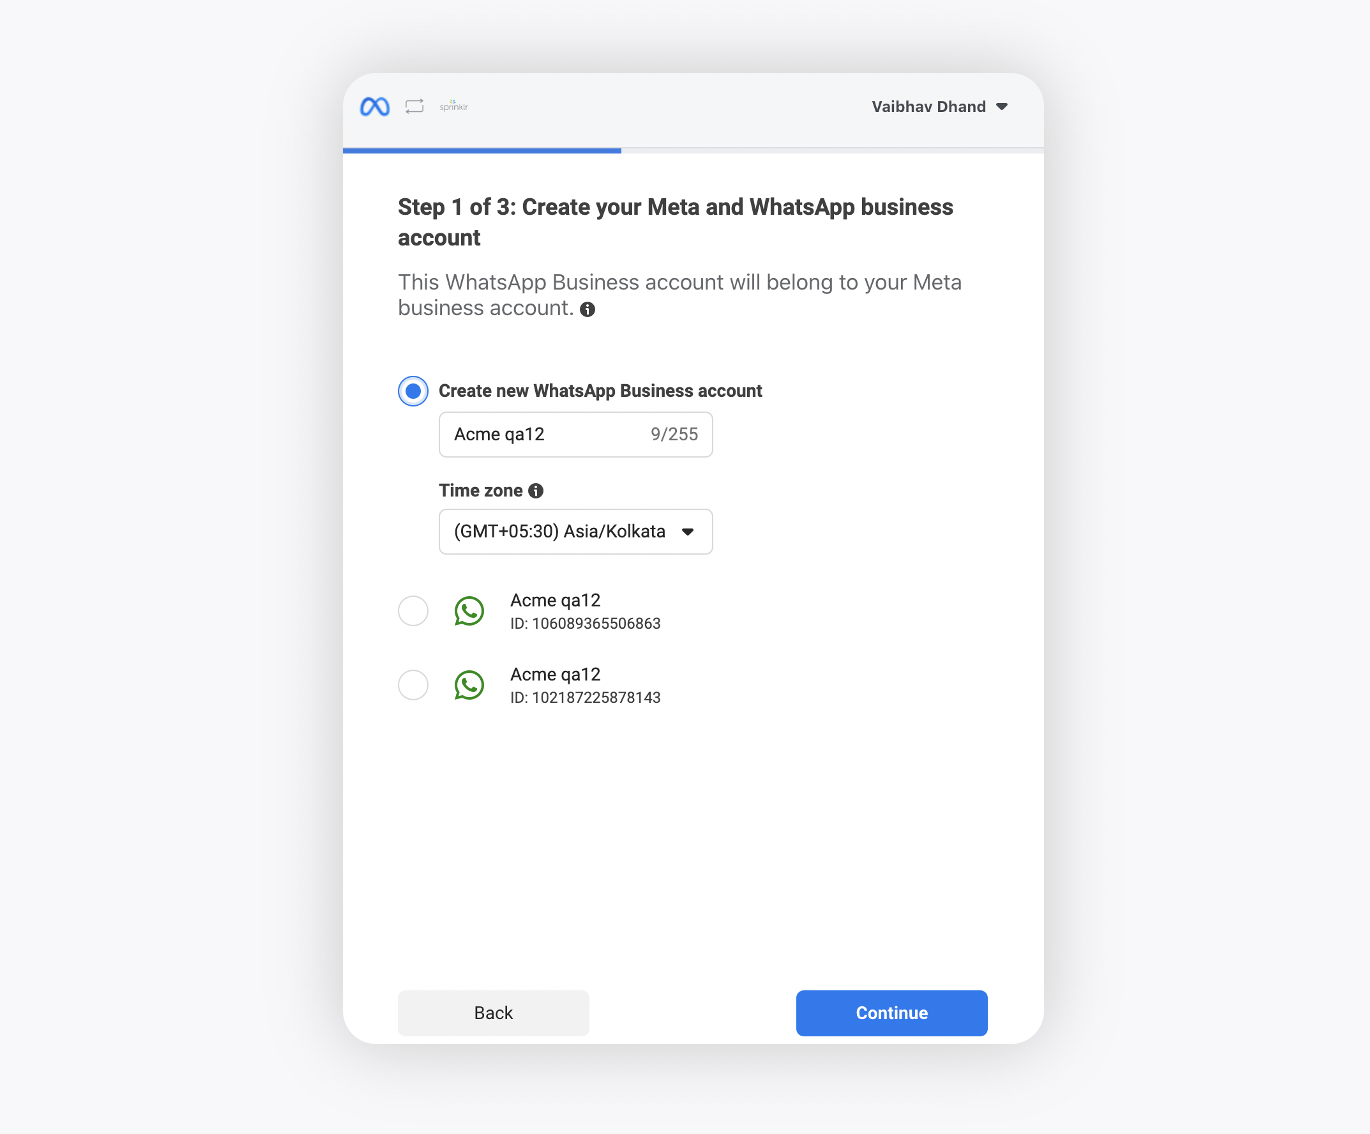
The next step is to create or link an existing WhatsApp Business Account. This WhatsApp Business Account is part of the Facebook Business Manager Account. You must name the account and add the billing time zone.
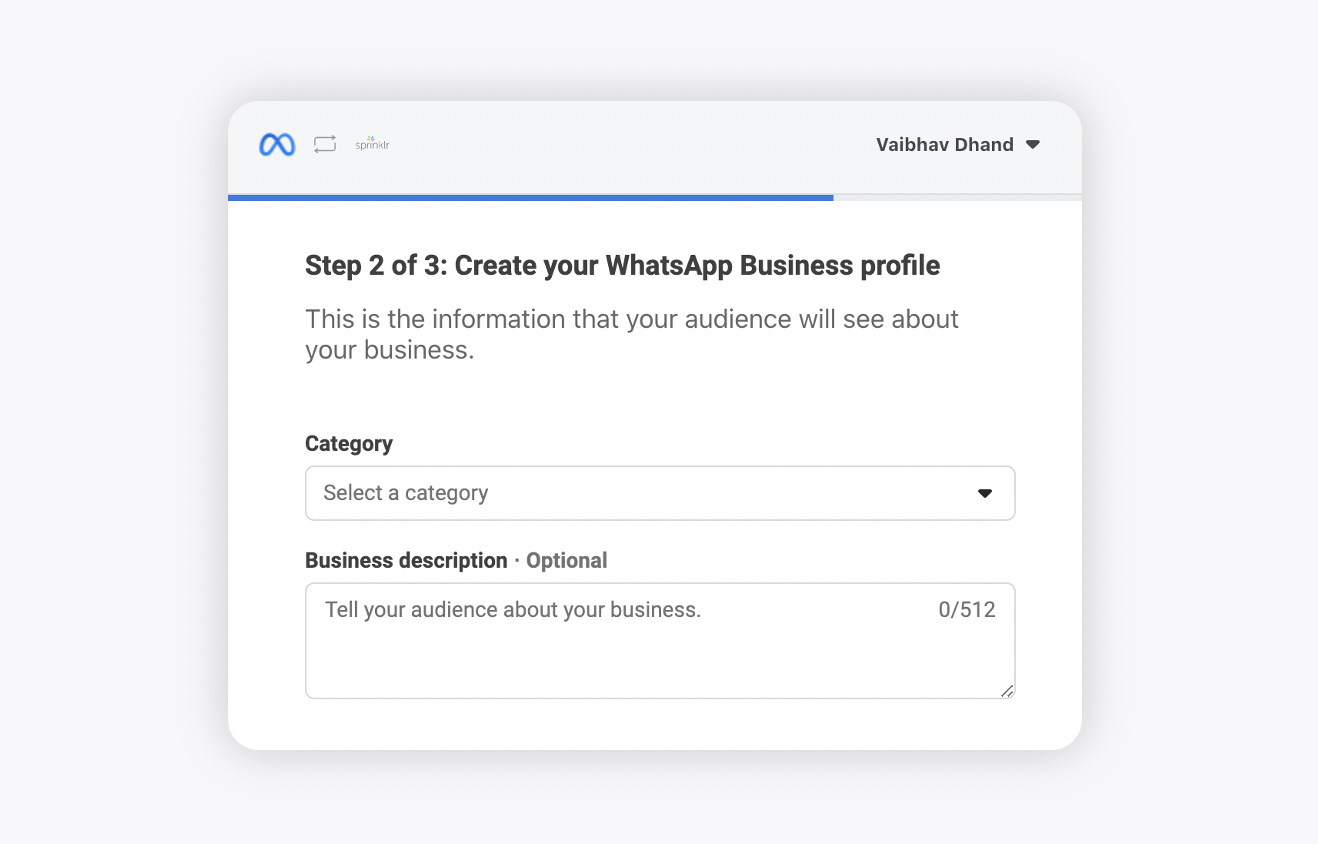
You must then add a display name that you will use to message customers. Next, select your category and write a brief business description. The category and business description will both be visible to customers messaging the business.
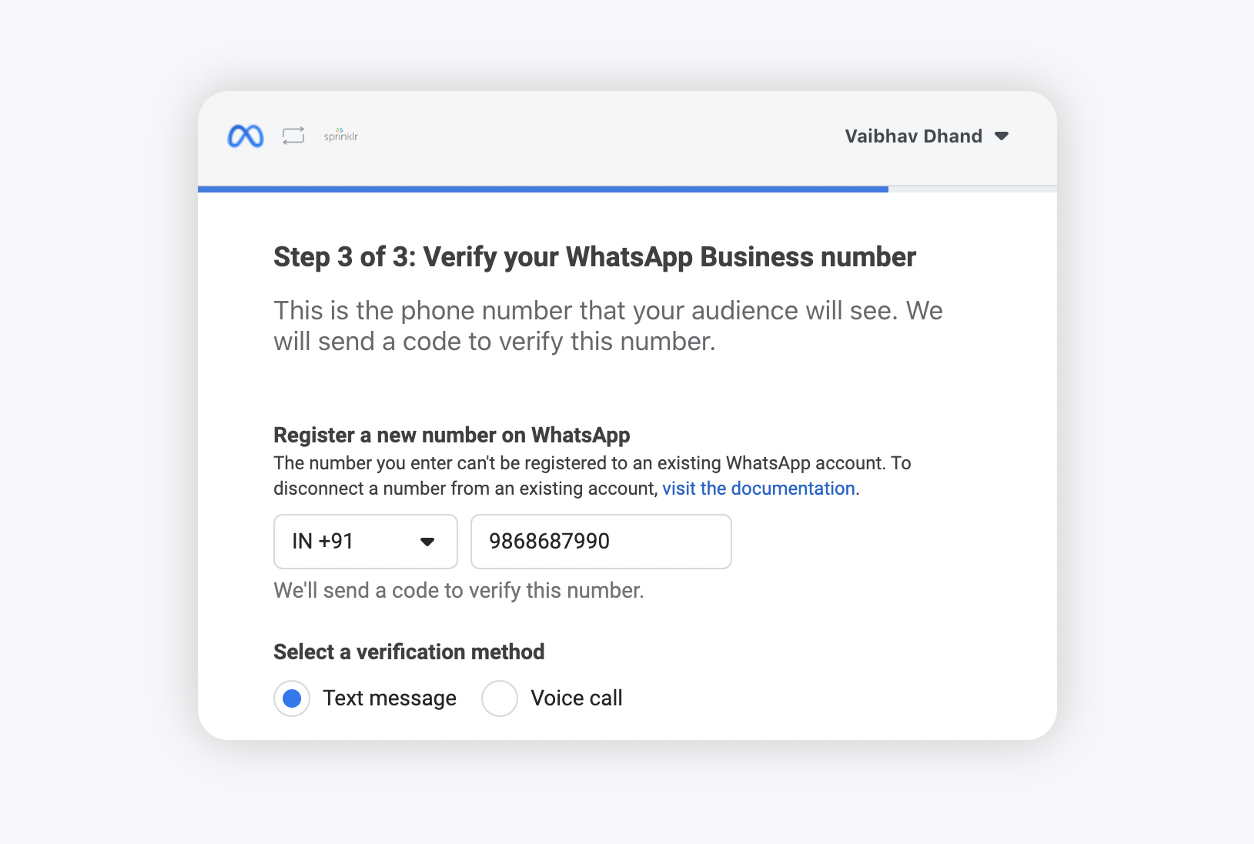
Next, select an existing number or enter a new number to register. You cannot register a number that is actively registered to either WhatsApp Messenger or the WhatsApp Business App. To disconnect a number from an existing account, visit the documentation.
You must verify your number via either text message or voice call. You will receive a six-digit verification code to that phone number that you can input.
Once you have verified your phone number, you complete the signup and ready to use the platform.
Video Walkthrough